- At a glance: Use dark turkey cuts for moisture and collagen that enrich the broth.
- Flavor boost: Brown meat and mushrooms thoroughly to build depth before simmering.
- Make-ahead friendly: The turkey stew improves after resting, which makes it ideal for meal prep.
- Pairings: Serve with crusty bread or creamy mashed potatoes to soak up the sauce.
Choosing the Perfect Mushrooms and Turkey Cuts for Hearty Turkey Stew
Ingredient choice determines the final texture and depth of this turkey stew. Select components that tolerate long, slow cooking and yield concentrated flavor.
Choose mushrooms that keep structure and turkey cuts that supply collagen for mouthfeel. For more detail on fungi types, consult mushroom profiles to match texture and taste.
Mushroom selection
Cremini (baby bella) and shiitake work well because they offer meaty texture and umami weight in the broth. Mixing varieties creates layered texture and avoids a single-note profile.
Smaller, firmer caps keep their shape during long simmers, so lean toward those if you want distinct mushroom pieces in the finished turkey stew.
Best turkey cuts
Dark meat—thighs or drumsticks—contains connective tissue that converts to gelatin with gentle heat. That gelatin gives the turkey stew body and a coating mouthfeel that breast meat cannot provide without extra fat or collagen.
Avoid cooking lean breast for the full simmer; add it near the end if you prefer white meat. For broader context on bird cuts, see turkey anatomy and common cuts.
Crafting the Ultimate Turkey Stew with Fresh Herbs and Spices
Layer flavors in defined steps: brown, deglaze, and simmer. Each of these actions concentrates taste and prevents a thin, diluted sauce.
Use herbs that hold well under slow heat and spices that complement mushroom umami. Learn about rosemary’s aromatic profile at rosemary characteristics before deciding how much to add.
Browning and aromatics
Sear turkey skin-side down until you get deep color; that Maillard crust supplies essential fond for the stew. Then sauté vegetables and mushrooms in the same pot to capture those browned flavors.
Add garlic, shallots, and a spoon of tomato paste to lift the savory base and give subtle sweetness. These aromatics unify the turkey stew and balance the earthiness of the mushrooms.
Deglazing and simmering
Deglaze with stock to dissolve browned bits and fold them into the liquid. Use turkey stock when available to reinforce the primary protein note in this turkey stew.
Then simmer gently until connective tissue softens and the liquid concentrates. Maintain a low simmer rather than a boil to keep meat tender and the broth clear.
Prep and Cook Time for Turkey Stew
Preparation: Plan 20 minutes for trimming, seasoning, and chopping. Good mise en place reduces stress during cooking and improves timing control.
Cooking: Expect roughly 1 hour 15 minutes to 1 hour 30 minutes of low simmering for tender dark meat. Actual time varies with cut size and pot conduction.
Timing strategy
Start hot to brown, then drop to low to let collagen convert slowly. This two-stage approach protects texture and yields a richer mouthfeel in the turkey stew.
If you plan to reheat, undercook slightly and allow residual heat to finish the texture. This preserves moisture and keeps the turkey meat from drying out when reheated.
Yield and Difficulty of This Turkey Stew
Yield: The recipe serves six generous portions when plated as a main. Serve over a starch for extended portions or family-style bowls.
Difficulty: Medium. The technique centers on timing, heat control, and staging rather than advanced skills, so experienced home cooks will succeed consistently.
Ingredients
Measure and assemble ingredients before you heat the pot to keep the cook phase focused. Consistent ingredient quality shortens cook time and increases repeatability of results.
Below is a practical list tailored for a classic turkey stew prepared with mushrooms and herbs.
- 2 lbs turkey thighs (bone-in, skin-on)
- 12 oz cremini mushrooms, cleaned and quartered
- 4 cups turkey or mushroom broth
- 1 large onion, finely diced
- 3 cloves garlic, minced
- 2 medium carrots, peeled and sliced
- 2 tbsp olive oil
- 2 sprigs fresh rosemary
- 3 sprigs fresh thyme
- 2 bay leaves
- 1 tsp smoked paprika
- Salt and black pepper to taste
- 1 tbsp tomato paste
- 1/4 cup chopped fresh parsley for garnish
Instructions for Turkey Stew
Work methodically through the steps to build flavor while protecting texture. Keep the pot on medium-high for browning, then reduce to low for the simmer stage.
Check seasoning after reduction rather than during high-heat stages; reductions concentrate salt and aromatics.
- Prepare: Pat turkey dry and season with salt and pepper. Dry surfaces brown better and create a more flavorful fond.
- Brown turkey: Heat oil in a heavy pot and brown thighs skin-side down until deep color forms. Transfer the meat and reserve the fond.
- Sauté vegetables: Add onion and carrots; cook until softened and fragrant. Stir to prevent sticking and pick up browned bits.
- Add mushrooms and garlic: Cook mushrooms until they lose moisture and begin to caramelize. Add garlic last to avoid bitter overcooking.
- Incorporate herbs and seasoning: Stir in tomato paste, rosemary, thyme, bay leaves, and smoked paprika. Toast briefly to release essential oils.
- Deglaze: Pour in broth and scrape the pot to dissolve browned bits into the liquid. Return turkey to the pot, submerged in liquid.
- Simmer gently: Bring to a low simmer, cover, and cook 1 hour 15 minutes until the meat is fork-tender. Avoid high heat to keep the meat juicy.
- Finish: Remove herb stems and bay leaves; check seasoning and adjust salt and pepper. Rest briefly off the heat to allow flavors to settle.
- Serve: Ladle into bowls and garnish with parsley. Serve over mashed potatoes, polenta, or with crusty bread.
Finishing touches
For a thicker sauce, whisk 1 tablespoon cornstarch into cold water and stir in during the last 10 minutes. The cornstarch slurry yields a glossy finish without overcooking the meat.
Alternatively, reduce the stew uncovered for 10–15 minutes on medium-low to concentrate flavors naturally. Choose reduction for a more intense profile or slurry for speed and control.
 Pro-Caution
Chef’s Tips for Turkey Stew Success
Small technique choices create large flavor gains in long-cooked dishes. Control moisture, heat, and browning to ensure a balanced final dish.
Use low-sodium stock when possible to avoid over-salting after reduction. Taste and adjust at the end rather than during the high-heat stages.
 Expert Insight
Practical shortcuts
Use bone-in thighs for both flavor and economy; bones improve the stock and add depth. If pressed for time, braise in a heavy Dutch oven to speed heat distribution.
Leftover roasted turkey integrates well—add it at the end to warm through without drying. This approach preserves texture while saving active cook time.
Serving Suggestions and Pairings to Elevate Your Turkey Stew
Pair the turkey stew with neutral starches that soak up the sauce and add contrast. Crusty bread, mashed potatoes, or polenta complement the rich broth and mushrooms.
Add a bright salad with acid to cut richness; simple arugula dressed with lemon vinaigrette balances the savory elements. For wine, choose a medium-bodied red like Pinot Noir to match the earthiness.
Nutrition Snapshot
Estimate per-serving values to guide portioning and dietary planning. Values vary with exact cuts, broth choice, and serving method.
Approximate per serving: 380 kcal, 45 g protein, 14 g carbohydrates, 12 g fat. Use these figures as a starting point for menu planning.
FAQ
Can I use leftover cooked turkey for this stew?
Yes. Fold diced leftover turkey in during the last 10 minutes of simmering to warm through without drying. This approach provides convenience while preserving texture in the turkey stew.
Which mushrooms give the deepest flavor?
Shiitake and cremini provide pronounced umami and meatiness that stand up to long cooking. Read about the science of umami at umami taste to understand why these mushrooms boost savory depth.
Is this stew freezer-friendly?
Yes. Cool completely and store in airtight containers before freezing. Reheat gently from thawed to maintain texture and avoid overcooking the turkey meat.
How do I make the stew gluten-free?
The base recipe is naturally gluten-free if you use certified gluten-free broth and thickeners. Verify labels on processed ingredients to ensure full compliance.
What wine pairs well with turkey and mushroom stew?
Choose a medium-bodied red such as Pinot Noir or a fuller-bodied white like an oaked Chardonnay. The wine should complement the earthiness without overpowering the turkey stew’s subtle herb notes.
Closing Notes
This turkey stew emphasizes technique: brown thoroughly, simmer gently, and season after reduction. Those steps create a reliable, crowd-pleasing dish suited for family meals and make-ahead plans.
Apply braising and stew principles consistently for predictable results; see an overview of stew methods at stew preparation for background on long, low cooking techniques.
See also: turkey stew recipes and braising techniques
See also: turkey stew
]]>
- Dry the surface immediately before cooking to enable the Maillard reaction.
- Use heavy cookware and a high smoke-point oil for steady heat transfer.
- Time your salt to season without wetting the exterior and loosened juices.
- Baste late and rest briefly to preserve gloss and texture.
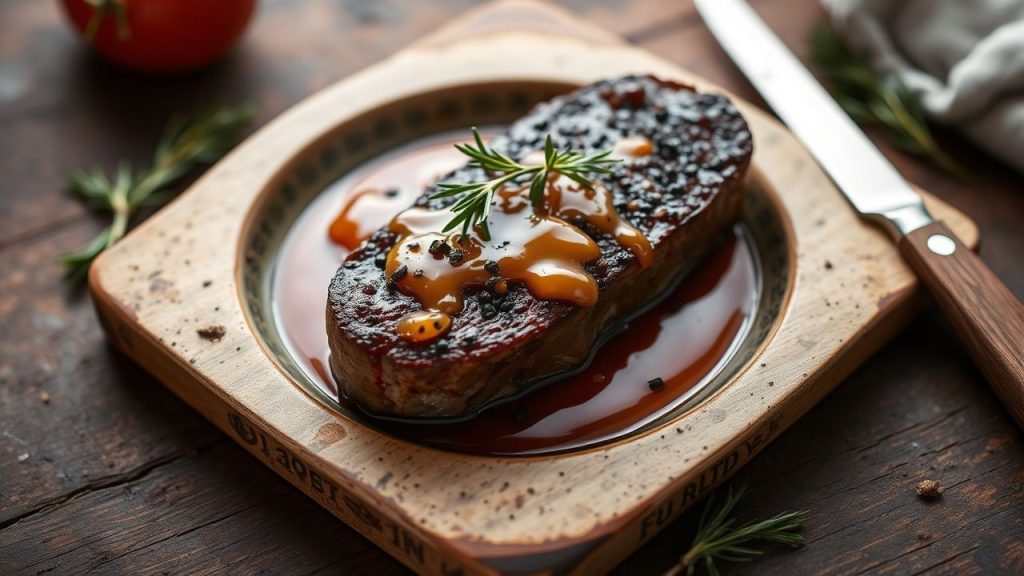
Understanding the Maillard Reaction for a Perfect Steak Crust
The visible brown layer on meat forms from the Maillard reaction, a chemical process between amino acids and reducing sugars that occurs at high heat.
That reaction creates complex aroma and taste compounds that define a real steak crust. For a technical primer, see Maillard reaction.
How surface chemistry matters
Proteins and surface sugars must reach roughly 140–165°C to form desirable Maillard products. Any surface moisture will convert to steam and keep the meat below that window.
A slightly higher pH speeds browning, which explains why small, controlled alkalinity changes affect the crust. Use these adjustments sparingly on thin cuts to avoid chemical flavors.
Why Your Meat Comes Out Pale: Fixes for a Steak Crust
Pale results typically trace to excess moisture or insufficient pan temperature. Steam prevents the surface from entering the Maillard temperature range and yields a steamed appearance instead of a crust.
Thin, lightweight pans drop temperature when meat is added and encourage steaming. A heavy pan retains heat and promotes immediate searing contact.
Moisture: the invisible saboteur
Even small droplets on the surface convert to steam at searing temperatures. Pat steaks dry with paper towels right before seasoning and cooking to remove surface water.
Avoid rinsing or wet brines immediately before searing. If you brine, dry thoroughly and allow time for the surface to set before heat contact.
Temperature and pan choice
Choose a pan that holds heat when food hits it, such as cast iron or heavy stainless steel. Cast iron stores energy and provides even contact for an efficient sear; see cast-iron skillet for heat capacity details.
If your pan cools dramatically, it will steam rather than sear. Preheat properly until the surface oil shimmers for direct heat transfer without pooling.
Preparation Steps That Make the Difference for a Steak Crust
Preparation narrows to three priorities: surface dryness, even thickness, and appropriate salt timing. Address all three and you dramatically raise the odds of a consistent steak crust.
Trim excessive surface fat and, if needed, score thick fat caps to encourage even contact. For thicker cuts, let them approach room temperature so heat penetrates predictably.
Salt timing and seasoning strategy
Salt first pulls moisture out, then reabsorbs it and seasons internally. A short rest of 15–30 minutes after salting typically dries the surface enough for a good crust without excessive juice loss.
Salt thin cuts immediately before searing. For thicker cuts, pre-salt and rest to achieve internal seasoning while keeping the exterior ready for browning. For deeper guidance, read our internal steak salting guide.
Expert Insight
Choose a high smoke-point oil—avocado or grapeseed works well—to transfer heat quickly. Add butter only near the end of the sear to avoid burning milk solids and spoiling the crust.
When the meat hits the pan, resist moving it. Undisturbed contact allows the Maillard reaction to proceed and build that visible crust reliably.
Heat Management and Technique for a Steak Crust
Heat control separates a strong sear from a scorched exterior. Begin on high heat to initiate browning, then adjust to maintain color without charring.
An infrared thermometer helps verify surface temperature and remove guesswork. Reliable measurement improves repeatability across different cookware and stovetops.
Basting and butter timing
Butter offers depth but burns at high temperatures. Add butter with aromatics like garlic and thyme only after the initial sear; baste briefly to coat the crust without degrading it.
Basting transfers flavor and creates a glossy finish while reducing direct butter contact with an extremely hot surface. Use tongs and a spoon to control the flow.
Flip strategy
Limit flips to once or twice; frequent turning interrupts the continuous contact time needed for browning. Allow each side an uninterrupted searing window to develop an even crust.
Use tongs rather than a fork to avoid piercing the meat and releasing juices. Gentle handling preserves internal moisture and the external texture.
Finishing, Resting, and Serving a Steak Crust
Remove the steak at target internal temperature and rest it to redistribute juices. Resting prevents interior liquids from rewetting and softening the crust.
Tent loosely with foil to allow vapor to escape while retaining heat. Tight wrapping traps steam and leads to a soggy exterior instead of a crisp steak crust.
Slicing and final touches
Slice against the grain to shorten muscle fibers and improve perceived tenderness. Finish with a light scatter of coarse salt or a quick pan sauce to complement the crust.
Different meats brown differently based on fat and sugar content. For reference on species-specific characteristics, see beef and poultry profiles.
Pro-Caution
After a rest, serve promptly to retain contrast between the crisp crust and tender interior. Time the plating so guests get peak texture and heat.
At-Home Equipment and Safety for Producing a Steak Crust
Match your technique to your tools. Heavy pans, a reliable digital thermometer, and a solid pair of tongs make consistent results realistic and repeatable.
Replace or re-season pans that no longer hold heat well. When searing at extreme temperatures, use ventilation to manage smoke and protect indoor air quality.
Recommended gear and setup
A cast-iron or heavy stainless pan provides the mass needed for steady searing. Learn more about searing mechanics at searing.
Keep a small heat-proof tray or rack to rest finished steaks. This prevents trapped steam beneath the meat and helps maintain the crust while you finish additional pieces.
For equipment suggestions, consult our internal roundup of the best cast iron skillet for searing, which lists pans that retain temperature and deliver a consistent steak crust.
FAQ
Why does my steak steam instead of sear?
Steam forms when surface moisture turns to vapor on a hot pan. Pat the steak dry, preheat a heavy pan, and avoid overcrowding to prevent steaming.
Also confirm your oil is shimmering but not smoking strongly; that window encourages direct heat transfer rather than steam buildup.
When should I add butter for flavor without burning the crust?
Add butter after the initial sear and once you flip to finish the second side. Baste briefly and keep the butter moving to avoid burning milk solids.
Alternatively, finish with cold butter off-heat to enrich pan juices and gloss the crust without exposure to extreme direct heat.
How long should I rest a steak to preserve the crust?
Rest most steaks 5–10 minutes depending on thickness. Tent loosely to keep heat while allowing vapor to escape so the crust stays crisp.
Longer resting times can soften crusts due to condensation; monitor timing to keep texture intact.
Does salting well in advance ruin the crust?
Salting hours ahead can draw moisture then reabsorb it, which seasons deeply. If you salt more than 60 minutes before cooking, pat the surface dry before searing to ensure a crust.
Short rests of 15–30 minutes often hit the sweet spot for thicker cuts: they season while still allowing a dry surface for browning.
What’s the single biggest change I can make to improve my steak crust?
The most impactful change is to remove surface moisture immediately before searing. Pat dry, preheat a heavy pan, and sear with minimal movement to produce a reliable steak crust.
Combine that with correct salt timing and steady heat management and you will see consistent, restaurant-quality results at home.
See also: steak crust
]]>
- Key takeaway: Caramelization is sugar-only browning; the Maillard reaction needs amino acids plus reducing sugars.
- Temperature guide: Caramelization usually starts near 160°C; Maillard pathways activate at lower surface temperatures depending on moisture.
- Practical edge: Dry surfaces and high, consistent heat maximize browning without burning.
- Safety note: Over-browning can create bitter flavors and trace contaminants; control time and heat.
Caramelization vs Maillard: Practical Overview
Caramelization occurs when sugars break down under heat and form new aromatic compounds and brown pigments. This process generates sweet, nutty, and toffee-like notes that suit desserts and certain roasted vegetables. See the chemistry summary on caramelization for molecular detail.
The Maillard reaction forms when amino acids react with reducing sugars, producing a broad set of flavor molecules and reddish-brown pigments. It dominates savory browning in seared meats, breads, and roasted coffee. For a technical reference, consult Maillard reaction.
How the Chemistry Works
Both reactions form brown pigments and volatile aroma compounds, yet they follow distinct chemical routes. Caramelization unfolds through sugar dehydration and fragmentation, while Maillard chemistry proceeds via Schiff bases and Amadori rearrangements.
Moisture, pH, and substrate composition steer which reaction dominates in a given dish. Controlling those variables lets you favor sweet caramel notes or savory Maillard complexity. For broader context on cooking transformations, see cooking.
Temperatures, Moisture, and Timing
Caramelization typically starts around 160°C (320°F) for common sugars; Maillard pathways can begin at lower surface temperatures if water evaporates quickly. Thus, dry heat methods like roasting, grilling, and pan-searing favor both processes.
However, too-high temperatures or prolonged exposure push both reactions toward char and bitterness. Monitor color changes, not just time, and use tools such as an infrared thermometer for consistent surface control.
Flavor Molecules and Umami
The Maillard reaction produces sulfur-containing and heterocyclic compounds that contribute savory depth and complexity. Those molecules often interact with glutamates to heighten perceived umami.
To learn how these compounds influence taste, review the umami literature and pairings. Strategic pairing boosts perceived richness without adding salt.
Prep and Cook Time
Preparation: 10 minutes. Keep ingredients organized and surfaces dry before heat to ensure efficient browning. Drying reduces steam and speeds Maillard reactions on proteins and vegetables.
Cooking: 15–20 minutes active searing and glaze finishing. Adjust time to pan size and initial temperature. Use a thermometer to confirm internal doneness for proteins.
Yield
Serves 4 generously. This portion highlights the interplay of sweet caramelized aromatics with savory Maillard crusts. Leftovers store well if you separate sauce and protein to retain texture.
For alternate proteins, porc and tofu adapt well to the same technique; each substrate shifts browning chemistry slightly. Trial different proteins to explore flavor outcomes.
Difficulty Level
Medium: success relies on attention to surface dryness and heat control. The technique rewards practice and sensory awareness more than specialized equipment.
Invest in a good skillet and a reliable thermometer to reduce guesswork. For guidance on cookware choice see our best searing pans guide to improve heat distribution.
Ingredients
- 2 tablespoons unsalted butter, softened
- 1 large shallot, finely sliced
- 1 cup granulated sugar
- 1 tablespoon olive oil
- 4 boneless chicken thighs, skin on, patted dry
- 1/2 cup low-sodium soy sauce
- 2 teaspoons fresh thyme leaves, chopped
- 1/4 teaspoon sea salt
- Freshly ground black pepper, to taste
- 1 tablespoon balsamic vinegar
Instructions
Heat a heavy skillet over medium heat and add butter and olive oil until shimmering to balance fat and prevent burning. Start gentler heat for the shallots to extract sugars without instant scorching.
Add shallot slices and sauté gently until translucent, about three minutes, to develop initial Maillard aromatics. Then sprinkle granulated sugar and swirl the pan as the sugar melts, moving toward a rich amber without burning to initiate caramelization.
Remove the shallots and caramel from heat briefly and set aside to avoid overcooking. Return the pan to medium-high and place chicken thighs skin-side down for a solid sear.
Sear five to seven minutes without moving to build a Maillard crust, then flip and cook an additional five minutes, seasoning with salt, pepper, and thyme. Add the caramelized shallots back into the pan for balanced sweet-savory layers.
Pour in soy sauce and balsamic vinegar to deglaze and form a glossy glaze that binds caramel and Maillard notes. Lower heat, cover loosely, and simmer five more minutes until flavors meld and skin stays crisp.
Remove from heat and rest five minutes before plating so juices redistribute and crust stays tender. Verify chicken reaches 74°C (165°F) internally for safety.
Tips for Success
Use a stainless-steel or heavy-bottomed skillet to promote even heat and consistent fond formation. Even heat produces predictable browning and easier deglazing for a glossy glaze.
Pat proteins completely dry before searing; moisture inhibits both Maillard and caramelization by creating steam. Work in small batches to avoid overcrowding the pan and dropping surface temperature.
Expert Insight
For sugar management, reduce heat if the caramel darkens too fast; burnt sugar tastes bitter. If you plan ahead, caramelize shallots earlier and reheat gently to preserve texture.
Health & Safety Considerations
Excessive browning can create trace contaminants such as acrylamide in starchy foods. Control time and temperature to enjoy desirable flavors without excess formation of undesirable compounds.
For details on potential health issues linked to excessive browning, consult technical sources like the acrylamide review. Balance flavor goals with cooking technique and portioning.
Pro-Caution
Use proper ventilation when searing and deglazing to remove volatile by-products and reduce kitchen smoke. A functioning range hood helps maintain air quality during high-heat cooking.
Serving Suggestions
Plate the thighs on a warm platter and spoon the glossy caramel-soy glaze over the skin for shine and flavor contrast. Garnish with fresh thyme and finely sliced scallions for a color and aroma boost.
Pair with creamy mashed potatoes or rustic roasted root vegetables to complement the sweet-and-savory interplay. For more on pairing these textures and tastes see our internal piece on Umami and the Fifth Taste.

| Nutrient | Per Serving |
|---|---|
| Calories | 320 kcal |
| Protein | 26 g |
| Carbohydrates | 12 g |
| Fat | 18 g |
Q&A
Q&A: Caramelization vs Maillard Reaction – Sweet Science Unveiled
What exactly is caramelization?
Caramelization is the thermal decomposition of sugars that produces sweet, browned, and nutty flavors. It requires only sugar, heat, and careful timing to avoid bitter overcooking.
How does the Maillard reaction differ from caramelization?
The Maillard reaction needs amino acids and reducing sugars to form complex savory molecules and browned crusts. It produces many compounds absent in pure sugar browning and delivers the characteristic savory roast notes.
At what temperatures do these reactions occur?
Caramelization commonly starts around 160°C (320°F) for common sugars, while Maillard chemistry activates at somewhat lower surface temperatures once moisture drops. Practical heat control and drying accelerate both.
Can caramelization and Maillard reaction happen at the same time?
Yes. Foods with both sugars and proteins often show overlapping chemistry, producing layered flavor. Grilled meats and roasted vegetables commonly combine both reactions to create complex crusts and glazes.
Why are these reactions important for cooks?
Mastering these reactions gives direct control over flavor, texture, and color. Attention to moisture, temperature, and timing lets cooks craft targeted taste profiles, from sweet caramel notes to savory, umami-rich crusts.
To Wrap It Up
Caramelization and the Maillard reaction form the backbone of flavorful cooking. Each reaction contributes distinct molecules that shape how we perceive sweetness, savoriness, and roast character in food.
Apply deliberate heat control, dry surfaces, and proper timing to harness both processes in your cooking. With practice, you will turn routine ingredients into memorable dishes by controlling the sweet science of browning.
See also: Caramelization
]]>
- Quick take: choose well-marbled beef, rinse rice, and add grains late to keep texture.
- Timing matters: low-and-slow for meat; short finish for rice to avoid gluey results.
- Balance flavors: build layers with browning, aromatics, and a final brightener.
- Storage tip: cool rapidly and reheat thoroughly; freeze without rice for best results.
Choosing the Perfect Cuts of Beef for Maximum Tenderness
Beef stew depends on connective tissue converting to gelatin during long, gentle cooking. Choose collagen-rich cuts such as chuck or brisket for a silky mouthfeel and richer sauce.
Cut the meat into uniform 1-inch cubes so each piece reaches tenderness at the same time. If you want background reading on the anatomy of meat and common beef cuts, consult the beef summary.
Preparation and Browning
Pat meat dry and brown in batches to develop Maillard flavor; avoid crowding the pot. Browned fond gives the stew a savory backbone when you deglaze with a splash of stock.
Keep a small amount of rendered fat if the pot is lean; that fat helps coat aromatics and carry flavor. Deglaze with broth, scraping the fond to fold those concentrated flavors back into the base.
Balancing Texture and Nutrition with Ideal Rice Varieties
Your rice choice changes texture and cook time. Long-grain rice such as jasmine or basmati produces distinct, fluffy grains, while brown rice adds fiber but takes longer to soften.
For separate-cooked rice, finish portions by stirring rice into bowls to preserve grain integrity. For context on rice varieties and processing, see the rice overview.
Grain Handling and Timing
Rinse rice under cold water until the runoff runs clear to remove surface starch and reduce stickiness. Then, add rice near the end of simmering so it absorbs a controlled amount of broth without breaking down.
Alternatively, par-cook brown rice or mix short-cooked grains separately to match beef timing. This approach improves reheating performance and helps portion control for leftovers.
Expert Techniques and Flavor Layering
Layer flavors in deliberate steps: sear meat, sweat aromatics, toast spices, and use a concentrated stock for depth. Each step adds a distinct flavor layer that combines in the final pot.
Use bay leaves and thyme for structural herbs, and add a splash of acid—lemon or vinegar—just before serving to lift the whole dish. Controlled seasoning throughout ensures balance, not over-salting at the end.
Expert Insight
Stepwise Approach to Building Flavor
Sear meat first, then sweat onions, carrots, and celery to extract natural sugars. Add garlic and tomato paste late in the browning stage to avoid bitterness and to build umami steadily.
Deglaze the pot and simmer gently to convert collagen slowly into gelatin. Keep the pot at a gentle simmer rather than a rolling boil to prevent meat from tightening and shredding the sauce.
Simmering, Pressure, and Slow-Cook Options
Stovetop simmering gives predictable results and improves your control over heat and evaporation. Maintain a low, steady bubble to let collagen break down over time.
If you use a pressure cooker, reduce overall time and expect a slightly different mouthfeel because gelatin converts faster under pressure. For slow cookers, always sear meat and brown aromatics first to avoid flat flavor.
Food Safety and Practical Notes
Handle cooked rice and meat carefully to avoid bacterial growth. Cool leftovers promptly and refrigerate within two hours to maintain safety and quality.
When reheating, bring the stew to at least 74°C (165°F) throughout. Because rice can harbor Bacillus cereus spores, never leave cooked rice at room temperature for extended periods.
Pro-Caution
Prep, Cook Time, Yield, and Difficulty
Prep Time: 20 minutes is sufficient to trim beef and chop vegetables when you work with mise en place. Organize ingredients by step to keep the cook process smooth.
Cook Time: About 2–2½ hours on low heat yields tender beef and integrated flavors; times vary with equipment. Expect 6 hearty portions from this recipe, depending on portion size.
Ingredients
This ingredient list uses pantry-friendly items and fresh aromatics for balance. Use low-sodium broth so you can control the final salt level.
- 2 lb beef chuck, cut into 1-inch cubes
- 1 large onion, finely chopped
- 3 cloves garlic, minced
- 2 medium carrots, peeled and diced
- 2 stalks celery, diced
- 1½ cups long-grain rice (jasmine or basmati) or 1½ cups cooked brown rice for more fiber
- 4 cups beef broth, low-sodium or homemade
- 1 cup crushed tomatoes
- 2 tbsp olive oil
- 2 bay leaves
- 1 tsp dried thyme or 2 tsp fresh
- Salt & freshly ground black pepper to taste
- 2 tbsp fresh parsley, chopped (garnish)
- 1 tbsp lemon juice or apple cider vinegar (optional brightener)
Instructions
Read the steps fully before you start so you can coordinate rice timing with simmering. Proper sequencing prevents overcooked grains and underdeveloped flavors.
- Heat oil in a heavy pot over medium-high. Brown beef in batches 5–6 minutes per batch, then set aside to keep fond intact.
- Reduce heat to medium and add onions, carrots, and celery. Sauté about 8 minutes until softened and translucent.
- Add garlic and cook 1 minute more. Return beef, add crushed tomatoes, broth, bay leaves, and thyme, and bring to a gentle simmer.
- Cover partially and simmer low for 1½–2 hours until beef is fork-tender. Stir occasionally and adjust liquid to keep a stew consistency you prefer.
- Rinse rice under cold water until clear to remove starch. Stir rinsed rice into the stew during the final 20–25 minutes and simmer until grains are tender.
- Finish with salt, pepper, and a splash of lemon or vinegar. Remove bay leaves, garnish with parsley, and serve warm.
If you prefer, cook rice separately and combine at plating to keep grains distinct. This works well for reheating and for adjustible portions.
Tips for Success and Variations
Sear meat in batches to avoid steaming and to build caramelized flavor. Use low-sodium broth and adjust seasoning near the end to prevent over-salting early in the cook.
Swap vegetables freely: diced potatoes or mushrooms added halfway through provide additional texture. For a vegetarian version, substitute hearty mushrooms or lentils and use vegetable stock.
Serving Suggestions
Serve the stew in deep bowls with a garnish of fresh parsley to add brightness and color. Offer crusty bread or a lightly dressed green to cut richness.
Finish with a drizzle of extra-virgin olive oil or a spoonful of plain yogurt or sour cream for contrast. Provide lemon wedges at the table for individual brightness adjustment.
For related techniques and background on the dish type, review the stew entry and the general cooking article.
Explore internal references for more recipes and tips: beef stew tag and beef and rice stew recipes for variations and community-tested notes.
FAQ
What cut of beef gives the best results?
Choose well-marbled, collagen-rich cuts like chuck or brisket for slow stewing. These cuts break down into tender pieces and enrich the sauce with gelatin for body.
When should I add rice to avoid mushiness?
Add rinsed long-grain rice during the final 20–25 minutes of simmering so it cooks through without turning gluey. Alternatively, cook rice separately and combine at serving.
Can I use leftover cooked rice?
Yes. Stir leftover rice into individual bowls just before serving to preserve grain integrity. Avoid simmering leftover rice in the pot for long periods to prevent over-softening.
How can I make the stew ahead?
Make the stew a day in advance; flavors meld and improve after resting overnight. Cool quickly, refrigerate within two hours, and reheat to 74°C (165°F) before serving.
Is this recipe freezer-friendly?
Freeze the stew without rice for best texture. Thaw and reheat, then cook fresh rice when you serve to avoid mush and reduce reheating risk.
Further reading on grains and their nutritional context: see the brown rice entry. These references support decisions about rice type and cook timing.
Pro-Caution
Recommended Reading:
]]>
- Fat dissolves fat-soluble aroma compounds. These molecules do not travel well in water but move readily when bound to lipids.
- Different fats add distinct notes. Butter, ghee, olive oil, and animal fats each change a dish’s profile under heat.
- Finishing fats amplify mouthfeel and extend the time flavor lingers after swallowing.
Prep and Cook Time
Prep Time: 10 minutes | Cook Time: 20 minutes | Total Time: 30 minutes.
These estimates assume basic mise en place and a properly heated skillet. Adjust time upward for dense mushrooms or slow rendering at low temperature.
Yield
Serves 4 generous portions as a side or 2–3 as a main component. The recipe concentrates flavor, so smaller portions deliver strong impact.
Scale linearly by weight for larger batches, and maintain pan space to avoid steaming the mushrooms and losing Maillard-derived compounds.
Difficulty Level
Medium. The techniques require attention to heat management and timing rather than advanced knife skills.
Practice browning on moderate heat and finishing at low heat separately before combining them to build confidence.
Ingredients
These ingredients show how blending neutral and flavored fats yields depth and clarity. Use quality stock and fresh mushrooms for best results.
- 3 tbsp unsalted butter, softened
- 2 tbsp extra virgin olive oil
- 1 small onion, finely diced
- 2 garlic cloves, minced
- 1 cup sliced wild mushrooms (shiitake, cremini, or porcini)
- 2 tsp soy sauce (for umami boost)
- 1/2 cup chicken or vegetable stock
- Salt and freshly ground black pepper, to taste
- Fresh thyme leaves, for garnish
Instructions
Work in controlled temperature stages: sweat aromatics, brown solids, reduce liquids, then finish with a flavorful fat. Each stage extracts or concentrates distinct classes of compounds.
Use a hot skillet, a wooden spoon to avoid scraping, and taste as you go to adjust seasoning and richness.
Sauté and Brown: Building Base Flavor
Heat 1 tablespoon olive oil in a skillet over medium heat. Add diced onion and sauté until translucent and fragrant, about 3–4 minutes.
Add the minced garlic and cook 30–60 seconds, stirring constantly so the garlic releases aroma without burning. Increase heat slightly and add sliced mushrooms with a pinch of salt to promote water release and browning.
Reduce and Finish: Concentration and Fat Integration
Sauté mushrooms until they release moisture and begin to caramelize, about 7–8 minutes. Drizzle soy sauce, stir, and pour in stock; simmer until reduced by roughly half to concentrate flavor.
In a separate small pan, melt butter with the remaining tablespoon of olive oil over low heat until it becomes nutty and fragrant. Combine browned butter with the mushroom mixture and season to taste. Serve immediately to preserve the glossy finish.
Why Fat Flavor Works (Science Explained)
Many aroma molecules are lipophilic; they dissolve more readily into fat than into water. When fat melts or emulsifies, it carries these molecules into the oral and nasal cavities where perception occurs.
The molecular concept is standard in lipid chemistry. See lipid for the basic classes and solubility behavior of these compounds.
Mechanisms: Solvent, Carrier, Modifier
Fat acts first as a solvent: non-polar aroma compounds partition into the lipid phase. That partitioning increases their volatility at mouth temperature and concentrates scent at the retronasal pathway.
At the same time, fat coats the oral mucosa and slows release, lengthening the time the brain registers flavors. These effects together define practical fat flavor technique.
Browning, Maillard, and Umami Synergy
Browning generates new savory molecules via amino-sugar chemistry. Those Maillard reaction products pair exceptionally well with fat because both increase perceptible intensity.
For technical background on the Maillard reaction, consult Maillard reaction. For how fat amplifies savory notes, see the concept of umami.
Practical Tips to Maximize Fat Flavor
Control pan temperature. Too low and ingredients steam; too high and fats smoke and create bitter off-notes. Adjust heat in stages for browning without burning.
Balance neutral and flavored fats. A neutral oil tolerates higher heat; butter or ghee adds aroma. Use a blend to get high-heat browning with a rich finishing note.
Expert Insight
Bloom spices briefly in fat to extract essential oils; that step unlocks perfume and intensifies impact when combined with other savory components. Fat dissolves many of the same volatile compounds that water cannot.
Pro-Caution
Choose fats with appropriate stability. Clarified butter and high-oleic oils resist breakdown better at higher heat while unrefined oils best serve as finishes.
Serving Suggestions
Pair umami-rich mushrooms with creamy polenta, toasted country bread, or roasted vegetable medley. Finish with a soft fried egg for added richness and silky mouthfeel.
A final drizzle of a flavored oil or a pat of butter immediately before serving increases the perceived intensity and gives a satin sheen.
Nutrition and Portion Notes
Fats supply most of the calories but also provide fat-soluble vitamins and satiety. Moderate portions deliver more flavor per calorie because fat amplifies perception.
Per serving (approximate): 230 kcal, 20 g fat. Reduce butter and oil to lower calories while retaining finishing technique for mouthfeel by using emulsions.
| Nutrient | Per Serving |
|---|---|
| Calories | 230 kcal |
| Protein | 5 g |
| Carbohydrates | 7 g |
| Fat | 20 g |
Visuals
High-resolution photos should show browning levels and the finished shine from finishing fats. Use them to judge color targets and avoid blackening.
Properly integrated fat produces a satin sheen and visible pooling without greasiness. Aim for deep golden-brown color and avoid char.
Mechanistic Notes and Practical Applications
Fat-soluble aroma release explains why finishing a dish with a flavored oil or butter can dramatically change perception. Fat coats the oral cavity and slows release, lengthening flavor duration.
For deeper reference on fatty structures and how chain length affects aroma, consult fatty acid chemistry.
At a Glance
- Fat flavor depends on partitioning of lipophilic aromas into a lipid phase.
- Blend neutral and flavored fats for heat tolerance and finishing aroma.
- Finish with a small amount of high-impact fat to extend flavor linger.
FAQ
Q: Why is fat so effective at carrying flavor?
Fat dissolves lipophilic aroma molecules that water cannot carry. When fat integrates into a sauce or coats ingredients, those dissolved compounds become volatile and perceptible as aroma.
This solubility difference explains why oil-based dressings smell and taste different than water-based broths using the same herbs.
Q: Can I get the same flavor without animal fats?
Yes. Plant fats like olive oil and coconut oil carry aroma and provide mouthfeel. Each fat still introduces its own profile, so choose one that complements the dish.
Use emulsions or nut-based finishes if you need texture without animal-derived components.
Q: How should I choose a fat for high-heat cooking?
Pick fats with higher smoke points for direct high-heat work and reserve butter or ghee for finishing. Blend a neutral high-smoke oil with a small amount of butter to combine heat tolerance and aroma.
Properly rendered animal fat also performs well for searing and sautéing because of lower moisture and improved heat stability.
Q: Will reducing fat ruin a recipe’s taste?
Reducing fat can make a dish taste flatter because you remove the carrier for many aroma compounds. Compensate by concentrating stock, using umami-rich ingredients, or finishing with a small amount of high-impact fat.
Emulsions spread small droplets across the palate and can maintain perceived richness with less total fat.
Q: Are some fats unhealthy to use for flavor?
Use fats judiciously. Avoid repeatedly overheating oils with low smoke points and prefer minimally processed oils when possible. Balance saturated and unsaturated fats within overall diet context.
For culinary choices, prioritize flavor and proper technique rather than avoiding fat entirely; small amounts of the right fat improve satisfaction and reduce overeating tendencies.
Closing Remarks
Fat acts as a chemical solvent, a texture modifier, and a delivery system for aroma and flavor. When used deliberately, it converts ordinary ingredients into more complex, satisfying dishes.
Apply the techniques above—control heat, choose appropriate fats, bloom spices in fat, and finish with a flavorful drizzle—and you will notice immediate improvements in intensity and mouthfeel.
See also: lipid, Maillard reaction, umami
See also: fat flavor
]]>
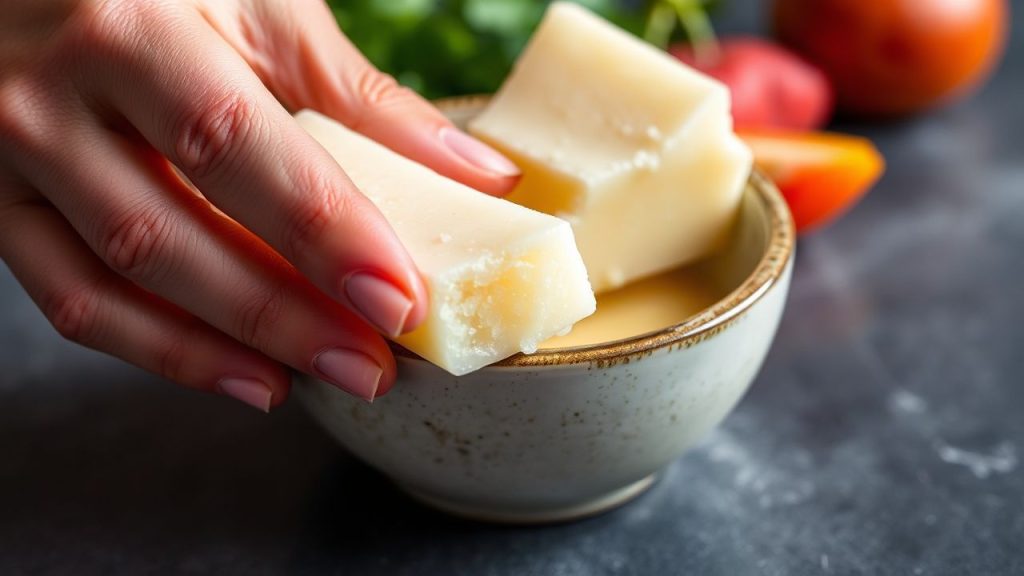
- Key takeaway: Natural glutamate sources—fermented, aged, dried—deliver the richest umami punch.
- Technique matters: Browning, slow-simmering, and fermentation unlock additional savory compounds.
- Practical payoff: Small additions (miso, parmesan, kombu) transform simple dishes without extra fat.
Crafting Umami-Infused Dishes for Contemporary Kitchens
Adapting traditional umami elements for home cooking requires technique and restraint. Use concentrated ingredients sparingly to build layers rather than overwhelm a dish.
Focus on complementary textures and acidity to keep richness lively. Acidic notes, like lemon or rice vinegar, lift glutamate-driven savoriness and prevent a flat finish.
Recipe: Umami-rich mushroom and miso glaze salmon
This recipe combines rehydrated dried shiitake and aged miso to produce concentrated savory aromas. It balances sweet and salty elements so the fish keeps a clean, bright finish.
The method emphasizes a quick sear followed by a short roast to preserve moisture while caramelizing the glaze. These steps concentrate umami without overcooking the salmon.
Prep and Cook Time
Prep: 15 minutes | Cook: 20 minutes | Total: 35 minutes
Yield & Difficulty
Serves 4. Difficulty: Medium.
Ingredients
- 4 skin-on salmon fillets (6 oz each)
- 1 cup dried shiitake mushrooms, rehydrated and finely chopped
- 3 tbsp white miso paste
- 2 tbsp low-sodium soy sauce or tamari for gluten-free
- 2 tbsp mirin
- 1 tbsp toasted sesame oil
- 1 tbsp freshly grated ginger
- 2 cloves garlic, minced
- 1 tbsp honey or maple syrup
- 1 tsp freshly ground black pepper
- 2 scallions, thinly sliced
- Sesame seeds and cilantro for garnish (optional)
Instructions
- Prepare mushroom glaze: In a small saucepan over medium heat, combine rehydrated shiitake, miso, soy/tamari, mirin, sesame oil, ginger, garlic, and honey. Stir until miso dissolves and the mixture thickens slightly, about 7-8 minutes. Remove from heat and set aside.
- Preheat oven: Set to 400°F (200°C) and prepare a baking sheet or an oven-safe skillet.
- Sear the salmon: Heat a skillet over medium-high heat. Place fillets skin-side down and sear 3-4 minutes until the skin crisps. Flip and sear 1-2 minutes.
- Apply glaze and roast: Spoon glaze over each fillet, then transfer to oven and roast 8-10 minutes until just cooked through and flaky.
- Garnish and serve: Sprinkle scallions and sesame seeds. Serve with lemon wedges to brighten the plate.
Tips for success
Prefer dried shiitake over fresh to intensify glutamate concentration after rehydration. Drying breaks down cell structures and frees bound amino acids, which enhances savory impact.
Make the glaze a day ahead to allow flavors to meld; stored refrigerated, it develops greater complexity. For gluten-free diets, substitute tamari for soy sauce.
Expert Insight
Science of Glutamate and Umami
Umami perception arises when free glutamate and certain nucleotides activate taste receptors on the tongue. Scientists classify umami alongside basic tastes because it triggers specific receptors linked to savory detection.
Cooking and preservation techniques alter the proportion of free amino acids. Long simmering, enzymatic breakdown during fermentation, and intentional drying increase detectable glutamates in foods.
For a reliable technical reference, see the main overview on umami. For biochemical detail on the molecule itself, review glutamic acid.
Fermentation and enzymatic release
Fermentation enzymes cleave proteins into free amino acids, enriching flavor. Traditional fermentations like miso and soy sauce create that dense, savory character chefs prize.
When you use fermented bases, you gain both glutamate and fermentation-derived aromatics. These compounds work together to create a rounded, lingering savoriness.
Umami Across Cultures
Every major culinary tradition uses concentrated glutamate sources to define its savory profile. Japan uses kombu and bonito to build dashi; Italy relies on aged cheeses and tomato reduction for a similar effect.
Examples include miso in Japan, sun-dried tomatoes in the Mediterranean, and fermented soybean pastes across East Asia. These ingredients produce cultural signatures built on the same biochemical principles.
Learn more about classic ingredients via these references: miso, shiitake mushroom, and kombu.
Pairing umami sources across cultures—such as combining parmesan rind with mushroom broth—creates synergy. The combined presence of glutamate and inosinate or guanylate amplifies perceived savoriness more than single ingredients alone.
Serving Suggestions & Nutrition
Pair the miso-shiitake glazed salmon with jasmine rice, soba salad, or quick sautéed greens to balance richness. A squeeze of citrus brightens the plate and counters heavy umami tones.
Per serving nutrition (approximate): 370 kcal, 33 g protein, 8 g carbohydrates, 20 g fat. Use low-sodium soy or tamari to reduce salt while preserving umami.
Pro-Caution
Use high-quality fish and control cooking time to maximize protein retention and texture. Small technique adjustments have outsized effects on perceived quality and satiety.
Explore more practical resources on fermentation and flavor development at our internal guides: Fermented Foods and Umami Guide and Mushroom Miso Salmon recipe.
The Conclusion
Understanding umami provides a toolkit for making food more nourishing and satisfying without excess fat. Use concentrated glutamate sources judiciously to amplify flavors and reduce the need for added salt.
Applying these principles helps home cooks and professionals craft dishes that resonate across cultural boundaries. The shared chemistry of umami ties diverse traditions together through a common sensory experience.
FAQ
What exactly is umami?
Umami is a savory taste caused primarily by free glutamate and certain nucleotides. It creates a rounded, mouthwatering sensation often described as brothy or meaty.
How can I add umami without extra sodium?
Choose fermented products labeled low-sodium or use concentrated ingredients in small quantities. Roasting, reducing, and fermenting at home also intensify umami with minimal added salt.
Are dried mushrooms really better for umami?
Yes. Drying concentrates free amino acids; rehydrated dried shiitake releases more glutamate than the fresh mushroom. Save soaking liquid to boost soups and sauces.
Is MSG the same as natural glutamate?
Monosodium glutamate is the sodium salt of glutamic acid and functions as a concentrated flavor enhancer. Natural glutamate from foods comes in complex matrices that also deliver aroma and texture.
Can umami help make healthier meals?
Strategic use of umami can reduce the need for fat and excess salt by increasing satisfaction per bite. Focus on whole-food umami sources—fermented beans, dried seaweeds, aged cheese—to keep meals balanced.
See also: Umami
]]>
- Key takeaway: controlled browning and slow, moist heat transform collagen into gelatin for a silky mouthfeel.
- Key takeaway: beer choice and sugar balance determine the stew’s bitter-sweet profile.
- Key takeaway: long resting time concentrates flavors and allows the sauce to finish naturally.
Overview and Heritage
Carbonnade Flamande sits squarely in the corpus of Carbonade flamande preparations; it represents Flemish regional cooking that pairs inexpensive beef with robust beer. The recipe evolved to extract maximum flavor from tough cuts through time and heat rather than expensive ingredients.
The dish also reflects broader elements of Belgian cuisine, where beer serves as both an ingredient and a cultural signifier. Understanding that context helps a cook select appropriate beer styles and accompaniments for authenticity.
Prep and Cook Time
Preparation: 30 minutes. Focus your mise en place: measured flour, trimmed beef, and sliced onions ready before heat hits the pan.
Cooking: 3–3½ hours in a low oven at roughly 300°F (150°C). The slow cycle is not passive: check for steam balance and skim occasionally to maintain clarity in the sauce.
Yield and Serving
Yield: Serves 6 hearty portions. This quantity scales predictably if you maintain meat-to-liquid ratios and oven temperature.
Serve over buttered mashed potatoes or thick slices of rustic bread to absorb the sauce. For further reading on stew variations, see our internal guide: Belgian Beef Stew Variations.
Difficulty Level and Equipment
Difficulty: Medium. The method demands attention during browning and the patience to braise slowly, but it does not require advanced knife skills.
Use a heavy Dutch oven or braiser for steady heat distribution. For technique reference, consult our internal resource on slow braising techniques to refine oven vs. stovetop control.
Ingredients
Below are practical ingredient choices and purpose-driven notes rather than optional decoration. Choose chuck or blade for connective tissue; they render gelatin when cooked low and long.
- 2 lbs (900g) beef chuck, cut into 1½-inch cubes
- 1 cup all-purpose flour, sifted
- 4 tbsp unsalted butter
- 2 tbsp neutral oil
- 3 large onions, thinly sliced
- 3 cloves garlic, finely minced
- 2 tbsp brown sugar
- 2 tbsp apple cider vinegar
- 12 oz Belgian dark ale or dubbel beer (use a malty, low-hop option)
- 2 cups beef broth
- 2 tbsp Dijon mustard
- 4 sprigs fresh thyme
- 2 bay leaves
- Salt and freshly ground black pepper, to taste
- 1 tbsp fresh flat-leaf parsley, chopped for garnish
- 2 tsp finely grated orange zest (optional)
Instructions
Follow a structured sequence: dry-coat, brown in batches, caramelize onions, deglaze, return meat, and finish with low, moist heat. Each stage builds a chemical and textural layer that the next stage refines.
Control is the theme: even heat during browning, gentle agitation when caramelizing onions, and a steady oven temperature during braise produce consistent results.
Browning the Beef
Pat beef dry and coat lightly with flour; this creates a thin starch layer that aids browning and slightly thickens the final sauce. Sear in hot butter and oil in batches to avoid steaming; aim for a rich, deep crust without burning.
Remove browned pieces to rest briefly. The browned bits left in the pot contain concentrated flavor compounds from Maillard reactions; preserve them for deglazing to build an umami backbone.
Caramelizing Onions and Aromatics
Cook onions low and slow until deeply golden. This process relies on caramelization and Maillard-type interactions to convert simple sugars into complex flavor molecules that balance the beer’s bitterness.
Add garlic near the end to avoid burning, then introduce brown sugar and vinegar to create a glossy glaze and a counterpoint of acid and sweetness that harmonizes the stew.
Deglaze and Assemble
Pour in beer to deglaze, scraping up browned bits with a wooden spoon. Follow with mustard, thyme, bay leaves, orange zest if using, return the beef and add broth so the meat is nearly submerged.
Bring to a gentle simmer on the stovetop, then cover and transfer to a 300°F (150°C) oven for 3–3½ hours. The consistent low temperature allows collagen to convert into gelatin without collapsing muscle fibers.
Pro-Caution
After braising, remove thyme and bay leaves, then adjust seasoning. Rest the stew covered for 10–20 minutes to let the sauce settle and thicken naturally.
Tips for Success
Selecting beef: Use well-marbled chuck or blade. These cuts contain collagen that becomes gelatin when cooked slowly, which yields a silky mouthfeel and rich body in the sauce.
Beer selection: Choose a malt-forward beer such as a dubbel or other dark Belgian ale; avoid heavily hopped styles that add grassy bitterness rather than malty sweetness. For context on Belgian beer styles, consult Beer in Belgium.
Expert Insight
If sauce is thin after braising, finish uncovered on the stovetop and reduce gently until glossy. Cold refrigeration overnight often firms the sauce due to gelatin, so reheating gently restores the desired texture.
Serving Suggestions
Serve hot over buttered mashed potatoes, egg noodles, or thick country bread to capture the sauce. A light sprinkling of fresh parsley brightens the final plate.
For wine or beer pairing, return to the cooking beer or choose similarly malty, low-hop beverages that echo the stew’s caramel and toasted notes. Offer steamed green vegetables or glazed root vegetables for balance.
Nutritional Snapshot
The following values are estimates per serving and will vary with precise ingredients and portion size. Use these as a planning guide rather than a lab measurement.
| Nutrient | Per Serving |
|---|---|
| Calories | 450 kcal |
| Protein | 38 g |
| Carbohydrates | 20 g |
| Fat | 22 g |

Science Behind Key Techniques
The Maillard reaction is central to flavor development during browning; it produces heterocyclic compounds and melanoidins that deliver savory, roasted, and toasted notes. For a technical overview, see Maillard reaction.
Meanwhile, gelatin formation from collagen gives the sauce body and mouthfeel. Maintaining a low, steady temperature maximizes this conversion without denaturing proteins into dry textures.
Q&A
What cut of beef works best?
Use chuck or blade because they have sufficient connective tissue to render gelatin during slow cooking. Lean cuts lack this collagen and will produce a thinner mouthfeel.
Can I substitute the beer?
Yes, but substitute with care. Choose malt-forward dark ales rather than hoppy IPAs. You can also substitute beef stock and a touch of dark sugar for a non-alcohol version, but the beer contributes specific flavor compounds difficult to replicate fully.
How do I fix a thin sauce?
Simmer uncovered until the liquid reduces and the sauce thickens. Alternatively, remove some braised meat and reduce the liquid, then return the meat once the sauce reaches the desired gloss and viscosity.
Is make-ahead practical?
Yes. Carbonnade Flamande often tastes better the next day as flavors meld and the sauce firms. Reheat gently to avoid breaking the emulsion and to preserve meat tenderness.
What temperature should I braise at?
A stable oven at about 300°F (150°C) yields predictable results. The key is steady, even heat; fluctuations toward higher temperatures risk tightening proteins and evaporating volatile aromatics.
In Retrospect
Carbonnade Flamande rewards an analytical approach: controlled browning, measured acidity, and long, moist heat working together produce both depth and tenderness. When cooks respect these mechanical and chemical steps, the results consistently excel.
Embrace these practical techniques and repeat them. Over time you will learn subtle adjustments that match your ingredients and equipment, producing a reliably excellent Carbonnade Flamande.

See also: Carbonnade Flamande
]]>