Unlocking the Magic of a Food Mill begins with appreciating its ingeniously simple yet multifunctional design, allowing you to transform fresh produce into silky smooth purees and velvety sauces effortlessly. As a culinary enthusiast, I’ve found that the food mill elevates even the humblest ingredients, turning them into sumptuous textures that no blender or sieve can quite mimic. Whether crafting rustic tomato sauce or delicate apple butter, this kitchen tool becomes an indispensable ally for the creative cook.
Prep and Cook Time
- Preparation: 10 minutes
- Cooking: 25 minutes
- Total: 35 minutes
Yield
Serves 4
Difficulty Level
Easy to Medium
Ingredients
- 3 cups ripe tomatoes, quartered
- 2 cloves garlic, minced
- 1 small onion, finely chopped
- 2 tbsp extra virgin olive oil
- 1 tsp sea salt
- 1 tsp fresh basil leaves, chopped
- 1/4 tsp freshly ground black pepper
- Optional: pinch of red chili flakes for heat
Instructions
- Sauté Aromatics: Heat the extra virgin olive oil in a medium skillet over medium heat. Add the minced garlic and chopped onion, sauté until fragrant and translucent, about 5 minutes, stirring regularly.
- Cook Tomatoes: Add the quartered tomatoes to the skillet. Cook for 15 minutes, stirring occasionally, until the tomatoes are soft and release their juices.
- Prepare the Food Mill: Set up your food mill with the medium disc in place. This size provides the perfect balance for a smooth sauce without losing texture.
- Mill the Tomato Mixture: Transfer the tomato mixture to the food mill. Using the hand crank, gently process the tomatoes, allowing the mill to separate skins and seeds, creating a silky puree.
- Season and Finish: Return the milled puree to the skillet. Stir in sea salt, chopped basil, black pepper, and red chili flakes if using. Simmer for another 5 minutes to meld flavors.
- Serve Warm: Pour the sauce over freshly cooked pasta or use as a base for your favorite dishes.
Tips for Success
- Selecting Your Food Mill: Choose a model with interchangeable discs to allow versatility-fine, medium, and coarse-to match your recipe’s texture needs.
- Ingredient Prep: Always cook fibrous or tougher produce until tender before milling; this ensures smoother purees.
- Cleaning Ease: Clean right after use. Soak the parts in warm soapy water to loosen stuck bits for effortless washing.
- Texture Control: Adjust processing speed. Slow, even turns of the crank prevent clogging and yield a finer puree.
- Creative Uses: Beyond sauces, try pureeing roasted vegetables, potatoes for gnocchi, or even fresh fruit for sorbets.
Serving Suggestions
Drizzle your fresh tomato puree over homemade pasta, garnish with a sprinkle of parmesan cheese and a few fresh basil leaves for a vibrant, elegant presentation. Alternatively, ladle it over grilled chicken or baked fish, finishing with a touch of extra virgin olive oil and cracked black pepper. For a rustic twist, serve alongside crusty warm bread for dipping-each bite bursting with garden-fresh flavor.

| Nutrient | Amount per Serving |
|---|---|
| Calories | 90 kcal |
| Protein | 2 g |
| Carbohydrates | 12 g |
| Fat | 4.5 g |
Curious to explore more culinary magic with versatile kitchen tools? Check out our Best Kitchen Toys for Home Chefs post for deeper insights. For further inspiration on perfect sauce textures, visit Serious Eats’ guide to tomato sauce.
Q&A
Q&A: Unlocking the Magic of a Food Mill – Your Kitchen’s Secret Tool
Q1: What exactly is a food mill, and why is it considered magical in the kitchen?
A: A food mill is a classic, hand-cranked kitchen gadget designed to puree and strain foods effortlessly. Its magic lies in its simplicity and versatility-turning chunky fruits, vegetables, and cooked ingredients into smooth sauces, soups, and baby food, all while effortlessly separating seeds, skins, and fibers. It’s like having a culinary wizard that transforms your ingredients with just a spin!
Q2: How does a food mill differ from a blender or food processor?
A: While blenders and food processors rely on sharp blades and electricity to chop and puree, a food mill uses a rotating blade pressed against a perforated disk to manually mash and sieve food. This means it gently preserves texture, removes unwanted bits (like tomato skins or seeds), and avoids over-processing, giving you a silky, refined texture without the fuss or noise of machines.
Q3: What types of foods can I prepare with a food mill?
A: The possibilities are vast! Use it to make luscious applesauce, silky tomato sauce, velvety mashed potatoes, smooth pumpkin puree, or even fresh baby food. It’s ideal for any cooked food that needs mashing and straining-think soups, jams, and pie fillings, where smoothness and texture matter.
Q4: Is the food mill difficult to use or clean?
A: Not at all! Using a food mill is as simple as placing it over a bowl, adding your cooked ingredients, and cranking the handle. The pureed food passes through the holes, leaving skins and seeds behind. Most food mills come apart easily for thorough cleaning, and many parts are dishwasher-safe-making the magic quick and tidy.
Q5: Can a food mill help improve my cooking results?
A: Absolutely. By removing seeds and skins naturally, your sauces and purees become silkier and more flavorful, without bitterness or texture issues. Plus, the gentle mashing keeps delicate flavors intact, making your homemade favorites taste like they came from a high-end kitchen.
Q6: Are there different sizes or types of food mills? How do I choose one?
A: Yes! Food mills come in various sizes-small (for baby food), medium (perfect for everyday use), and large (for big batches). They also feature interchangeable disks with different hole sizes, allowing you to control the texture. Choose based on your cooking habits: a medium size with multiple disks is a great all-rounder for a busy kitchen.
Q7: Can a food mill replace other kitchen tools, or is it best used alongside them?
A: A food mill complements rather than replaces other tools. It excels at creating smooth purees and removing fibers, while blenders and food processors are better for chopping or mixing raw ingredients. Incorporate it into your cooking toolkit to add finesse and texture control to your culinary creations.
Unlocking the magic of a food mill means embracing a timeless tool that elevates your cooking with minimal effort. Spin your way to smoother sauces, richer purees, and kitchen creations that taste like a warm hug-no wizardry required.
Future Outlook
As you welcome the humble food mill into your kitchen arsenal, you unlock a world where texture, flavor, and tradition converge effortlessly. This unassuming tool transforms humble ingredients into silky sauces, velvety purees, and delightful jams-all while preserving the essence of natural goodness. Whether you’re a seasoned chef or an enthusiastic home cook, the food mill is your secret to culinary magic, bridging the gap between rustic charm and refined technique. So next time you prepare a meal, let your food mill work its subtle wonders and watch as ordinary dishes become extraordinary creations with just a turn of the handle.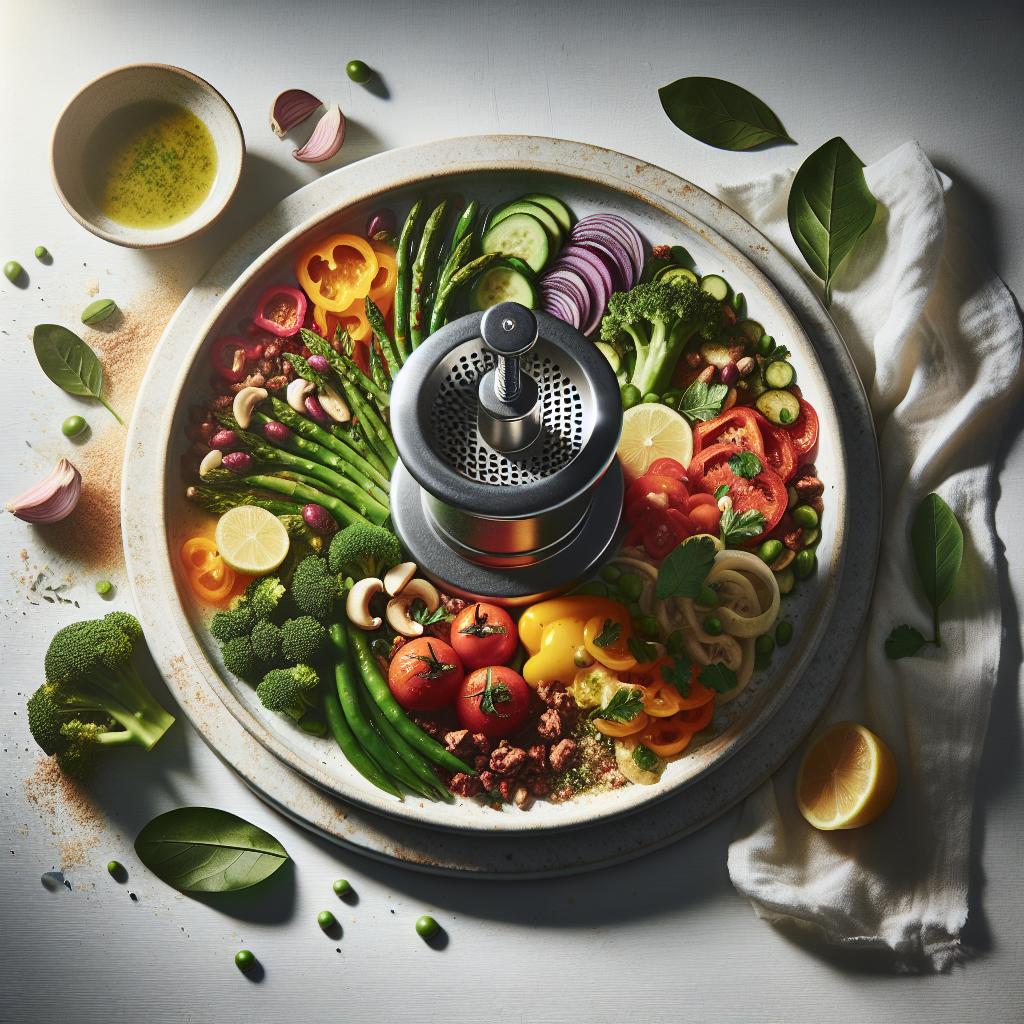
Crafting tender, fluffy scones begins with understanding the pivotal role fat plays in developing texture and flavor. Whether you’re pulling out your baking tools for a cozy teatime or a special brunch, knowing how to choose and work with fat ensures every bite is perfectly flaky, moist, and rich. Using the right fat not only enhances tenderness but also promotes delicate layers that melt on your tongue-transforming simple scones into a sublime treat.
Prep and Cook Time
- Preparation: 15 minutes
- Cooking: 12-15 minutes
- Total Time: Approximately 30 minutes
Yield
Makes 8 classic-sized scones
Difficulty Level
Easy to Medium – perfect for home bakers aiming for professional results
Ingredients
- 2 cups (250g) all-purpose flour, sifted
- 1/4 cup (50g) granulated sugar
- 1 tablespoon baking powder
- 1/2 teaspoon salt
- 6 tablespoons (85g) unsalted cold butter, cubed
- 1/2 cup (120ml) whole milk, chilled
- 1 large egg, beaten
- 1 teaspoon vanilla extract (optional)
Instructions
- Combine dry ingredients: In a large bowl, whisk together the flour, sugar, baking powder, and salt until evenly distributed.
- Cut in the butter: Using a pastry cutter or your fingertips, quickly cut the cold butter into the dry ingredients until the mixture resembles coarse crumbs with pea-sized bits of butter. Chunks of butter are essential for achieving flaky layers-don’t overwork.
- Mix wet ingredients: In a small bowl, whisk together the milk, egg, and vanilla extract (if using).
- Incorporate liquids: Pour the wet mixture into the dry ingredients. Gently fold with a spatula just until the dough comes together-avoid overmixing to retain tender crumb and flakiness.
- Shape the dough: Turn the dough onto a lightly floured surface. Pat it into a 1-inch thick circle. Using a sharp knife or biscuit cutter, cut into 8 equal wedges or round shapes.
- Chill briefly: Arrange scones on a parchment-lined baking tray. Chill in the refrigerator for 15 minutes to firm up the butter chunks, crucial for maximum rise and flaky texture.
- Bake to perfection: Preheat your oven to 425°F (220°C). Brush the scones gently with a little milk or beaten egg for a golden crust. Bake for 12-15 minutes until puffed and golden brown.
- Cool and serve: Let scones cool on a wire rack for 5 minutes before serving. Enjoy warm for best flavor and texture!
Chef’s Notes: Tips for Success
- Butter matters: Use unsalted, cold butter straight from the fridge. The colder the fat, the better the flakiness.
- Don’t overwork: Overmixing activates gluten, making scones tough-fold gently and minimally.
- Alternative fats: For a richer flavor, try substituting part of the butter with cold cream cheese or chilled coconut oil-just adjust liquids slightly.
- Balance liquid: If dough feels sticky, dust a little extra flour; too dry? Add a splash more milk. The dough should feel soft but not wet.
- Make ahead: Prepare shaped scones in advance, freeze on a tray, then transfer to a bag. Bake directly from frozen, adding a couple of extra minutes.
Serving Suggestions
Serve these tender, fluffy scones warm, slathered with clotted cream and your favorite jam-classic strawberry or tangy marmalade work beautifully. For a refreshing contrast, accompany with freshly brewed tea or a cappuccino. Garnish with a light dusting of powdered sugar or a few fresh berries for a stunning presentation that invites indulgence.
| Nutrient | Per Scone |
|---|---|
| Calories | 220 kcal |
| Protein | 4 g |
| Carbohydrates | 28 g |
| Fat | 9 g |
Explore more scone recipes to elevate your baking repertoire.
For further reading on the science of baking fats, visit King Arthur Baking’s guide to butter.

Q&A
Q&A: The Magic of Fat – Crafting Tender, Fluffy Scones Perfectly
Q1: Why is fat such a crucial ingredient in making the perfect scone?
A: Fat is the unsung hero in scone baking-it’s what transforms humble flour and milk into tender, flaky clouds of delight. When fat melts during baking, it creates tiny pockets of steam that give scones their signature fluffiness. Without enough fat, your scones can turn out dry, dense, or crumbly instead of soft and inviting.
Q2: What types of fat work best for scones?
A: Traditional recipes call for cold butter because it’s flavorful and creates beautiful layers when gently cut into the flour. However, other fats like shortening or even ricotta can be used for different textures and moisture levels. Each fat imparts its own magic-butter offers a rich, creamy taste; shortening yields extra tenderness; and ricotta can add moistness and a subtle tang.
Q3: How does the temperature of fat affect the scone’s texture?
A: Cold fat is key! When cold fat is cut into flour, it creates pea-sized chunks that remain solid until baking. This lets steam puff up the dough around the fat bits, resulting in airy, flaky layers. If the fat melts too soon (like if it’s warm when you mix), it blends too thoroughly with the flour, making the dough dense and tough.
Q4: Is there a secret technique to incorporating fat into scone dough?
A: Absolutely. The secret is “cutting in” the fat just enough so that the mixture resembles coarse crumbs with tiny chunks. Use a pastry cutter, two knives, or your fingertips-just be gentle and precise. Overworking the fat and flour together can develop gluten, which toughens the dough. Remember: handle the dough lightly and quickly.
Q5: Can the amount of fat be adjusted for different scone outcomes?
A: Yes! Increasing fat generally makes scones richer and more tender, while reducing it leads to a firmer, sturdier crumb. For a more cakey scone, add a bit more butter. If you’re after a rustic, biscuit-like texture, stick to the classic moderate fat ratio. Experimenting is the fun part-just keep the balance so the dough isn’t greasy or dry.
Q6: How does fat interact with other ingredients in scones?
A: Fat harmonizes beautifully with flour, sugar, and liquids. It coats flour proteins, limiting gluten formation and softening the crumb. Fat also carries flavor, helping scones taste buttery and luscious. When combined with baking powder or soda, the melting fat gives rise to tender pockets, while moisture ingredients like cream or buttermilk join the party to boost lift and richness.
Q7: Any tips for baking scones to maximize the magic of fat?
A: Definitely! Freeze or chill your fat and dough before baking for that signature rise. Bake on a preheated tray or stone to set edges quickly and encourage oven spring. Don’t overbake-pull scones out when golden and just firm, then let them cool briefly before indulging. This locks in moisture and keeps them tender bite after bite.
Unlocking the magic of fat is the key to scones that float between crumbly and cloudlike, buttery and fluffy. With these insights, you’re ready to craft scones that taste like little pieces of baked sunshine-every time.
The Conclusion
In the delicate dance of scone-making, fat plays the silent yet starring role-transforming humble ingredients into tender, fluffy delights that melt in your mouth. Whether it’s butter’s rich embrace or cream’s velvety whisper, understanding the magic of fat invites you to craft scones that aren’t just baked, but lovingly sculpted. So next time you mix, fold, or knead, remember: it’s the fat that turns simple dough into a masterpiece of texture and flavor, inviting you to savor every perfect bite. Happy baking!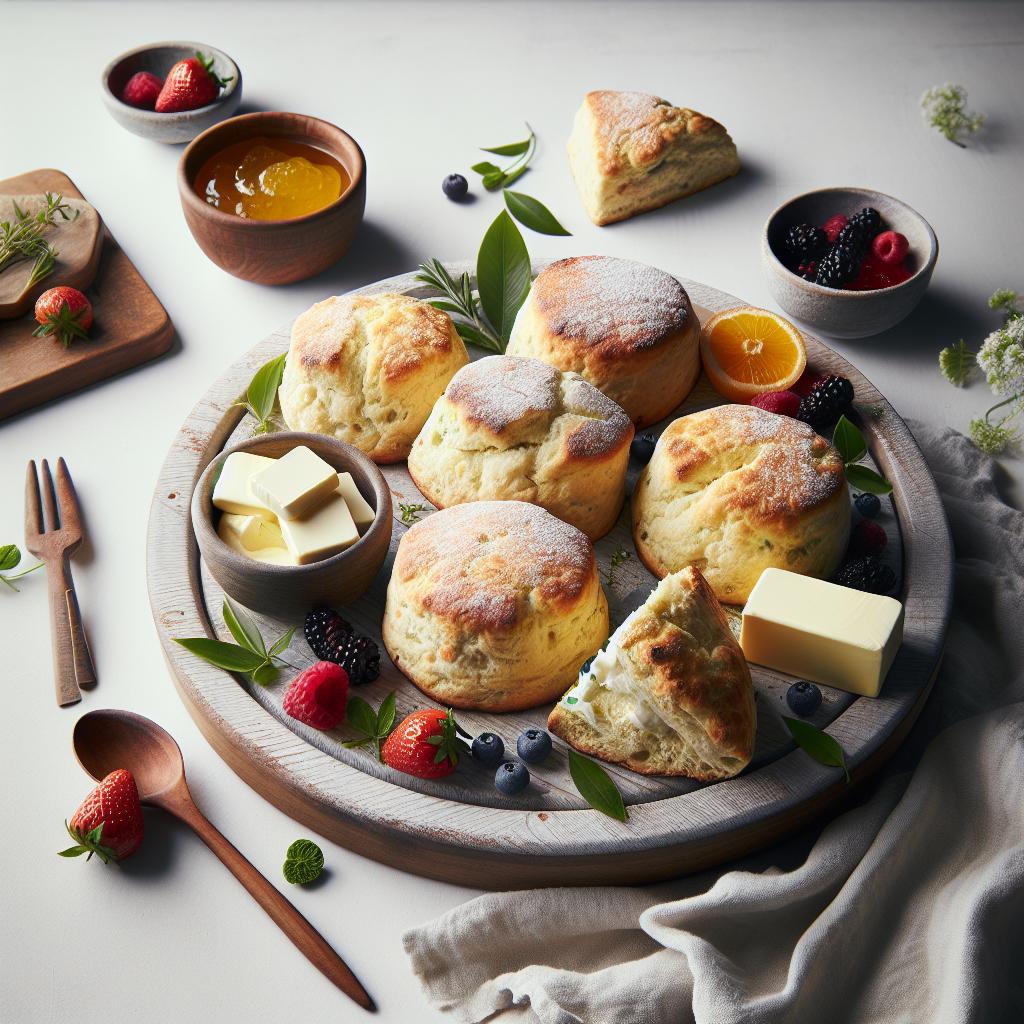
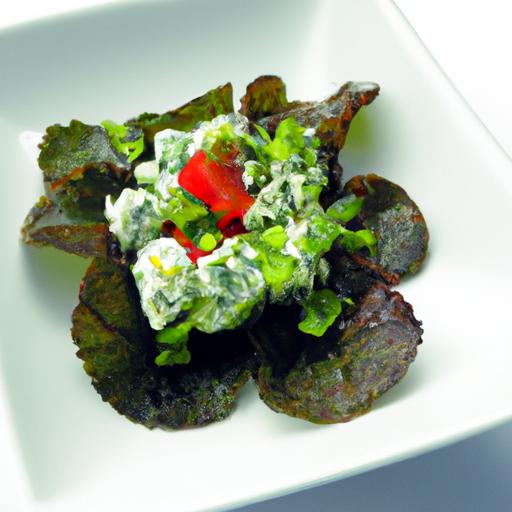
The Science Behind Wild Fermentation and Its Health Benefits
The Magic of Wild Fermentation: Nature’s Taste Adventure invites you to uncover the fascinating microbial symphony that transforms humble ingredients into culinary treasures rich in probiotics, flavor, and tradition. Rooted in ancient techniques, wild fermentation harnesses the power of local microbes, cultivating unique tangy and complex flavors that reflect your environment-a true gastronomic journey from nature’s own pantry.
Prep and Cook Time
- Preparation Time: 15 minutes
- Fermentation Time: 5-14 days (varies by recipe and ambient temperature)
- Total Time: 5-14 days plus initial prep
Yield
- Approximately 1 quart batch (serves 4-6 as a condiment or side)
Difficulty Level
- Easy to Medium
Ingredients
- 1 medium organic cabbage, chopped or shredded (about 1.5 lbs)
- 1 tablespoon fine sea salt (non-iodized, for optimal fermentation)
- Filtered water (enough to create a brine, approx. 1 cup)
- Optional flavorings: 2 cloves garlic, thinly sliced; 1 teaspoon caraway seeds; 1 small grated carrot for color and sweetness
Instructions
- Prepare Your Vegetables: Rinse the cabbage thoroughly and chop into bite-sized pieces. In a large bowl, combine the cabbage, optional garlic, carrot, and caraway seeds.
- Salt and Massage: Sprinkle the sea salt over the vegetables. Using clean hands, massage and squeeze the mixture for about 8-10 minutes until the cabbage softens and releases natural juices.
- Pack into Your Fermentation Vessel: Transfer the salted cabbage mixture tightly into a clean glass jar. Press firmly to eliminate air pockets. Pour in any juices released during massaging.
- Add Brine if Needed: If the cabbage is not fully submerged under its liquid, add filtered water to create a brine that covers the vegetables completely to prevent mold.
- Weight and Seal: Place a fermentation weight or a small glass insert on top of the cabbage to keep it submerged. Cover the jar with a cloth secured by a rubber band or use an airlock lid to allow gas escape.
- Ferment Time: Store your jar at room temperature (65-75°F) away from direct sunlight. Begin tasting after 3 days; fermentation can continue anywhere from 5 to 14 days depending on desired sourness and texture.
- Refrigerate: Once the desired flavor is achieved, seal with a lid and move to refrigeration to slow fermentation and preserve your creation.
Tips for Success
- Salt Precision: Correct salt quantity is critical; too little can cause spoilage, while too much slows fermentation.
- Healthy Microbes: Use organic, fresh vegetables and filtered water without chlorine to encourage beneficial bacteria.
- Avoid Mold: Always keep vegetables submerged under brine; if mold forms, remove carefully-fermentation below remains safe.
- Experiment Boldly: Wild fermentation thrives on creativity-try local herbs, spices, or even seasonal fruits to uncover new flavor dimensions.
- Clean Tools Only: Sanitize your utensils and jars before use to prevent unwanted microorganisms from invading.
Serving Suggestions
Present your tangy, probiotic-rich fermented cabbage as a bright, crisp side to grilled meats or roasted vegetables. Garnish with fresh dill or parsley for added vibrancy. Use it to top sandwiches, tacos, or incorporate into salads to add depth and a natural zing. A drizzle of extra virgin olive oil and a sprinkle of toasted seeds elevates both texture and taste. Let this living condiment be the star of your next meal by pairing it with earthy cheeses or hearty grains for an unforgettable bite.

| Nutrient | Per Serving |
|---|---|
| Calories | 35 |
| Protein | 2 g |
| Carbohydrates | 7 g |
| Fat | 0.2 g |
| Fiber | 3 g |
Discover more about fermentation fundamentals and innovative recipes in our comprehensive fermentation techniques guide. For a deeper understanding of probiotics and gut health foundations, visit the National Center for Complementary and Integrative Health.
Q&A
Q&A: The Magic of Wild Fermentation – Nature’s Taste Adventure
Q1: What exactly is wild fermentation?
A1: Wild fermentation is a magical microbial dance where nature’s own yeasts and bacteria transform simple ingredients into complex, tangy, and flavorful creations. Unlike commercial fermentation, it relies on the natural microbes present in the environment-on the food, in the air, and on your hands-to spark a lively alchemy of taste and preservation.
Q2: Why is wild fermentation considered a “taste adventure”?
A2: Each jar, crock, or slice fermented in the wild develops its own unique personality. Because wild microbes vary by region, season, and even kitchen atmosphere, no two batches are exactly alike. This unpredictable artistry turns every bite into a flavorful journey, where you savor nature’s creativity and your own hands’ craftsmanship.
Q3: What are some popular foods made through wild fermentation?
A3: From the crisp tang of sauerkraut and kimchi to the fizzy zing of naturally fermented sodas and sourdough breads, wild fermentation infuses everyday foods with depth and complexity. There’s also pickles, kombucha, miso, and even fermented hot sauces-each capturing a wild microbial signature.
Q4: How does wild fermentation benefit our health?
A4: Wild fermentation not only preserves food but also boosts its nutritional profile and digestibility. The friendly microbes break down hard-to-digest compounds and produce beneficial probiotics, enzymes, and vitamins, making fermented foods a delicious passport to gut health and vitality.
Q5: Is it safe to practice wild fermentation at home?
A5: Absolutely! When done with care and patience, wild fermentation is as safe as it is rewarding. The key is to create an environment where beneficial microbes flourish-think clean utensils, proper salt ratios, oxygen control-and to trust your senses: vibrant smells, pleasing bubbles, and bright colors are your guides. Any off-putting odors or molds mean it’s time to pause and start anew.
Q6: How does wild fermentation connect us to nature?
A6: Engaging in wild fermentation invites us to slow down and listen to nature’s microbial whispers. It reconnects us to the soil, the seasons, and traditional knowledge. In cultivating living cultures, we become partners in a timeless cycle of transformation, honoring the unseen ecosystems that flavor our food-and our lives.
Q7: Can anyone start their own wild fermentation adventure?
A7: Definitely! Wild fermentation is as accessible as a cucumber or a head of cabbage and as creative as your curiosity allows. With a little patience and an open mind, anyone can embark on this sensory quest, unlocking flavors and stories nurtured by the wild microbes all around us.
Dive into the world of wild fermentation and discover how nature’s smallest artisans craft the richest tastes-one bubbling jar at a time!
In Summary
As we journey through the enchanting world of wild fermentation, it becomes clear that this age-old craft is much more than a method of preservation-it’s a vibrant celebration of nature’s unseen alchemy. Each bubbling jar holds a story written by wild microbes, transforming humble ingredients into complex symphonies of flavor that awaken our senses and nourish our bodies. Embracing wild fermentation invites us to slow down, listen to the whispers of the earth, and rediscover the magic woven into life’s simplest processes. So next time you savor a tangy sauerkraut or a fizzy kombucha, remember: you’re partaking in a timeless adventure where nature herself plays the master chef, crafting tastes that delight, heal, and connect us to the wild wonders all around.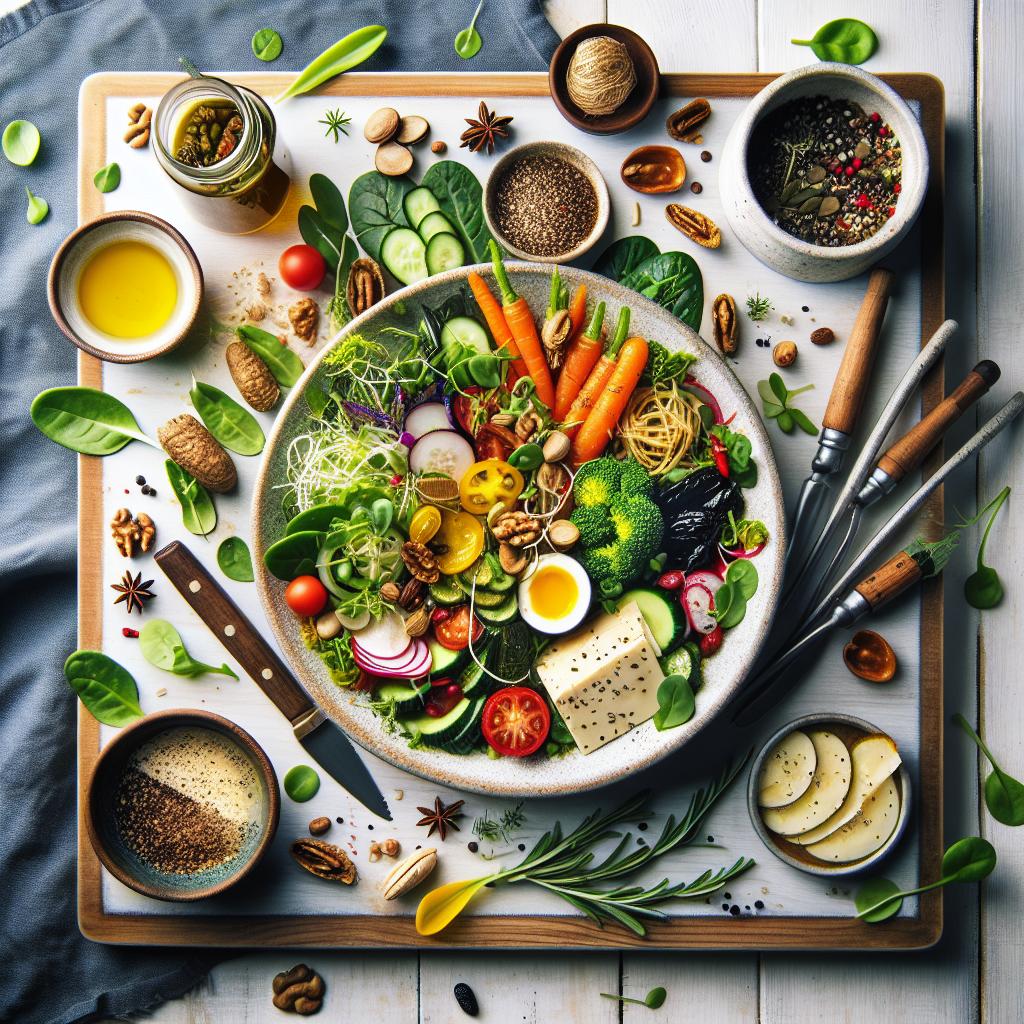
The Magic of Fat: How It Preserves and Tenderizes Food
The magic of fat is the secret ingredient in countless culinary masterpieces, elevating every dish by infusing tenderness, depth, and preservation power. From the rich marbling of a perfectly cooked steak to the golden, flaky crust of a buttery pie, fat transforms textures and flavors in ways that water or other cooking mediums simply cannot. Understanding the science behind fat’s unique ability to preserve moisture and break down proteins is your key to achieving greatness in every bite.
Prep and Cook Time
- Prep Time: 20 minutes
- Cook Time: 40 minutes
- Total Time: 1 hour
Yield
Serves 4 generously
Difficulty Level
Medium – Perfect for home cooks ready to elevate their technique
Ingredients
- 1.5 lbs (680 g) beef chuck roast, well-marbled
- 2 tbsp unsalted butter, softened
- 2 tbsp olive oil
- 3 garlic cloves, minced
- 1 tbsp fresh rosemary, chopped
- 1 tsp smoked paprika
- Salt and freshly ground black pepper, to taste
- 1 cup beef broth, low sodium
- 2 medium onions, sliced thin
- 1/2 cup heavy cream
Instructions
- Prepare the beef: Pat dry the beef chuck roast with paper towels to ensure a clean sear. Season generously with salt, pepper, smoked paprika, and half the rosemary.
- Heat the fat base: In a heavy skillet or Dutch oven, warm olive oil and 1 tbsp of butter over medium-high heat until shimmering but not smoking. This combination helps impart flavor while maximizing fat’s cooking magic.
- Sear the beef: Add the roast and sear on all sides until a deep golden-brown crust forms, about 3-4 minutes per side. The fat assists in forming this flavorful crust while locking in moisture.
- Sauté the aromatics: Reduce heat to medium, add garlic and onions. Stir occasionally, cooking until soft and caramelized, about 6-8 minutes, enhancing richness and layering flavor.
- Deglaze with broth: Pour in beef broth to lift all the fond-the browned bits rich with flavor-from the pan bottom. Stir gently.
- Slow cook and infuse fat: Return beef to the pot, including rendered fat. Cover and cook at low simmer or in a 300°F (150°C) oven for 30-40 minutes until fork-tender. The fat penetrates meat fibers, breaking them down and preserving juiciness.
- Finish with cream and butter: Remove beef and rest. Stir cream and remaining butter into the pan juices, simmering until slightly thickened, creating a silky sauce rich in fat that enhances mouthfeel.
- Serve immediately: Slice roast against the grain, spoon sauce over, and garnish with remaining fresh rosemary.
Chef’s Notes
- Choosing the right fat is essential: Butter brings sweetness and creaminess, while olive oil adds a fruity, silky base. Combining fats creates a symphony of flavors and textures.
- For a dairy-free version, replace butter and cream with coconut milk and coconut oil for similar tenderness and richness.
- Resting the meat after cooking is crucial-this allows the fat and juices to redistribute evenly, locking in moist tenderness.
- Using well-marbled cuts maximizes fat infusion, leading to unparalleled juiciness. If using lean cuts, consider adding a piece of pork fat or basting frequently with fat.
Serving Suggestions
Plate slices over a bed of buttery mashed potatoes or roasted root vegetables to complement the richness. A sprinkle of fresh herbs-like parsley, thyme, or rosemary-adds brightness. For a colorful contrast, a handful of lightly dressed arugula or baby kale refreshes the palate while highlighting the magic of fat.
| Nutrient | Amount per Serving |
|---|---|
| Calories | 530 kcal |
| Protein | 45 g |
| Carbohydrates | 8 g |
| Fat | 35 g |
Discover more about the art of rendering fat for cooking and dive deeper into enhancing your culinary skills. For scientific insight into fat’s preservation powers, visit the ScienceDaily Fat Emulsion Article.

Q&A
Q&A: The Magic of Fat – How It Preserves and Tenderizes Food
Q1: Why is fat often called a “magical” ingredient in cooking?
A1: Fat is like the silent magician of the culinary world. It doesn’t just add flavor; it transforms texture, preserves freshness, and brings out the juiciest qualities in food. Its unique chemical makeup allows it to lock in moisture and tenderness, giving dishes that melt-in-your-mouth appeal.
Q2: How does fat help in preserving food?
A2: Fat acts as a natural barrier against air and bacteria, slowing down oxidation and spoilage. When foods are coated or cooked in fat, they’re protected from drying out and harmful microbial growth, extending shelf life. Think of it as an edible shield that keeps freshness locked inside.
Q3: Can you explain the science behind fat’s tenderizing power?
A3: Absolutely! Fat infiltrates muscle fibers and connective tissues, lubricating and softening them. This reduces toughness by breaking down proteins and collagen during cooking, resulting in food that’s more succulent and easy to chew. It’s a bit like a gentle massage for your steak or poultry, loosening up every fiber.
Q4: Are all fats created equal when it comes to preserving and tenderizing?
A4: Not quite! Different fats have different melting points and flavors. Butter, for example, adds richness and a creamy texture, while olive oil brings smoothness and a fruity aroma. Animal fats like lard or tallow are excellent at sealing and tenderizing due to their unique fatty acid profiles. Choosing the right fat depends on the dish and desired effect.
Q5: Beyond preservation and tenderizing, what else does fat do in cooking?
A5: Fat is a flavor powerhouse. It carries and amplifies aromatic compounds, making herbs and spices come alive. It also creates that crispy golden crust we all love on fried and roasted foods. Plus, it provides energy and satisfies cravings, which is why foods rich in fat are often so comforting.
Q6: Is there a way to enjoy the magical benefits of fat without overindulging?
A6: Definitely! The magic lies in balance and technique. Using moderate amounts of quality fats and combining them with fresh, wholesome ingredients lets you enjoy tender, flavorful meals without excess calories. Techniques like basting, slow cooking, and emulsifying oils can maximize fat’s wonders efficiently.
Q7: What’s a simple kitchen tip to harness fat’s tenderizing magic?
A7: Marinate your meats in oil-based marinades infused with acids like vinegar or citrus. The fat dissolves slowly into the meat, while the acid helps break down tough fibers. This two-pronged approach turns even modest cuts into tender treats bursting with flavor.
Fat might sometimes get a bad rap, but in the kitchen, it’s nothing short of magical-preserving, tenderizing, and transforming food into sensory masterpieces. Embrace fat’s secrets, and your culinary creations will never be the same!
In Conclusion
As the curtain falls on our exploration of the marvelous role fat plays in the culinary world, it’s clear that this often-misunderstood ingredient is nothing short of magical. Beyond its rich flavor and satisfying mouthfeel, fat is a masterful preserver, warding off spoilage while tenderizing even the toughest cuts with a gentle, transformative touch. Whether cloaked in golden butter, marbled within a steak, or glistening in a slow-cooked stew, fat is the silent architect behind many of our favorite textures and tastes. So next time you savor a silky slice of roast or relish the crisp, succulent skin of poultry, remember that fat is not the villain-it’s the alchemist turning simple ingredients into unforgettable feasts. In the dance of flavors, fat leads with grace, reminding us that sometimes, it’s what lies beneath the surface that truly makes food magical.
The Magic of Carryover Cooking: Perfect Roasts Every Time
Mastering the art of roast perfection begins with understanding carryover cooking-a science that transforms a well-prepared cut of meat into a succulent masterpiece. Whether you’re roasting a prime rib or a tenderloin, this essential cooking phenomenon preserves juicy results and deepens flavor through the magic of residual heat. Here, we dive into practical insights that empower you to rest confidently, select the ideal cut, and refine your techniques to never settle for anything less than perfection.
Prep and Cook Time
- Preparation Time: 15 minutes
- Cook Time: 1 hour to 1 hour 30 minutes (depending on roast size)
- Rest Time: 20 to 30 minutes
Yield
Serves 6 to 8, ideal for family dinners or festive gatherings
Difficulty Level
Medium – Requires attention to temperature and timing, but rewarding for home cooks
Ingredients
- 3-4 lb beef prime rib roast, boneless and trimmed
- 2 tsp kosher salt
- 1 tsp freshly ground black pepper
- 1 tbsp olive oil
- 4 cloves garlic, minced
- 2 sprigs fresh rosemary
- 1 sprig fresh thyme
- 1 cup beef broth (optional, for resting pan juices)
Instructions
- Preheat your oven to 450°F (230°C) and position the rack in the center.
- Pat the prime rib dry with paper towels. Rub olive oil, salt, and pepper evenly over the surface for maximum flavor and crust formation.
- Scatter garlic, rosemary, and thyme over the top, gently pressing into the meat.
- Place the roast on a rack in a shallow roasting pan, fat side up. Insert a meat thermometer into the thickest part of the roast, avoiding bone or fat.
- Roast at 450°F for 15 minutes to develop a caramelized exterior, then reduce oven temperature to 325°F (160°C).
- Continue roasting until the internal temperature reaches 10°F (5°C) below your desired final temperature-typically 120°F for medium-rare.
- Remove the roast from the oven and tent loosely with foil. Rest for 20-30 minutes uncut, allowing carryover cooking to finish the process. Residual heat raises the core temperature gently, locking in juices.
- While resting, optionally pour beef broth into the roasting pan and simmer over medium heat to create a pan sauce.
- Slice against the grain, serve, and enjoy the heightened flavor and enhanced tenderness thanks to perfect carryover cooking.
Chef’s Notes
- For stunning crusts, salt your roast a day ahead and refrigerate uncovered overnight-this dry brining intensifies flavor and moisture retention.
- Resting times vary by roast size but never cut too soon; slicing releases valuable juices prematurely.
- Boneless cuts are easier to handle for consistent carryover; bone-in roasts can affect heat distribution and require a bit more experience.
- If seeking an alternative, pork shoulder or lamb leg both respond beautifully to carryover cooking with minor temperature adjustments.
Serving Suggestions
Present your roast on a warm platter garnished with fresh rosemary sprigs and a drizzle of the pan sauce. Pair it with creamy mashed potatoes, roasted root vegetables, and crisp green beans for a balanced plate both visually and flavor-wise. A glass of robust red wine like Cabernet Sauvignon will elevate the dining experience.
| Nutritional Info (per serving) | Amount |
|---|---|
| Calories | 450 kcal |
| Protein | 40 g |
| Carbohydrates | 3 g |
| Fat | 32 g |
For more on roasting techniques and how to maximize flavor through cooking science, explore our article on timing your roasts to perfection. Additionally, the Science of Carryover Cooking by Serious Eats offers excellent detailed explanations and temperature charts to boost your culinary confidence.

Q&A
Q: What exactly is carryover cooking, and why does it matter for roasting?
A: Carryover cooking is the culinary magic that happens after you pull your roast out of the oven. The residual heat trapped inside continues to cook the meat gently, often raising its internal temperature by 5-15°F. This matters because it allows the roast to finish cooking evenly without drying out, ensuring juicy, tender perfection every time.
Q: How can understanding carryover cooking help me avoid overcooked or undercooked roasts?
A: By anticipating carryover cooking, you can remove your roast from the heat several degrees before it reaches your desired doneness. This foresight prevents overcooking, locking in moisture and flavor. Conversely, if you ignore it, you risk letting the roast sit prematurely, resulting in an underdone center or inconsistent texture.
Q: Are all roasts affected by carryover cooking in the same way?
A: Not quite! The size and shape of the roast influence how much carryover cooking it experiences. Larger, denser roasts retain heat longer, leading to a more pronounced temperature increase after resting. Smaller cuts or thinner roasts tend to have minimal carryover cooking, so you’ll want to adjust your timing accordingly.
Q: How long should I rest my roast to take full advantage of carryover cooking?
A: Resting isn’t just resting-it’s the grand finale where juices redistribute and temperature evens out. For most roasts, a 15 to 30-minute rest period is ideal. This wait allows carryover cooking to complete the process perfectly while ensuring every bite is succulent and tender.
Q: Can carryover cooking impact food safety?
A: Absolutely! Carryover cooking helps your roast reach safe internal temperatures even after it’s out of the oven, reducing the risk of harmful bacteria. However, always use a reliable meat thermometer to monitor temperatures and rest your meat properly to balance perfect doneness and safety.
Q: Any tips for mastering carryover cooking in my kitchen?
A: Yes! Invest in a good digital meat thermometer, plan your cooking times with carryover in mind, and resist the urge to carve immediately. Tent your roast loosely with foil during resting to retain warmth without steaming. With practice, carryover cooking will become your secret weapon for flawless roasts every time.
To Wrap It Up
As the aroma of a perfectly cooked roast fills your kitchen, remember that the true magic lies not just in the cooking, but in the art of carryover cooking. This subtle yet powerful technique transforms good roasts into unforgettable meals, locking in juiciness and enhancing flavor long after the heat is turned off. By embracing carryover cooking, you invite patience and precision into your culinary routine, ensuring every roast emerges tender, succulent, and beautifully done. So next time you prepare your masterpiece, trust in the magic of carryover cooking – your taste buds will thank you.
Mastering Temperature Control Techniques for Perfect Melting and Cooking Results
Unlocking the Magic of Double Boilers: The Bain-Marie Explained is the secret behind many culinary masterpieces that require gentle, even heat. This process preserves the delicate flavors and textures that can be easily compromised by direct heat. The double boiler’s layered heating method ensures slow, controlled melting-transforming ingredients like chocolate, butter, and custards into silky, luxurious components without scorching or seizing.
Imagine melting rich 70% dark chocolate for ganache or preparing a creamy hollandaise sauce without any risk of curdling. The steam from simmering water heats the upper bowl just enough to melt or warm without ever crossing the boiling point directly. If you’ve ever wrestled with burnt chocolate or curdled sauces, you’ll appreciate how this humble kitchen tool turns frustration into success.
Prep and Cook Time
- Preparation: 5 minutes
- Cooking/Melting: 10-20 minutes
Yield
- Serves 4-6 (varies by recipe)
Difficulty Level
- Easy to Medium
Ingredients for Classic Double Boiler Chocolate Ganache
- 8 oz high-quality dark chocolate, chopped
- 1 cup heavy cream
- 1 tbsp unsalted butter, room temperature
- Pinch of fine sea salt (optional)
Instructions
- Fill the bottom pot of your double boiler with about 2 inches of water. Bring it to a gentle simmer over medium-low heat. Avoid boiling to prevent steam splashes.
- Place the chopped dark chocolate in the upper bowl or heatproof mixing bowl that fits snugly over the water pot. Ensure the bottom of the upper bowl does not touch the water.
- Pour the heavy cream slowly into the chocolate and stir gently with a silicone spatula. Continue stirring until the chocolate melts and cream blends into a smooth, glossy ganache-approximately 10 minutes.
- Add the unsalted butter and a pinch of sea salt to enhance richness and balance. Stir until combined and silky.
- Remove the bowl from heat immediately to prevent overheating. Use the ganache to glaze cakes, fill truffles, or drizzle over desserts.
Chef’s Notes
- Temperature control is paramount-keep water simmering, not boiling, to avoid sudden temperature spikes.
- For precision melting, use a thermometer to maintain temperatures around 110°F (43°C).
- Try substituting heavy cream with coconut cream for a dairy-free alternative; the double boiler preserves its smooth texture beautifully.
- Leftover ganache can be refrigerated in an airtight container and gently reheated using the same method.
- If you don’t have a double boiler, place a heatproof bowl over a saucepan filled with simmering water to mimic the effect, making sure the bowl doesn’t touch the water.
Serving Suggestions
Serve your ganache as a decadent sauce over fresh berries, or let it cool and whip slightly for a luscious mousse. For an elegant finish, sprinkle with edible gold dust or fresh mint leaves, adding vibrant color and freshness that complement the smooth, glossy finish. This gentle melting technique ensures every bite melts effortlessly on your tongue, impressing guests with both texture and depth of flavor.

Nutrition Information (per serving)
| Calories | Protein | Carbs | Fat |
|---|---|---|---|
| 250 kcal | 3 g | 18 g | 20 g |
Discover more tips on temperature control in kitchen techniques by visiting our Temperature Control Guide and dive deeper into how gentle heating can elevate your cooking. For a rich understanding of bain-marie history and applications, check this detailed article from Britannica.
Q&A
Q&A: Unlocking the Magic of Double Boilers – The Bain-Marie Explained
Q1: What exactly is a double boiler, or Bain-Marie, and why does it have such a magical reputation in cooking?
A1: Think of a double boiler as a gentle, soothing bath for your delicate ingredients. It’s a kitchen tool consisting of two stacked pots-one sitting above the other-where the bottom pot holds simmering water that heats the upper pot indirectly. This slow, even warmth unlocks culinary magic by preventing scorching or curdling, perfect for melting chocolate, crafting silky custards, or making luscious hollandaise. Its gentle approach transforms temperamental ingredients into velvety masterpieces.
Q2: How does the Bain-Marie differ from direct heat cooking?
A2: Imagine cooking over a whisper instead of a shout. Direct heat applies relentless, concentrated energy that can easily scorch or scramble sensitive foods. The Bain-Marie, by contrast, envelops its contents in mild, moist heat from the steam and simmering water below, creating a controlled environment that cooks slowly and evenly. This enchanting method preserves texture, flavor, and integrity, turning what could be a culinary disaster into a triumphant delight.
Q3: Can I make a Bain-Marie at home without special equipment?
A3: Absolutely! No need for a fancy bargain at the kitchen boutique. All you need is a heatproof bowl or smaller pot that snugly fits over a larger pot filled with simmering water. Just ensure the water doesn’t touch the bottom of the upper vessel. This DIY double boiler setup invites you to experiment and bring the Bain-Marie’s magic right to your own stove, making gourmet techniques approachable for any home chef.
Q4: What are some classic dishes that rely on the Bain-Marie’s gentle touch?
A4: The Bain-Marie is the unsung hero behind many culinary icons. From melting smooth chocolate for ganaches and truffles to gently cooking eggs into velvety custards like crème brûlée, it’s central to creating silky sauces such as hollandaise and béarnaise. Beyond sweets, it’s perfect for warming delicate soups or slow-cooking savory terrines, making it versatile magic for both sweet and savory artistry.
Q5: Are there any tips to master the Bain-Marie technique like a kitchen wizard?
A5: First, patience is your ally-slow and steady wins the race! Keep the water at a gentle simmer, never a rolling boil, to avoid overheating. Ensure your upper pot or bowl is dry on the outside to prevent extra water from dripping in. Stir frequently for even heat distribution, especially with chocolate or custards. Lastly, always use quality, heatproof vessels to ensure safety and performance. Master these rituals, and the Bain-Marie becomes your trusted spellbook for culinary enchantment.
Unlocking the Bain-Marie’s secrets reveals a world where subtlety reigns supreme, and precision meets artistry. With this simple yet ingenious method, you can elevate everyday cooking into magical creations worthy of any feast.
In Conclusion
As the gentle steam rises and warmth envelops your carefully balanced vessel, the double boiler-or bain-marie-reveals itself as more than just a kitchen tool. It’s an age-old secret, a silent guardian of delicate flavors and textures, patiently coaxing ingredients to perfection without the fear of scorching or curdling. Whether you’re tempering chocolate, crafting velvety custards, or melting butter with tender care, understanding the magic behind this humble apparatus unlocks a world of culinary possibilities. Embrace the bain-marie, and let your cooking flow with the grace of steam, balancing science and artistry in every simmering moment.
Acid-Set Cheese Unveiled brings you into the intimate world of crafting fresh ricotta-a culinary treasure rooted in Italian tradition yet wonderfully accessible in any home kitchen. This creamy, tangy cheese captivates with its delicate texture and subtle flavor, achieved through the fascinating science of acid setting. Whether you are a passionate home cook or a devoted cheese lover, embracing the magic behind ricotta will unlock the secrets to creating your own luscious, fresh cheese that can elevate countless dishes.
Prep and Cook Time
Prep Time: 10 minutes
Cook Time: 30 minutes
Total Time: 40 minutes
Yield
Makes approximately 2 cups of fresh ricotta cheese.
Difficulty Level
Easy to Medium: Perfect for beginners looking to experiment with homemade cheese.
Ingredients
- 4 cups whole milk (not ultra-pasteurized for best results)
- 1 cup heavy cream (for extra creaminess)
- 3 tablespoons lemon juice (freshly squeezed; alternatively white vinegar or citric acid)
- ½ teaspoon salt (adjust to taste)
The Role of Acid in Your Homemade Ricotta
Using an acid to gently set the protein matrix in milk is the cornerstone of ricotta making. The acid lowers the pH of the milk-and-cream blend, causing casein proteins to coagulate and form delicate curds. This method, unlike rennet cheeses, skips the enzymatic coagulation for a speedier, fresher result bursting with tang and luscious mouthfeel. Choosing the perfect acid – whether lemon juice for brightness, vinegar for sharpness, or citric acid for neutral flavor – influences not only texture but also the subtle flavor notes of your ricotta.
Step-by-Step Guide to Craft Your Authentic Ricotta
- Combine the milk and cream: In a large saucepan, pour 4 cups whole milk and 1 cup heavy cream. Heat over medium until the mixture reaches 185°F (85°C), stirring occasionally to prevent scorching.
- Add the acid carefully: Remove the pot from heat and slowly add 3 tablespoons lemon juice while gently stirring. You will see curds start to form within seconds.
- Rest and separate: Let the mixture sit undisturbed for 10 minutes, allowing full curd formation.
- Line a colander: Place a fine-mesh strainer lined with cheesecloth or a clean kitchen towel over a large bowl.
- Ladle the curds: Carefully transfer the curds into the lined strainer to drain. Allow to drain for 20-30 minutes for a soft, creamy texture.
- Season: Transfer the ricotta to a bowl and stir in ½ teaspoon salt. Taste and adjust seasoning as needed.
- Store fresh: Keep your ricotta refrigerated and consume within 3-4 days for optimal flavor and freshness.
Tips for Success: Insider Secrets to Perfect Ricotta
- Milk matters: Fresh, high-quality whole milk yields silkier curds; avoid ultra-pasteurized milk as proteins may not set well.
- Temperature control: Heating milk just below boiling ensures proteins denature properly without bitterness.
- Acid choice: Lemon juice imparts a natural brightness; white vinegar offers sharper tang; citric acid works well for neutral flavor and precise pH control.
- Straining timing: Less draining time yields creamier, wetter ricotta; extend for a firmer result suitable for baking.
- Flavor variations: Add fresh herbs, garlic, or roasted red peppers to customize.
- Make ahead: Fresh ricotta keeps in an airtight container up to 4 days refrigerated. Bring to room temperature before use to revive creaminess.
Serving Suggestions
Elevate your homemade ricotta by serving it drizzled with high-quality extra virgin olive oil, a sprinkle of flaky sea salt, and a dusting of cracked black pepper. Pair with honey and toasted nuts for a sweet contrast, or dollop onto pasta, pizza, or fresh bruschetta. Garnish with vibrant basil leaves, microgreens, or a dusting of fresh ground nutmeg for visual flair and an aromatic punch. The creamy tang of acid-set ricotta transforms simple plates into memorable culinary experiences.

| Nutrient | Amount per ¼ cup (50g) |
|---|---|
| Calories | 100 |
| Protein | 6g |
| Carbohydrates | 2g |
| Fat | 7g |
For deeper insight into the chemistry of acid-set cheeses, visit Exploratorium’s science of curd formation. Explore further how homemade cheese can revolutionize your kitchen on our Homemade Cheese Basics page for other fresh cheese recipes.
Q&A
Q&A: Acid-Set Cheese Unveiled: The Magic Behind Ricotta
Q1: What exactly is acid-set cheese, and how does ricotta fit into this category?
A1: Acid-set cheese is a type of cheese made by curdling milk using acid rather than rennet. Ricotta is a classic example – it’s crafted by introducing an acid (like lemon juice or vinegar) to hot whey or milk, causing the proteins to coagulate and form those delicate, fluffy curds we love. Think of it as a gentle culinary magic trick, turning simple ingredients into creamy goodness.
Q2: How does acid actually ‘set’ the cheese?
A2: Milk proteins, especially casein, normally stay suspended in liquid because of the milk’s natural pH balance. When you add acid, it lowers the pH, disrupting that balance and causing the proteins to clump together or “coagulate.” This coagulation traps fat and water, forming curds that become the cheese. It’s a natural chemistry lesson served on a plate!
Q3: Why is ricotta traditionally made from whey rather than whole milk?
A3: Ricotta-meaning “recooked” in Italian-is traditionally made from the whey left behind after making other cheeses. Whey still contains precious proteins like albumin and globulin, which don’t set during the initial cheese-making. By gently heating and acidifying the whey, these leftover proteins coagulate, giving ricotta its signature light, grainy texture that’s different from denser cheeses made from whole milk.
Q4: What makes ricotta’s texture so unique compared to other cheeses?
A4: Ricotta’s texture is a soft, fine-grained curd, achieved by the specific acid-setting process and the way it’s gently handled during production. Unlike firm cheeses that are pressed and aged, ricotta remains moist and spreadable, almost cloud-like in mouthfeel. This delicate texture makes it wonderfully versatile, perfect for dolloping over pasta, blending into desserts, or savoring fresh.
Q5: Can you make acid-set cheese at home?
A5: Absolutely! Acid-set cheeses like ricotta are surprisingly accessible for home cooks. All you need is milk, an acid such as lemon juice or white vinegar, and a bit of patience. Heat the milk gently, stir in the acid, and watch as curds magically form. Drain through cheesecloth, and voila-fresh homemade ricotta ready to elevate any recipe.
Q6: How does acid-set cheese differ nutritionally from other cheeses?
A6: Since acid-set cheeses like ricotta are often made from whey, they tend to be lower in fat and calories than many rennet-coagulated cheeses. They’re rich in protein but lighter in texture and density. This makes ricotta a nutritious, versatile option for those seeking creamy cheese without the heaviness.
Q7: What’s the secret behind ricotta’s enduring popularity?
A7: Ricotta’s charm lies in its simple ingredients, straightforward process, and stunningly versatile flavor and texture. It’s a canvas for both savory and sweet dishes-from lasagna layers to luscious cheesecakes. Its acid-set magic bridges science and art, embodying centuries of culinary tradition while inviting endless creativity in the kitchen. Truly, ricotta is cheese alchemy at its finest.
Wrapping Up
As the delicate curds of acid-set cheese softly come together, ricotta reveals itself not just as a dairy delight but as a testament to the seamless dance between science and tradition. From humble whey to creamy perfection, this cheese carries the magic of transformation in every spoonful. Whether draped over pasta, folded into desserts, or savored fresh, understanding the gentle art behind ricotta deepens our appreciation for a craft thousands of years in the making. So next time you indulge, remember: there’s a world of chemistry and culture bubbling quietly beneath its tender texture-a true marvel of acid-set cheese unveiled.
Unlocking Umami: The Magic of Bonito Flakes (Katsuobushi) reveals the timeless charm nestled within this delicate yet intensely flavorful ingredient. Originating from Japan’s intricate culinary heritage, bonito flakes embody a deep umami essence that transforms even the simplest dish into a savory masterpiece. From my first taste of katsuobushi-laden dashi broth to experimenting with its smoky notes in modern recipes, I have come to cherish how it amplifies flavors with subtle complexity and aromatic depth.
Prep and Cook Time
- Preparation: 10 minutes
- Cooking: 15 minutes
- Total Time: 25 minutes
Yield
Serves 4 as a flavor enhancer or garnish
Difficulty Level
Easy – perfect for both beginners and seasoned cooks aiming to elevate their dishes
Ingredients
- 1 cup bonito flakes (katsuobushi), fresh and slightly flaky
- 4 cups water, filtered for clean dashi base
- 1 piece kombu (dried kelp), 4 inches square
- 2 tablespoons soy sauce, naturally brewed
- 1 teaspoon mirin, optional for subtle sweetness
- Freshly chopped scallions, for garnish
Instructions
- Prepare the Dashi Base: Gently wipe the kombu with a damp cloth to remove impurities. Soak it in 4 cups of cold water for 30 minutes-this softens the seaweed and extracts umami.
- Heat the Kombu Infusion: Slowly bring the water and kombu to just before boiling over medium heat. Remove the kombu right as tiny bubbles start forming-avoid boiling to prevent bitterness.
- Add Bonito Flakes: Immediately sprinkle 1 cup of bonito flakes into the hot water. Turn off the heat and let steep for 5 minutes, allowing the smoky aroma and savory notes to infuse deeply.
- Strain the Broth: Using a fine mesh sieve or cheesecloth, strain the dashi into a clean pot or bowl. Press gently to extract all flavorful liquids without crushing the flakes.
- Flavor the Broth: Stir in soy sauce and mirin to taste. This step enhances the natural umami and balances the savory layers.
- Use or Store: Utilize the broth immediately in soups, sauces, or stir-fries, or cool and refrigerate for up to 2 days to maintain its fresh complexity.
Chef’s Notes & Tips for Success
- Choose high-quality bonito flakes: Opt for thin, light-colored flakes with a pleasant smoky scent for maximum flavor impact.
- Experiment with texture: Add a small handful of flakes directly to salads or steamed veggies for a crispy, umami-packed contrast.
- Make-ahead dashi: Prepare a batch and freeze in ice cube trays for portioned convenience in future recipes.
- Substitutions: While kombu adds oceanic depth, using only bonito flakes creates a more direct smoky profile.
- Visual delight: Garnish dishes with a delicate tangle of bonito flakes that dance with heat, showcasing their ethereal quality.
Serving Suggestions
Bonito flakes are wonderfully versatile. Serve the dashi broth as a base for miso soup with silken tofu and seaweed. Sprinkle flakes atop freshly steamed rice or mix into okonomiyaki and takoyaki for authentic crunch and flavor bursts. For creative flair, toss flakes with lightly dressed greens or blend into mashed potatoes for an umami punch.

Nutritional Information per Serving
| Component | Amount |
|---|---|
| Calories | 15 kcal |
| Protein | 3 g |
| Carbohydrates | 0 g |
| Fat | 0 g |
To dive deeper into traditional Japanese cooking, don’t miss our article Japanese Ingredients Guide. For scientific insights on the umami sensation, visit the National Institutes of Health.
Q&A
Q&A: Unlocking Umami – The Magic of Bonito Flakes (Katsuobushi)
Q1: What exactly are bonito flakes, and why are they so special?
A1: Bonito flakes, or katsuobushi, are thin, delicate shavings of dried, fermented skipjack tuna. But they’re much more than just fish flakes – they’re the essence of umami, the mysterious “fifth taste” that is deeply savory and satisfying. Through a meticulous process of smoking, fermenting, and drying, these flakes develop a complex depth that instantly elevates any dish they touch.
Q2: How do bonito flakes contribute to the flavor of a dish?
A2: When sprinkled on hot dishes, bonito flakes dance and curl, releasing smoky, oceanic aroma and a burst of umami. They add a subtle smoky sweetness and a punch of savory depth that can transform simple broths, rice bowls, and even salads into rich, layered culinary experiences.
Q3: What’s the history behind katsuobushi?
A3: Katsuobushi traces its origins back hundreds of years in Japan, where preservation methods were essential for storing protein-rich fish. The art of smoking and fermenting bonito not only preserved the fish but created a flavor powerhouse cherished in Japanese cuisine. Today, it’s a cornerstone of traditional dishes like dashi stock, the foundation of many Japanese soups.
Q4: Can bonito flakes be used beyond Japanese cooking?
A4: Absolutely! Bonito flakes are global umami enhancers waiting to be explored. Try sprinkling them over popcorn for a crunchy, savory twist, blend them into pasta sauces for depth, or use them to finish off roasted veggies. Their smoky depth complements many cuisines and adds an unexpected magic.
Q5: Is there a difference between regular bonito flakes and katsuobushi?
A5: Often used interchangeably, traditional katsuobushi undergoes a lengthy fermentation process that intensifies its flavor and umami compounds. Some commercially sold bonito flakes might be simply smoked and dried without fermentation, which can result in milder taste. For the full magic, seek out authentic katsuobushi.
Q6: How should bonito flakes be stored to preserve their flavor?
A6: To keep that dazzling umami punch, store bonito flakes in an airtight container away from light, heat, and moisture – ideally in the refrigerator. This prevents degradation and keeps the flakes crisp and flavorful for weeks.
Q7: Any tips for cooking with bonito flakes?
A7: Treat them gently! Add them toward the end of cooking to preserve their delicate aroma and texture. For making dashi, steep flakes in hot water briefly, then strain to capture their full umami essence without bitterness. And don’t forget to watch them dance atop hot dishes-a delicious performance as much as an ingredient!
Bonito flakes aren’t just a seasoning; they are a sensory experience and an umami key to unlock the hidden depths of your cooking. Whether in a humble soup or an adventurous fusion dish, these flakes deliver a sprinkle of culinary magic.
To Wrap It Up
As we close the chapter on the captivating world of bonito flakes, it’s clear that katsuobushi is much more than just a seasoning-it’s a bridge to umami’s deepest mysteries. These delicate, smoky shavings, crafted through centuries of tradition, unlock a symphony of flavors that can transform everyday dishes into unforgettable culinary experiences. Whether sprinkled atop a steaming bowl of ramen or infused into a rich dashi broth, bonito flakes invite us to savor the subtle magic woven into the heart of Japanese cuisine. Embracing katsuobushi is not just about tasting umami; it’s about discovering the art of flavor itself-one fragrant flake at a time.
Understanding Extracts: How Extraction Methods Shape Flavor Profiles and Potency
Unlocking flavor is an art, especially when it comes to harnessing the true essence of natural extracts. From the source of vanilla beans to the final bottle, this process is a meticulous journey shaped by extraction methods that directly influence potency and intricate flavor notes. Whether using alcohol, glycerin, or oil-based extractions, each technique offers a unique concentration that brightens your culinary creations in extraordinary ways.
Prep and Cook Time
- Preparation: 5 minutes
- Extraction Time: Varies (1 to 6 weeks depending on method)
- Cooking/Baking Time Using Extracts: Depends on recipe
Yield
Approximately 1 cup of homemade extract (adjust based on source and container size)
Difficulty Level
Medium – Requires patience and attention to detail for optimal results
Ingredients
- 1 cup vodka or clear alcohol (40-50% ABV)
- 1 vanilla bean pod, split lengthwise
- 1 cup glycerin (alternative for alcohol-free extract)
- Fresh herbs or spices (e.g., cinnamon sticks, peppermint leaves, citrus peels)
- Glass jar with airtight lid
Instructions
- Prepare the source ingredient: If using vanilla beans, split the pod lengthwise to expose the seeds, releasing more flavor.
- Combine with solvent: Place the bean, herb, or spice into a clean glass jar. Pour your choice of solvent (vodka, glycerin, or oil) over it until fully submerged.
- Seal and shake: Close the jar tightly and shake vigorously to combine. Store in a cool, dark place.
- Infuse over time: Shake the jar daily to promote flavor extraction. The typical time frame ranges from 1 week for delicate notes to up to 6 weeks for stronger, more complex profiles.
- Strain and bottle: After the infusion period, strain out solids using a fine mesh sieve or cheesecloth. Transfer the extract into smaller bottles for easier use, labeling with date and flavor.
Tips for Success
- Use high-quality, fresh ingredients to ensure the richest taste.
- Alcohol extracts are most potent and long-lasting; glycerin extracts offer sweeter, milder flavors ideal for children or those avoiding alcohol.
- For oil-based extracts, use carrier oils like fractionated coconut oil, but be aware these are less shelf-stable and best for immediate use.
- If your extract tastes overly bitter after extraction, dilute it slightly with the solvent to balance intensity.
- Keep your extracts away from heat and direct sunlight to preserve freshness.
Serving Suggestions
Use extracts to elevate cakes, cookies, frostings, and marinades. A few drops of vanilla extract can turn a simple custard into an indulgent dessert. Infuse your morning coffee with a hint of peppermint extract for a refreshing twist, or add almond extract to your baked goods for nostalgic warmth. Garnish desserts with shards of vanilla bean or fresh herbs matching your extract flavors to visually and aromatically enhance your plate.

| Extract Type | Best Solvent | Flavor Intensity | Typical Shelf Life |
|---|---|---|---|
| Vanilla | Alcohol | High | Up to 2 years |
| Herbal (Peppermint, Basil) | Glycerin | Medium | 6 to 12 months |
| Citrus Peel | Oil | Light | 3 to 6 months |
For deeper insights into the science behind food flavors and culinary techniques, check out our comprehensive guide to flavor science. To explore the fascinating chemistry of extraction processes, visit National Science Foundation’s Extraction Chemistry Resources.
Q&A
Q&A: Unlocking Flavor – The Magic Behind Extracts Explained
Q1: What exactly are extracts, and why are they considered magical in the kitchen?
A1: Extracts are concentrated essences drawn from natural ingredients like vanilla beans, almonds, or citrus peels. They’re magical because a few drops can coax out intense flavors, transforming ordinary dishes into unforgettable culinary experiences. Think of extracts as tiny flavor wizards, amplifying taste with minimal effort.
Q2: How are these flavor-packed extracts made?
A2: The magic begins with a process called extraction, where the key flavor compounds are pulled out using solvents such as alcohol, glycerin, or even water. For example, vanilla extract is created by soaking vanilla beans in alcohol, which lovingly dissolves and captures their rich aroma and taste. This concentrated potion preserves the essence of the ingredient in its purest form.
Q3: Why do recipes call for just a few drops of extract?
A3: Extracts are intensely flavorful, so a little goes a long way. Adding too much can overpower your dish, much like an overly enthusiastic wizard casting a spell. The goal is balance-just the right sprinkle of extract to enhance without overwhelming.
Q4: Can extracts be used beyond baking?
A4: Absolutely! Extracts are versatile flavor enhancers. Beyond cakes and cookies, try adding almond extract to your morning oatmeal, a dash of peppermint extract in a cocktail, or a splash of lemon extract in salad dressings. They’re like secret flavor passports to explore new taste territories.
Q5: What’s the difference between natural and artificial extracts?
A5: Natural extracts come directly from the source-real vanilla beans, fresh almonds-capturing authentic flavor molecules. Artificial extracts, on the other hand, are synthesized in labs to mimic these flavors. While both serve their purpose, purists often prefer natural extracts for their depth and complexity.
Q6: How should extracts be stored to maintain their magic?
A6: Keep extracts in a cool, dark place, away from heat and sunlight, ideally in tightly sealed glass bottles. Like bottled spells, exposure to light and warmth can weaken their potency over time, so proper storage preserves their enchanting flavor powers.
Q7: Can I make my own extracts at home?
A7: Yes! Crafting your own extracts is a delightful DIY project. Simply soak your chosen ingredient-vanilla beans, citrus zest, mint leaves-in a high-proof alcohol and let nature work its magic over several weeks. The result is a personalized potion bursting with your favorite flavors.
Q8: Why are extracts considered essential tools for cooks and bakers?
A8: Extracts are the secret ingredients that bring depth, aroma, and complexity to recipes without adding bulk or moisture. They’re like tiny capsules of flavor brilliance, giving chefs and home cooks alike a powerful means to elevate their dishes instantly.
Unlocking the power of extracts opens a whole new world of flavor possibilities. With a little knowledge and a drop or two, you can transform simple ingredients into extraordinary culinary creations-truly the magic behind the marvels of taste.
Concluding Remarks
As we’ve journeyed through the fascinating world of extracts, it’s clear that these liquid treasures hold far more than just flavor-they carry the essence of nature’s most beloved ingredients, concentrated and ready to transform the ordinary into the extraordinary. Whether it’s the warm embrace of vanilla, the bright zing of citrus, or the deep allure of spice, extracts unlock a symphony of taste with just a few drops. So next time you reach for a bottle on your shelf, remember the magic it contains and the centuries of craft distilled into every drop. Unlocking flavor isn’t just science-it’s an art, inviting you to savor the extraordinary in every bite.
Unlocking Flavor: The Magic of Culinary Syringes Explained
Unlocking flavor through the precise use of culinary syringes transforms the way we approach taste and presentation in the kitchen. This technique, inspired by modernist cuisine and professional gastronomy, allows cooks to infuse delicate layers of flavor right into the heart of every dish, offering an unmatched sensory experience. Whether you are injecting herbaceous oils into a tender roast or introducing luscious, flavored gels into desserts, the mastery of syringe techniques elevates your culinary creations with a refined touch and vibrant excitement.
Prep and Cook Time
Preparation: 15 minutes
Cooking/Infusion: 10-15 minutes
Total Time: 30 minutes
Yield
4 servings
Difficulty Level
Medium – requires steady hands and patience but highly rewarding.
Ingredients
- 1/2 cup fresh rosemary-infused olive oil, strained
- 1/4 cup house-made balsamic glaze, chilled and slightly thickened
- 2 tablespoons lemon-honey syrup
- 4 boneless chicken breasts, trimmed and lightly pounded
- Salt and freshly ground black pepper, to taste
- Fresh microgreens and edible flowers, for garnish
- 1 culinary syringe with a 10 ml capacity, sterilized before use
Instructions
- Season the chicken breasts liberally with salt and pepper. Set aside while preparing the flavor infusions.
- Fill your culinary syringe with the rosemary-infused olive oil. Ensure there are no air bubbles by tapping the syringe gently and expelling any excess air.
- Inject the oil into the thickest parts of each chicken breast. Insert the needle deeply, then slowly dispense the oil while carefully withdrawing the syringe to create pockets of flavor within the meat.
- Repeat the injection process with lemon-honey syrup and balsamic glaze, alternating flavors per injection site for a multi-dimensional taste layer.
- Allow the infused chicken to rest in the refrigerator for 10-15 minutes to let the flavors penetrate deeply.
- Cook the chicken over medium heat-pan-sear until golden brown, approximately 5 minutes per side. Use a meat thermometer to ensure an internal temperature of 165°F (75°C).
- Rest the chicken briefly once cooked to allow juices to redistribute.
- Slice and plate the chicken breast, artistically drizzle with any remaining balsamic glaze, and garnish with delicate microgreens and edible flowers for visual and flavor contrast.
Tips for Success
- Select your syringe wisely: Opt for food-grade, easy-to-clean syringes with fine needles for precise control and hygiene.
- Choose complementary ingredients that will maintain their texture and integrity when injected; oils, syrups, and light gels work best.
- Practice your injection technique on scrap meat or gelatin to build confidence before applying on the final protein or dish.
- Mind the quantity injected-too much liquid can alter texture negatively; small, frequent injections produce the best flavor balance.
- Experiment with temperatures: Warm infusions slightly to enhance fluidity but avoid overheating, as delicate flavors can degrade.
- Clean your syringes immediately after use to prevent residue buildup and ensure longevity.
- For vegetarian or dessert applications, try infusing fruit juices or herb-infused syrups into mousses or custards for delightful bursts of flavor.
Serving Suggestions
Serve your infused chicken slices on a sleek charcoal or white porcelain plate to highlight the vibrant colors of the microgreens and glaze. Surround the main protein with dots of complementary sauces or purees created using syringes to mirror the infusion concept visually and tastefully. Pair the dish with a light, herbaceous salad or a citrusy quinoa pilaf for texture contrast and palate refreshment. Finish with a subtle sprinkle of flaky sea salt for enhanced mouthfeel and burst of flavor.

| Nutrition (per serving) | Amount |
|---|---|
| Calories | 320 kcal |
| Protein | 38 g |
| Carbohydrates | 4 g |
| Fat | 15 g |
For an expanded exploration of infusion techniques and flavor development, check out our related guide on modernist cooking techniques. To explore the science behind flavor molecules and syringe applications, ScienceDaily offers insightful research updates.
Q&A
Q&A: Unlocking Flavor – The Magic of Culinary Syringes Explained
Q1: What exactly is a culinary syringe?
A culinary syringe is a specialized kitchen tool designed to inject or extract liquids, sauces, marinades, and flavors directly into or out of food. Think of it as a flavor wand, delivering bursts of taste precisely where you want them, transforming ordinary dishes into extraordinary experiences.
Q2: How do culinary syringes unlock new flavor possibilities?
By injecting marinades or seasonings inside meats, fruits, or desserts, culinary syringes allow flavors to penetrate deeply rather than just sitting on the surface. This technique ensures every bite is infused with bold, consistent taste, creating a multi-dimensional flavor profile that surprises and delights the palate.
Q3: What kinds of dishes benefit most from using a culinary syringe?
Roasts, poultry, and steaks are classic candidates-imagine juicy turkey breasts brimming with herby butter or succulent pork shoulders soaked in a tangy barbecue concoction. Beyond meats, syringes can supply fillings to pastries, infuse cocktails with concentrated fruit juices, or drizzle artistic sauces with pinpoint precision.
Q4: Is using a culinary syringe complicated?
Not at all! While it might look like a scientific experiment, it’s surprisingly straightforward. Fill the syringe with your chosen liquid, insert the needle gently into the food, and slowly inject. The magic lies in the technique – steady, thoughtful injections can elevate your dish from bland to brilliant.
Q5: Are culinary syringes safe and hygienic?
Absolutely. Most culinary syringes are made from food-grade materials and can be easily disassembled for thorough cleaning. Using dedicated syringes for sweet and savory applications helps prevent cross-contamination. Just like any kitchen tool, cleanliness is key to keeping your magical flavor tool safe.
Q6: Can culinary syringes be used in professional kitchens, or are they mainly for home cooks?
Both! Professional chefs leverage syringes to create dishes with precision and flair, while adventurous home cooks discover new layers of flavor and creativity. They’re versatile, affordable, and a fun way to innovate in any kitchen setting.
Q7: What are some creative uses of culinary syringes beyond flavor injection?
Syringes aren’t just flavor delivery devices; they’re artists’ brushes for plating. Use them to craft delicate sauce patterns, fill ravioli or dumplings perfectly, or drop edible liquids to surprise diners with unexpected textures. Their potential is limited only by your imagination.
Q8: Where can I get started with culinary syringes?
Start simple: pick up a basic syringe kit with a few needle sizes online or at culinary stores. Experiment with classic marinade recipes, infuse fruits with flavored syrups, or surprise family and friends with injections of savory or sweet essences. Unlock your kitchen’s flavor potential one syringe at a time.
Unlock the magic hidden in your meals by embracing culinary syringes-a small tool with enormous flavor possibilities waiting to be explored!
Concluding Remarks
As the culinary world continues to evolve, the humble syringe emerges not just as a tool, but as a bridge between innovation and flavor mastery. Unlocking the true potential of ingredients with precision and flair, culinary syringes invite chefs-both professional and home cooks alike-to experiment, create, and delight the palate in ways once unimaginable. So next time you seek to elevate your dish from ordinary to extraordinary, remember: sometimes, the magic lies in the smallest, most targeted drop. Unlock flavor’s hidden depths, one squeeze at a time.