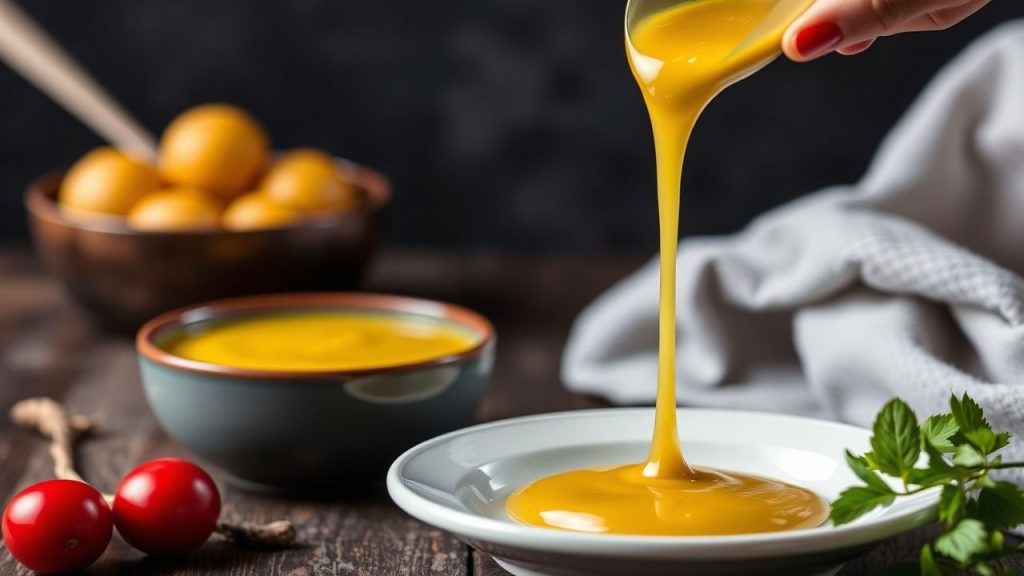
- Key outcome: Silky broccoli soup texture without heaviness.
- Timing: Ready in about 55 minutes for six servings.
- Cheese mix: Aged cheddar, Gruyère, and Parmesan for balanced melt and flavor.
- Storage: Freeze the base before adding cheese; reheat gently to restore creaminess.
Velvety Texture Secrets for the Perfect Broccoli Soup Blend
Achieving a truly velvety broccoli soup requires controlled starch gelatinization and careful dairy integration. Begin with a pale roux and hydrate it with warm stock to build body without lumps.
When pureeing, use an immersion blender for incremental control so you can leave small pieces for texture. For a short reference on the thickening technique, see the roux article.
Broccoli Soup: At-A-Glance Prep and Yield
Prep: 20 minutes. Cook: 35 minutes. Total roughly 55 minutes for six servings. These times assume fresh broccoli florets and room-temperature dairy.
Yield: Serves 6 generous bowls. Plan 1 to 1.5 cups per serving depending on appetite and whether you pair it with bread or salad.
Broccoli Soup Ingredients
Use fresh, firm broccoli for the best color and nutrient retention. Frozen broccoli works if handled carefully, but it can release more water and yield a milder green hue than fresh florets.
Below are precise ingredient amounts to reproduce reliable results. Substitute full-fat oat milk for a dairy-free option and follow the same tempering steps to avoid graininess.
- 4 cups fresh broccoli florets, chopped into bite-sized pieces
- 1 tablespoon unsalted butter
- 1 tablespoon olive oil
- 1 medium yellow onion, finely diced
- 3 cloves garlic, minced
- 3 tablespoons all-purpose flour, sifted
- 4 cups low-sodium vegetable broth
- 2 cups whole milk, warmed (or full-fat oat milk)
- 1 cup sharp white cheddar cheese, shredded
- 1 cup Gruyère cheese, shredded
- ½ cup Parmigiano-Reggiano, finely grated
- Salt and freshly ground black pepper, to taste
- Pinch of freshly grated nutmeg
- Fresh chives, chopped (for garnish)
Broccoli Soup Instructions
Follow a structured sequence to prevent curdling and to layer flavors. Soften aromatics, build a pale roux, and add broth gradually to control thickness and prevent lumps.
1. Heat butter and olive oil over medium heat. Sauté the diced onion and garlic until translucent, about 5 minutes, stirring to avoid browning.
2. Sprinkle the flour over the softened aromatics and stir constantly to form a smooth paste. Cook 2–3 minutes to remove the raw flour flavor while keeping the roux pale.
3. Slowly whisk in the warm vegetable broth so the base stays lump-free. Bring to a gentle simmer; this helps the flour hydrate and thicken consistently.
4. Add the chopped broccoli and simmer uncovered for 10–12 minutes until tender but still bright green. A moderate simmer preserves color and nutrients; for detailed broccoli nutrient context, see broccoli.
5. Use an immersion blender to puree most of the soup to a silky consistency while leaving some texture. Alternatively, blend in batches with a high-speed blender for an ultra-smooth finish.
6. Reduce heat to low and stir in warmed milk. Add shredded cheeses in small batches, stirring until fully melted and smooth before adding more. Tempering warm dairy prevents protein shock and separation.
7. Season with salt, pepper, and nutmeg to taste. Keep the soup below simmering after cheese addition to prevent oil separation and graininess.
8. Serve warm in bowls and finish with chopped chives for visual contrast and a fresh, mild onion note.
 Pro-Caution
Chef’s Notes and Cheese Strategy for Broccoli Soup
Choosing the correct cheese profile matters more than adding extra cheese. A sharp aged cheddar supplies bite, Gruyère adds nuttiness, and Parmigiano-Reggiano gives savory umami that pulls the flavor together. For background on each cheese, consult the respective resources on Cheddar cheese, Gruyère, and Parmigiano-Reggiano.
Grate cheeses fresh from a block whenever possible. Pre-shredded cheese often contains anti-caking agents that can inhibit smooth melting and contribute to a slightly grainy mouthfeel.
 Expert Insight
Texture and Flavor Adjustments for Broccoli Soup
To increase silkiness, blend a larger portion of the soup until the desired viscosity is reached. To preserve bite, reserve one cup of chopped florets and stir them back in after pureeing.
Adjust seasoning in small increments. Cheese contributes salt and umami, so taste after each addition and fine-tune. A tiny pinch of nutmeg brightens dairy notes without overtaking the broccoli.
Broccoli Soup: Make-Ahead, Storage, and Reheating
This soup thickens when chilled due to gelatinized starch and congealed fats. Reheat gently and whisk in a splash of warm milk or broth to restore a smooth consistency before serving.
Freeze the base before adding cheese to limit textural breakdown. Store in airtight containers for up to two months and thaw overnight in the refrigerator for best results.
Broccoli Soup Serving Suggestions
Pair the soup with crusty sourdough, a warm baguette, or a crisp green salad to balance texture and richness. A grilled cheese sandwich complements the bowl and provides additional chew and flavor contrast.
For garnish, sprinkle with extra shredded cheese, cracked black pepper, and chopped chives. A light drizzle of extra-virgin olive oil or crispy shallots adds texture and visual appeal.
Explore related recipes and variations on the site: broccoli soup recipes and cheesy soup variations offer quick swaps and presentation ideas.
Broccoli Soup Nutrition Snapshot
Estimate per-serving values to help with meal planning. Nutrition varies with ingredient brands and portion sizes, so treat the numbers as an informed approximation.
Calories: ~290 kcal. Protein: ~16 g. Carbohydrates: ~20 g. Fat: ~15 g. These values assume whole milk and the cheese quantities listed above.
Broccoli supplies fiber, vitamin C, and folate. Cooking reduces some heat-sensitive vitamins; quick simmering preserves most of the nutrient profile compared with extended boiling, and the vegetable remains a strong source of micronutrients. For cultivar and nutrient detail, refer to broccoli.
Images

FAQ
What makes this broccoli soup a comfort classic?
The balance of creamy dairy and bright, slightly bitter broccoli provides contrast that feels familiar and satisfying. Texture plays a major role: a smooth, glossy soup with small vegetable bites triggers a pleasing mouthfeel.
Simple, recognizable ingredients and straightforward technique also support the classic status. Small adjustments to cheese and blending deliver consistent comfort every time.
How do you keep the soup rich without it feeling too heavy?
Use whole milk rather than heavy cream to reduce calorie density while keeping mouthfeel. Pureeing part of the broccoli adds body without additional fat.
Control portion size and serve with a light salad to balance the meal. Adjust the cheese ratio for perceived richness without oversalting.
Can I make this broccoli soup dairy-free or vegan?
Yes. Replace milk with full-fat oat or almond milk and swap butter for olive oil. Use fortified plant-based milks and commercial vegan cheeses or blended cashews to achieve creaminess.
Remember that melting behavior and flavor will change. Test small batches and adjust seasoning before serving to guests.
How should I freeze and reheat the broccoli soup for best results?
Freeze the soup base before adding any shredded cheese to reduce separation. Store in airtight containers for up to two months and thaw overnight in the refrigerator.
Reheat gently over low heat and whisk in warm milk or broth to revive texture. Add shredded cheese only after reheating for the best melt quality.
What are simple ways to elevate the soup for guests?
Serve in mini bread bowls or ramekins, garnish with truffle oil or crispy pancetta, and offer homemade croutons on the side. Fresh herbs and a finely grated finishing cheese add polish.
Keep presentation neat: wipe bowl rims and add a small herb sprig to signal care and craftsmanship. Small touches increase perceived value without much effort.
See also: broccoli soup
See also: broccoli soup
]]>The method focuses on fundamental technique: high-heat browning, controlled sauce development, and finishing steps that preserve texture and flavor. Follow each stage deliberately for consistent, restaurant-quality results.
- Key takeaway: Browning builds flavor; don’t crowd the pan.
- Key takeaway: A light roux plus controlled simmer gives a stable, velvety sauce.
- Key takeaway: Choose marbled cuts for tenderness and mouthfeel.
- Key takeaway: Rest meat briefly to preserve juiciness.
Crafting the Perfect Creamy Garlic Sauce to Elevate Your Beef
The sauce relies on three pillars: concentrated garlic, an emulsified dairy phase, and a proper thickening agent. Use fresh garlic for volatile aromatics and quick flavor release; minced or crushed garlic softens quickly when sautéed briefly in butter or oil.
For body and stability, combine cold heavy cream with a cooked flour base or reduction. Cold cream incorporates smoothly and resists splitting when added gradually to a warm, stabilized liquid. See the cream entry for basic composition and how fat percentage affects sauce behavior.
Core Sauce Techniques
Start by sweating garlic briefly to develop sweetness without browning. Then create a light roux to bind fat and liquid, which yields a satin mouthfeel and prevents separation.
Use the roux method or a beurre manié for finishing; both stabilize and thicken while preserving gloss. Whisk constantly when introducing liquid to avoid lumps.
Prep and Cook Time
Plan for about 20 minutes of active prepping and 30 minutes of cooking. Active timing varies with cut thickness and pan size, but these benchmarks fit most home kitchens.
Allow extra time for resting the meat and finishing the sauce. Resting for 5–10 minutes improves texture and redistributes juices.
- Preparation: 20 minutes
- Cooking: 30 minutes
- Total Time: 50 minutes
Ingredients: Select for Flavor and Texture
Ingredient choice determines the final profile. Use marbled cuts—top sirloin, ribeye, or tenderloin—for consistent tenderness and flavor. For background on beef composition, consult the beef reference.
Keep ingredients simple and high quality: fresh garlic, unsalted butter, a neutral oil, heavy cream, and a low-sodium beef stock help you control seasoning precisely.
- Beef: 1.5 lbs top sirloin or ribeye, trimmed and cut into 1-inch strips
- Garlic: 6 cloves, finely minced
- Butter: 3 tbsp unsalted
- Olive oil: 2 tbsp extra-virgin
- All-purpose flour: 2 tbsp, sifted
- Heavy cream: 1 1/2 cups, cold
- Beef broth: 1 cup, low-sodium
- Dijon mustard: 1 tsp for acidity and balance
- Fresh thyme: 1 tsp, finely chopped
- Fresh parsley: 2 tbsp, finely chopped, for garnish
- Salt & pepper: to taste
- Optional: pinch of smoked paprika
Step-by-Step Instructions
Technique beats speed. Work in controlled stages: sear, remove, build sauce, then finish by returning beef to the pan. Each stage requires brief attention for consistent results.
Use a heavy skillet or a stainless steel pan for predictable browning and easy deglazing. Reserve pan juices to enrich the sauce.
- Prepare the beef: Pat meat dry with paper towels. Season generously with salt and freshly cracked black pepper to season to the core.
- Brown in batches: Heat oil over medium-high heat. Add strips without overcrowding. Sear 3–4 minutes per side until deeply caramelized, then transfer to a warm plate.
- Sauté garlic: Reduce heat to medium, melt butter, and add minced garlic. Sauté 1–2 minutes until fragrant, stirring constantly to prevent bitter charring.
- Create the roux: Sprinkle flour into the butter-garlic mixture and whisk for about 2 minutes to cook raw flour taste away while keeping the roux pale.
- Deglaze and build: Gradually whisk in beef broth to lift fond, then add cold heavy cream in a slow stream while whisking to form an emulsion. Stir in Dijon and thyme.
- Simmer and adjust: Simmer gently until sauce thickens to coat the back of a spoon, roughly 5–7 minutes. Taste and adjust salt and pepper.
- Return beef: Add beef with accumulated juices back to the skillet. Warm through for 3–5 minutes to meld flavors without overcooking.
- Finish and serve: Off heat, stir in chopped parsley. Rest briefly, then plate over mashed potatoes, noodles, or rice to capture every drop of sauce.
Tips for Success from a Culinary Professional
Temperature control matters most. High initial heat forms a flavorful crust; lower temperatures during finishing preserve tenderness and prevent curdling of dairy.
Use small batches when searing and keep a warm oven (120°C / 250°F) to hold finished meat if you must. This prevents carryover cooking from drying the protein.
Expert Insight
Herbs and acid balance the richness. A teaspoon of Dijon or a small splash of white wine reduces perceived fattiness and sharpens flavors without dominating the profile.
Pro-Caution
For dairy-free adaptations, substitute coconut cream and a neutral oil, but taste carefully: coconut carries its own aroma that changes the final profile. Adjust herbs and acid to compensate.
Serving Suggestions and Pairing Ideas for an Unforgettable Meal
Serve this beef over creamy mashed potatoes or buttered egg noodles to highlight the sauce. The starch acts as a carrier for the silky cream and captures the pan juices.
Round the plate with lemon-tossed asparagus or roasted Brussels sprouts to introduce a bright counterpoint. Crusty bread also performs well for mopping the pan.
For wine, choose a medium-bodied red that offers moderate tannin and ripe fruit notes to match the sauce’s weight. For non-alcoholic options, a citrus-infused sparkling beverage cuts richness and refreshes the palate.
Explore related resources on our site for advanced techniques, such as luxury beef dinners and a guide to selecting beef cuts to refine your approach to texture and doneness.
| Nutrient | Per Serving |
|---|---|
| Calories | 480 kcal |
| Protein | 38 g |
| Carbohydrates | 8 g |
| Fat | 32 g |

FAQ
Which beef cuts work best for this dish?
Choose marbled cuts such as ribeye or top sirloin for juiciness and flavor. These cuts sear well and stay tender during the brief simmer in sauce.
Can I make the sauce ahead of time?
Yes. Prepare the sauce up to 48 hours in advance and cool rapidly. Reheat gently over low heat, then add freshly cooked beef to preserve texture and temperature control.
How do I prevent the cream from splitting?
Add cold cream slowly while whisking and keep the sauce below a rapid boil. Maintain a gentle simmer to stabilize the emulsion and avoid high heat that causes separation.
What are good side pairings?
Buttery mashed potatoes, garlic-infused noodles, and roasted seasonal vegetables complement the sauce. Acidic or bright sides help balance fat and refresh the palate.
Is there a vegetarian alternative that keeps the same profile?
Replace beef with seared king oyster mushrooms or firm tofu and use vegetable stock in the sauce. Finish with the same technique to achieve a similar savory, creamy texture.
See also: Garlic beef
]]>
- Key: Build flavor in layers—sauté, toast spices, then simmer gently to keep the body clean for a true white chili.
- Texture: Partial blending of beans plus a light roux yields a silky mouthfeel without losing bean bite.
- Flexibility: Swap dairy or protein to match dietary needs while maintaining creaminess in white chili.
- Finish: Acid and fresh herbs lift the bowl just before serving for balanced brightness.
Prep and Cook Time for White Chili
Preparation: 15 minutes. Cooking: 40 minutes with pre-cooked chicken. These estimates assume a medium-strength burner and standard cookware. Plan about 55 minutes total when starting with shredded, cooked chicken.
If you poach raw chicken in the pot, add 15–20 minutes for gentle poaching and brief resting time. Gentle temperature control during poaching keeps the chicken tender and prevents the stock from clouding the white chili.
Yield for White Chili
This recipe serves 6 generously, suitable for family dinners and meal prep containers. Multiply the recipe in even batches to keep cooking times and seasoning ratios consistent when scaling the white chili.
Leftovers often improve overnight as spices and aromatics marry; store in an airtight container in the refrigerator for up to 3 days. Reheat gently and thin with a splash of broth if the white chili tightens after chilling.
Difficulty Level for White Chili
Easy to medium. The recipe asks for a light roux and tempering dairy to avoid curdling—simple steps that require attention rather than advanced skills. Follow sequencing carefully for consistent results with this white chili.
Beginner cooks succeed by following order: sweat aromatics, toast spices, build roux, add broth, then fold in dairy off the heat. This sequence controls texture and avoids gritty or separated dairy in the finished white chili.
Ingredients for White Chili
Ingredient quality and sequence matter for the final texture. Use low-sodium chicken broth and stable dairy or a reliable substitute to preserve the creaminess of white chili.
Below is a practical ingredient list sized for six servings. Quantities scale easily; maintain ratios when making larger batches of this white chili.
- 2 tablespoons olive oil, extra virgin for richness
- 1 medium yellow onion, finely diced
- 3 cloves garlic, minced
- 2 jalapeño peppers, seeded and finely chopped (adjust for heat preference). See jalapeño for variety and heat guidance.
- 1 1/2 teaspoons ground cumin, toasted briefly to bloom the aroma
- 1 teaspoon dried oregano
- 1/2 teaspoon smoked paprika, for subtle smoke
- 4 cups low-sodium chicken broth, homemade or quality store-bought
- 2 (15-ounce) cans white beans (cannellini or great northern), drained and rinsed; review bean varieties at white beans.
- 2 cups cooked white chicken breast, shredded or diced. See chicken handling and cook times for best safety and yield.
- 1 cup crème fraîche or sour cream, for the signature creaminess
- 1/4 cup all-purpose flour, sifted for thickening (roux base); background on roux is available at roux.
- 1 cup sharp white cheddar cheese, shredded (optional)
- Fresh lime juice, from 1 lime
- Salt and freshly ground black pepper, to taste
- Fresh cilantro, chopped, for garnish
- Optional toppings: diced avocado, sliced green onions, tortilla strips
Step-by-Step Instructions for White Chili
Follow the order precisely to control texture: sweat aromatics, toast spices, form a light roux, add broth, then beans and chicken, finishing with dairy off heat. This sequencing keeps the white chili smooth and prevents dairy separation.
Work on medium heat and give attention during the roux stage. Whisk while adding broth to eliminate lumps and create a stable base for a creamy white chili.
- Heat olive oil in a large Dutch oven over medium heat. Add onion and sauté until translucent, about 5 minutes.
- Add garlic and jalapeños and cook 1–2 minutes until fragrant. Avoid browning the garlic to keep the flavor bright for the white chili.
- Sprinkle cumin, oregano, and smoked paprika and toast briefly to bloom the spices for 20–30 seconds.
- Stir in the flour to create a light roux; cook 1–2 minutes while stirring. This binds starch and fat for a stable creaminess in the white chili.
- Whisk in the chicken broth slowly and bring to a gentle simmer. Cook 8–10 minutes until slightly reduced and the base thickens enough to coat a spoon in the white chili.
- Add beans and chicken and simmer 12–15 minutes so flavors meld and the chicken warms through without overcooking.
- Reduce heat to low and fold in crème fraîche or sour cream off the heat. Stir until smooth to avoid curdling; this step completes the finishing texture of the white chili.
- Season with salt, pepper, and lime juice. Taste and adjust; acid brightens the bowl and balances fat in white chili.
- Optional: Stir in shredded cheddar until melted for extra richness, then serve immediately.
Technique Notes
Partial blending: Reserve a cup of beans before adding them to the pot. Purée that cup and return it to thicken naturally while preserving intact bean texture for the final white chili.
Temperature control: Add dairy when the pot is off the heat or at the lowest practical temperature. Rapid heating increases the risk of separation in the white chili.
Expert Insight
When making the roux, keep whisking and watch color carefully; a pale blond roux thickens without adding heavy toasty notes. That measured development yields a neutral base ideal for white chili’s delicate flavors.
Tips for Success: Elevate Your White Chili
Small, deliberate steps improve clarity of flavor. Toast the spices separately and taste at each stage to decide if you want more heat or acid in your white chili.
Use pre-cooked or roasted chicken for convenience; shredding hot chicken into the pot finishes the dish quickly without overcooking. Maintain broth control to keep the white chili from thinning or tightening excessively.
Pro-Caution
Use low-sodium broth so you control final salt. If the white chili thickens after refrigeration, thin with a splash of broth while reheating to restore texture without diluting flavor.
Serving Suggestions to Impress with White Chili
Serve steaming in rustic bowls with a squeeze of lime and a scattering of cilantro for brightness. Crisp tortilla strips or toasted pepitas add welcome textural contrast to the white chili.
Pair with warm cornbread or a simple green salad to complete the meal. For slow-cooker fans, this chili adapts well—finish dairy off-heat for best results and consult your slow-cooker manual for timing when making white chili.
Nutrition Snapshot for White Chili
Estimated per-serving values provide practical guidance for meal planning. Values shift with ingredient substitutions and portion size, so treat numbers as a baseline for this white chili.
Use lighter dairy or omit cheese to reduce fat while preserving protein and fiber from beans and chicken. A lean version keeps the nutritional profile favorable for weeknight dinners of white chili.
| Nutrient | Per Serving |
|---|---|
| Calories | 350 kcal |
| Protein | 32 g |
| Carbohydrates | 28 g |
| Fat | 12 g |
FAQ for White Chili
Answers below address common questions for texture control, reheating, slow-cooker adaptation, and dairy-free swaps for white chili. Each response focuses on practical, tested steps.
Use these FAQs to troubleshoot quickly and keep the white chili on track during prep and reheating.
What makes white chicken chili different from red chili?
White chili uses white beans and a creamier base instead of tomato and beef. It relies on aromatics, green chiles or jalapeños, and dairy or starch to build body rather than tomato-based depth.
How do I keep the chili creamy when reheating?
Reheat gently over low heat and stir frequently to reincorporate separated liquids. Thin with a splash of broth if the white chili tightens after refrigeration to restore a silky mouthfeel.
Can I make this in a slow cooker?
Yes. Layer beans and broth first, then chicken and aromatics. Add dairy at the end off-heat to avoid curdling; finish and adjust seasoning only after the white chili has cooled slightly.
What are good dairy substitutes for a dairy-free version?
Use unsweetened coconut cream or a high-quality cashew cream to mimic texture. Reduce added acid slightly and taste as you go to balance savory and bright notes when making dairy-free white chili.
Can I freeze the chili?
Freeze without the dairy component for best quality. Thaw, reheat gently, then stir in crème fraîche or sour cream just before serving to refresh the texture and flavor of the white chili.

See also: Explore techniques for similar bowls and ingredient swaps to broaden your repertoire with white chili.
See also: white chili
]]>
- Instant comfort: A rich, smooth chowder ready in under an hour.
- Versatile base: Works with fresh, frozen, or canned corn and adapts to dairy-free diets.
- Make-ahead friendly: Flavors deepen overnight; reheat gently to preserve texture.
Prep and Cook Time
Plan about 55 minutes from start to finish for this chowder, including prep and simmering. The timing lets potatoes soften fully and the roux develop a nutty backbone for the cream.
Short active prep keeps this recipe user-friendly for home cooks. Meanwhile, the gentle simmer and brief blending deliver the velvety texture without long hands-on time.
- Preparation: 15 minutes
- Cooking: 40 minutes
Yield
This recipe yields about six generous bowls, ideal for a family dinner or small gathering. Leftovers reheat well and remain satisfying when handled gently.
Portion control is straightforward since the chowder stores evenly in airtight containers. Freeze in single portions for quick future meals.
Serves: 6 generous bowls
Difficulty Level
Skill level rates as easy to medium: it requires basic knife work and attention to heat. No advanced techniques are necessary, but timing and gentle heat matter.
The recipe rewards small technique points like browning the roux and avoiding a boil after adding cream. Those details create a restaurant-style finish at home.
Ingredients
Gather fresh, high-quality ingredients for the best flavor. Fresh corn and good-quality cream or whole milk make the biggest difference in taste and mouthfeel.
Below is a concise ingredient list that balances body, sweetness, and savory depth. Quantities scale easily for larger or smaller batches.
- 6 cups fresh corn kernels (about 6–7 ears), or 5–6 cups frozen, thawed
- 4 medium Yukon Gold potatoes, peeled and diced into ½-inch cubes (Yukon Gold potato)
- 1 large yellow onion, finely chopped
- 2 cloves garlic, minced
- 4 cups low-sodium vegetable or chicken broth
- 2 cups whole milk or heavy cream, warmed (see dairy alternatives)
- 3 tbsp unsalted butter
- 3 tbsp all-purpose flour, sifted
- 1 tsp smoked paprika for subtle warmth
- Salt and freshly ground black pepper to taste
- 2 sprigs fresh thyme or 1 tsp dried thyme
- 2 stalks celery, finely diced
- Optional garnish: chopped fresh chives, crispy shallots, squeeze of lemon
Step by Step to a Silky Smooth Chowder with Rich, Comforting Depth
Follow a clear sequence to build both texture and flavor. The method centers on a classic thickening roux, gentle simmering, and partial blending for velvet without losing all texture.
To reference culinary context, corn chowder belongs to the broader category of chowders and benefits from classic chowder technique (chowder). Keep bowls warm while you finish the chowder.
Sauté Aromatics
Heat a heavy-bottomed pot over medium heat and melt the butter until foaming. Add onion and celery and cook, stirring, until soft and translucent—about seven minutes—then add garlic and thyme for one minute.
This gentle sauté extracts sweetness and builds a fragrant base. Avoid browning the vegetables too much; the goal is soft aromatics that fold smoothly into the chowder.
Make a Roux Base
Sprinkle the flour over the softened vegetables and stir constantly to form a pale paste. Cook the roux for three to four minutes to remove the raw flour taste and develop a subtle nutty note.
A properly cooked roux thickens the chowder uniformly and stabilizes the cream. For reading on roux technique consult a general guide (roux).
Add Broth and Potatoes
Gradually whisk in the broth to avoid lumps, then add the diced potatoes and bring the pot to a gentle simmer. Cook uncovered for 15–20 minutes until the potatoes yield easily to a fork.
Simmering time ensures the potatoes break down enough to thicken the soup when blended. Use low-sodium broth to control overall salt levels.
Blend for Velvetiness
Use an immersion blender to pulse about half the chowder, focusing on the potatoes and aromatics until creamy but still textured. Alternatively, blend in small batches in a stand blender and return to the pot.
Blending half the pot keeps pleasant corn kernels while creating body from pureed potato. This hybrid method gives the chowder its signature velvety mouthfeel.
Incorporate Corn
Add the corn kernels and smoked paprika, then simmer for about ten minutes to marry flavors and warm the corn through. Fresh kernels release juice that lifts the chowder’s natural sweetness.
If using frozen corn, add it slightly earlier to ensure even heat. Taste as the corn cooks and adjust seasoning incrementally.
Stir in Cream
Reduce heat to low and whisk in the warmed milk or cream slowly to avoid shocking the dairy. Heat gently—do not boil—to maintain a smooth, non-grainy texture.
Warming the milk first reduces the temperature differential and keeps the emulsion stable. For dairy-free options, use full-fat coconut milk or cashew cream.
Season to Perfection
Taste and finish with salt and pepper, and remove the thyme sprigs before serving. Add a squeeze of lemon if you want a bright counterpoint to the cream.
Adjust texture with extra broth or cream if the chowder sits too thick in refrigeration. Reheat slowly and stir often to revive the original consistency.
Expert Tips for Serving and Pairing Your Corn Chowder Masterpiece
Garnishes add contrast and interest; think crisp shallots, fresh chives, or a small drizzle of chili oil. Textural contrast makes a bowl more memorable and satisfying.
Pair the chowder with crusty bread for dipping and a crisp salad to cut richness. For bread ideas, see our internal recipe pages for complementary bakes.
- Garnishes: finely chopped chives, crispy shallots, toasted corn kernels.
- Perfect pairings: crusty sourdough, garlic-herb bread, or a bright, vinegary salad.
- Make-ahead tip: flavors deepen overnight; reheat slowly and add a splash of milk if needed.
- Vegetarian option: use vegetable broth and olive oil in place of butter.
For specific bread pairings, try our internal Garlic-Herb Bread or the Creamy Potato Leek Soup for a complementary course. These internal links provide tested companion recipes to round out a meal.
Chef’s Notes: Velvety Creamy Corn Chowder Perfection
Freshness matters: choose corn with bright kernels and firm texture; fresher ears produce sweeter, cleaner flavor. Good potatoes, like Yukon Gold, contribute smooth texture and subtle sweetness.
The roux is not optional for this recipe; it builds body and provides a stable base for the dairy. Controlled heat during finishing prevents separation and preserves silkiness.
- Freshness: pick prime ears at their peak for best sweetness and texture.
- Roux: cook long enough to remove raw flour taste but not so long that it darkens excessively.
- Heat control: avoid boiling after adding dairy to prevent curdling and grainy texture.
- Umami boost: a splash of soy sauce or teaspoon of nutritional yeast adds depth without masking corn.
Expert Insight
Use that same reserved liquid to thin the chowder if it tightens up after chilling. Gentle adjustments restore original consistency without diluting flavor.
Pro-Caution
Nutritional Information per Serving
Per-serving nutrition depends on ingredient choices and portion size. Using whole milk and butter raises fat and calories compared to dairy-free options.
The table below provides a baseline estimate for a standard preparation; adjust numbers when you substitute plant-based milks or reduce butter.
| Calories | Protein | Carbs | Fat |
|---|---|---|---|
| 320 kcal | 8 g | 40 g | 14 g |
FAQ
What makes corn chowder velvety and creamy?
The texture comes from a combination of pureed potatoes and a cooked roux, which adds body and smoothness. Blending part of the chowder yields a silky base while leaving some whole kernels for bite.
Can I use frozen or canned corn?
Yes. Frozen corn preserves much of the fresh flavor and is an excellent year-round option. Drain canned corn well to avoid diluting the chowder’s body.
How do I make this chowder dairy-free?
Use full-fat coconut milk or cashew cream and swap butter for a neutral oil. These choices maintain richness and mouthfeel while keeping the recipe plant-based.
Is corn chowder filling enough as a main course?
Absolutely. The potatoes and cream provide satisfying calories and texture, making the chowder a solid main when paired with bread or a salad. Add protein like crispy bacon or smoked tofu if desired.
How should I store and reheat leftovers?
Refrigerate in an airtight container for up to three days, or freeze small portions for longer storage. Reheat slowly over low heat, stirring and adding a splash of milk or broth to restore creaminess.
Insights and Conclusions
Corn chowder succeeds when technique aligns with ingredient quality: a measured roux, tender potatoes, and properly warmed dairy. Each step contributes to a cohesive bowl with depth and comfort.
Refer to general resources on corn and chowder to expand your technique and ingredient knowledge. For botanical information on corn, see the article on maize, and explore classic chowder context via the linked chowder entry. For starch behavior, consult the potato article.
Serve this chowder with crusty bread and a bright salad for balance. For bread pairings, try the internal Garlic-Herb Bread or our Creamy Potato Leek Soup recipe for a contrasting course.

See also: Corn Chowder
]]>Imagine searing tender beef until it forms a deep brown crust, then finishing it in a silky cream sauce laced with aromatic garlic and fresh thyme. This creamy garlic beef technique concentrates meat flavor while delivering a sauce that clings to every forkful.
- High-heat sear, low-heat finish: Lock Maillard flavor, then control temperature to protect cream.
- Stabilize the sauce: Use a light roux to prevent separation and improve mouthfeel.
- Layer aromatics: Build depth with onions, roasted garlic, and deglazed fond.
- Finish with acid and herbs: Brighten richness with a splash of stock or vinegar and fresh thyme.
As a professional, I emphasize precise steps: dry the beef well, sear in hot oil, deglaze thoroughly, and simmer gently. These actions create a glossy, stable sauce rather than a greasy one.
Prep and Cook Time
Preparation: About 20 minutes. Prepare mise en place: trim beef, mince garlic, and measure cream and broth so you move strictly and efficiently at the stove.
Cooking: Approximately 40 minutes active time. Sear in batches, build the sauce, and simmer until connective tissue softens; checking tenderness with a fork is more reliable than a timer.
Yield
This recipe yields 4 generous portions. It scales well for family dinners and small gatherings when you want second helpings available.
Scale by 25–50% increments and increase sauce proportionally to maintain coverage and texture without diluting flavor. For larger batches, consider braising in a larger pot to keep surface contact consistent.
Difficulty Level
Medium. The cook must control searing heat and maintain a gentle simmer after adding dairy; these skills are straightforward but demand attention. With practice, home cooks can repeat the method reliably.
Focus on temperature cues and use a heavy skillet or Dutch oven for even heat distribution. That control separates a silky cream sauce from one that breaks.
Ingredients
Gather quality components; each plays a structural role in the dish. Pick beef with visible marbling to enrich the sauce and sustain moisture during the braise.
Key ingredients: 1½ lb boneless beef chuck, 4 tbsp unsalted butter, 8 garlic cloves minced or roasted, 1 medium onion diced, 1 cup heavy cream, ½ cup beef broth, 2 tbsp all-purpose flour, 2 tsp fresh thyme, salt, black pepper, 2 tbsp olive oil, and chopped parsley to finish.
For context on the primary protein and aromatics, consult the beef entry and garlic entry on reference sites to understand collagen breakdown and volatile sulfur compounds. For dairy behavior, review the cream entry to see how fat content affects stability.
Beef background • Garlic information • Cream properties
Instructions
Work in sequence: sear, build aromatics and a light roux, deglaze, add cream, then finish the beef. This order preserves Maillard flavor and stabilizes the sauce for a glossy finish.
Use a hot pan but avoid crowding; crowding creates steam and prevents proper browning. Use neutral oil with a high smoke point for initial searing and finish with butter for flavor.
- Prepare the beef: Pat cubes dry and season liberally. Dry surface area promotes an even, deep crust.
- Sear in batches: Heat 2 tbsp olive oil in a heavy skillet over medium-high and brown beef 3–4 minutes per batch. Remove and rest to avoid steaming in the pan.
- Sauté aromatics: Lower to medium heat, add butter and onions, and sweat until translucent about 5 minutes. Add garlic and cook 1–2 minutes until fragrant but not brown.
- Create the roux: Sprinkle flour and stir to coat the butter-onion mix; cook 2–3 minutes to cook out raw flour taste. This produces a stable base for cream.
- Deglaze and combine: Whisk in beef broth, scraping the fond to dissolve browned bits. Add heavy cream and thyme, stirring to a uniform, glossy sauce.
- Simmer the beef: Return seared beef to pan, reduce to low, cover, and simmer gently 25–35 minutes until tender. Stir occasionally to keep heat even.
- Finish and serve: Adjust seasoning, fold in chopped parsley, and serve over mashed potatoes or noodles for best sauce capture.
Chef’s Notes
Cut selection: Chuck or brisket yields succulent results for longer braises; sirloin or ribeye work for faster versions. Choose according to texture you want and time you have.
Sauce stability: Never boil after adding cream; keep to a gentle simmer to prevent curdling. If separation occurs, whisk in a small amount of cold cream off-heat to re-emulsify.
Pro-Caution
After the warning step, allow the sauce to rest for a minute before plating so emulsions can set. That rest improves mouthfeel and sauce cling on starches.
Technique detail
Use a heavy-bottom pan to maximize thermal mass and avoid hot spots. Controlled heat prevents the sauce from breaking and produces even tenderization of collagen-rich cuts.
Deglaze thoroughly: dissolve the fond into the sauce to capture concentrated flavor. This technique amplifies savory notes that cream alone cannot provide.
Serving Suggestions
This dish pairs classically with buttery mashed potatoes, which act as a neutral canvas and capture the sauce. For reference, see our internal mashed-potatoes guide for texture and seasoning tips.
Alternate sides include egg noodles, creamy polenta, or lightly steamed greens for contrast. Serve with crusty bread to mop the pan and increase guest satisfaction.
Mashed potatoes guide • Searing technique
Expert Insight
For a lighter plate, reduce cream by 25% and increase stock to maintain volume, or use a 50/50 mix of milk and crème fraîche for similar texture with less fat. Adjust seasoning to compensate.
Nutrition
Per serving estimates depend on cut and quantities, but a typical portion contains roughly 520 kcal, 45 g protein, 8 g carbohydrates, and 32 g fat. Use these figures to plan balanced portions.
To alter macros, reduce cream volume, substitute lighter dairy, or choose leaner cuts. Remember that fat contributes both flavor and silky texture to the sauce.
| Nutrient | Per Serving |
|---|---|
| Calories | 520 kcal |
| Protein | 45 g |
| Carbohydrates | 8 g |
| Fat | 32 g |
Variations and Substitutions
For dairy-free options, use blended cashew cream or canned coconut cream and reduce butter to avoid overwhelming the substitute. These swaps keep creaminess while changing the flavor profile.
Try different cuts: sirloin tips for quick cooks or short ribs for low-and-slow braises. Each cut alters cooking time and mouthfeel, so adjust simmer duration accordingly.
To layer acidity, deglaze with a splash of dry white wine or brandy before adding broth and cream; reduce alcohol fully to avoid harshness. For technique context, review the roux entry and the Maillard reaction entry to refine texture and flavor control.
Roux basics • Maillard reaction
Key Takeaways
Velvety creamy garlic beef depends on controlled heat, an effective light roux, and proper deglazing to capture concentrated savory flavor. These steps favor technique over complexity and deliver consistent results.
Always dry the meat, sear at high heat, then lower to a gentle simmer after adding cream. Small adjustments in herb timing or finishing acid let you tailor brightness and aromatic lift without jeopardizing sauce stability.
FAQ
What cut of beef gives the best results?
For slow-simmered tenderness, choose chuck or brisket because connective tissue breaks down into gelatin, yielding succulence. For faster cooks, use sirloin tips and reduce simmer time accordingly.
Can I make this ahead and reheat?
Yes. Flavors often meld overnight, improving depth. Cool completely, store airtight, and reheat gently over low heat to avoid curdling the cream.
How do I prevent the cream from splitting?
Keep the sauce at a gentle simmer after adding cream and avoid rapid boiling. If temperatures differ greatly, temper the cream by whisking in a ladle of hot sauce before combining fully.
Is there a lighter alternative to heavy cream?
Use full-fat milk thickened with a small roux or a 50/50 mix of milk and crème fraîche for lighter texture. Expect a slightly different mouthfeel but retain much of the structure.
How can I intensify garlic without overpowering the sauce?
Roast garlic to soften and sweeten, then fold it in near the end to preserve balance. Alternatively, infuse whole cloves in butter early and remove some before finishing to control intensity.

See also: garlic beef
]]>
- Key takeaway: Lumps result from starch granules swelling unevenly.
- Key takeaway: Temperature control and gradual liquid addition prevent most clumps.
- Key takeaway: Simple rescues — strain, blend, or whisk — restore silkiness quickly.
- Key takeaway: Use technique over shortcuts for superior flavor and texture.
Understanding why gravy becomes lumpy
Gravy thickens because starch granules absorb liquid and swell, forming a network that traps water. When those granules meet heat and moisture unevenly, they clump instead of dispersing, producing lumps.
Two technical points explain most failures: insufficient mechanical dispersion and thermal shock. Mechanical dispersion means whisking the starch into fat or liquid so granules separate; thermal shock happens when very cold liquid hits hot roux and causes sudden clumping.
For the science behind thickening agents, see starch structure and gelatinization. For classic technique background, consult the culinary concept of a roux.
Common culprits that turn your gravy grainy
One frequent error is adding dry flour directly to hot fat without proper whisking; dry pockets caramelize or remain raw, then clump when liquid arrives. Another is pouring cold stock too quickly, which shocks the starch and yields gluey clumps instead of a smooth dispersion.
High heat also ruins texture. A violent boil can break starch granules and force water from the network, leaving a separated, grainy sauce. Use a gentle simmer to let the starch hydrate and align into a cohesive matrix.
When choosing thickeners, note that cornstarch behaves differently from wheat flour. For details about corn-based thickeners, review cornstarch. If you want technique drills, review our internal guide on perfect gravy techniques for step-by-step practice drills.
Mastering stir and heat control
Start by cooking the fat-and-flour mixture (the roux) on medium heat and stir constantly until it smells nutty and looks pale gold. That color signals that the starch has lost its raw edge and will thicken evenly without tasting floury.
Next, bring your stock up to warm, not cold. Add it in a steady stream while whisking vigorously. This mechanical action prevents pockets of concentrated starch from forming, and the warmed liquid reduces thermal shock to the roux.
Think of the whisk as an alignment tool: it breaks clusters, introduces consistent motion, and helps distribute heat. For practical technique cues and pan selection, see our internal note on roux basics and pan choice.
Rescue tactics: how to fix lumpy gravy fast
If lumps appear, don’t panic. Remove the pan from direct heat and whisk over low flame; often the reduced temperature lets trapped granules rehydrate and loosen. For concentrated clumps, push gravy through a fine-mesh sieve while pressing with the back of a spoon.
When you need a rapid fix before serving, an immersion blender will emulsify and smooth the sauce in seconds. Alternatively, whisk a small amount of cold liquid into a measured scoop of gravy to form a temporary slurry, then reincorporate slowly to break stubborn clumps.
Expert Insight
Straining and blending change texture slightly but restore a pleasing mouthfeel faster than starting over. For a long-term fix, reheating gently with whisking, then finishing with a knob of butter, will rebuild sheen and body.
Prevention checklist: practical steps to avoid lumps
Use a measured roux: equal parts fat and flour by weight produces predictable thickening. Sift flour before adding to fat and whisk immediately to create a uniform paste. This prevents dry islands that later become lumps.
Temper liquids: warm stock slightly and add in a slow, continuous stream while whisking. Keep heat at a bare simmer so gelatinization proceeds gradually and evenly. Additionally, consider a slurry for cornstarch—mix cornstarch with cold water first, then whisk into hot liquid to avoid clumping.
Recipe: Basic smooth gravy (4 servings)
This recipe emphasizes method over magic. Follow the sequence exactly for a reliable, lump-free result every time.
Prep and cook times remain short: five minutes prep and about 15 minutes cook time. Yield is approximately four servings and difficulty is moderate due to technique demands.
Ingredients
3 tbsp unsalted butter
3 tbsp all-purpose flour, sifted
2 cups warm chicken or beef stock
½ tsp salt, ¼ tsp black pepper, 1 tsp Worcestershire (optional)
1 tsp fresh thyme (optional)
Instructions
1. Melt the butter in a medium saucepan over medium heat until it foams but does not brown. Immediately whisk in the sifted flour to form a smooth paste.
2. Cook, stirring constantly, 3–5 minutes until the roux turns light golden. This removes any raw flour flavor and stabilizes thickening performance.
3. Warm your stock separately. Add it slowly in a thin stream while whisking vigorously to integrate the liquid and eliminate pockets of dry flour.
4. Simmer gently while whisking until the gravy thickens, about 5–7 minutes. Adjust seasoning and thin with warm stock if necessary.
5. Finish off heat and stir in a small knob of butter for gloss. Serve immediately and keep leftovers loosely covered in the refrigerator.
Chef’s notes and substitutions
For a gluten-free option, replace flour with cornstarch but prepare it as a slurry mixed into cold liquid first. Cornstarch thickens more quickly and yields a glossier finish than wheat flour.
To rescue overly thick gravy, whisk in warm stock incrementally until you reach the desired consistency. Avoid water if possible; stock adds flavor and keeps texture cohesive.
Pro-Caution
Make-ahead tip: prepare the roux up to a day in advance and refrigerate. Warm gently before finishing with hot stock to avoid introducing cold liquid into the hot fat.
Common mistakes and how to correct them
Skipping constant stirring and using high heat are the two most consistent errors I see in kitchens. Both produce hot spots and uneven gelatinization that create lumps and grainy textures.
Another misstep is mismeasuring. Fat and starch ratios determine thickening power, so measure by volume or weight for predictable outcomes. If you need a thinner result, add warm stock slowly and test texture incrementally.
FAQ
Why does my gravy clump when I add cold stock?
Cold stock cools the roux locally and causes starch granules to constrict and clump. Always warm stale or refrigerated stock before adding to a hot roux and add it gradually while whisking.
Can I fix gravy that already has lumps?
Yes. Remove the pan from high heat and whisk over low. Strain through a fine sieve for larger clumps or use an immersion blender for rapid smoothing. Re-season after adjusting consistency.
Is cornstarch better than flour for gravy?
Cornstarch gives a clearer, glossier finish and thickens at a lower temperature. However, it requires a cold-water slurry before adding to hot liquid. Flour roux provides more flavor and a classic mouthfeel.
Will overheating a gravy break it?
Excessive boiling can break down the starch network and cause separation or a grainy texture. Maintain a gentle simmer and remove from direct heat once the desired thickness appears.
What tools prevent lumps most effectively?
A balloon whisk provides the best mechanical action for dispersion. For final texture control, an immersion blender or fine-mesh sieve will rescue any remaining imperfections quickly.
For technique reinforcement, review our step-by-step pages on perfect gravy techniques and roux basics. For authoritative background on sauces, consult classic sauce theory.
See also: Gravy lumps
]]>
- Roux controls texture: color determines flavor and thickening strength.
- Fat choice matters: butter yields creaminess; neutral oil yields darker, cleaner flavors.
- Cook time trades thickness for depth: darker roux thickens less but tastes nuttier.
- Make ahead: cooled roux stores well for fast sauce-making.
Understanding Roux: The Foundation of Flavor and Texture
A roux forms when flour coats fat and cooks enough for starch granules to hydrate and swell once liquid is added. This interaction produces a gelatinous network that thickens sauces while creating a smooth mouthfeel.
Different colors of roux—white, blonde, brown—signal how long the mixture cooked and how much thickening power remains. For technical detail on roux and its role in cooking, refer to the roux (cooking) entry.
Basic Ingredients and Ratios
Classic proportions start at equal parts fat to flour by weight; a common home ratio is 1:1 by volume for simplicity. Use a digital scale when precision matters; weight-based ratios deliver repeatable results.
Fat choice influences flavor and smoke point. Use unsalted butter for béchamel and higher smoke-point fats like vegetable oil for darker, longer-cooked roux.
Choosing Fat
Butter provides a rich, dairy-forward note ideal for white and blonde roux used in milk-based sauces. It also browns faster, so monitor heat closely when aiming for deeper color.
Rendered animal fats or neutral oils tolerate higher heat and support darker browning required for dishes such as gumbo. For more on sauces and their classifications, see béchamel and velouté.
Choosing Flour
All-purpose wheat flour gives predictable thickening and flavor. Sift flour to remove lumps and to encourage even coating of fat for a smooth finish.
Alternative starches such as rice or chickpea flour can work for gluten-free needs, but they change viscosity and flavor. Test small batches to adjust cook time and liquid ratios.
Technique: Step-by-Step Roux Cooking
Heat control and constant stirring deliver an even color and prevent scorching. Use a heavy-bottomed pan to distribute heat and avoid hot spots that char flour particles.
Start by melting fat until it liquefies but does not brown. Add flour gradually and stir immediately to fully coat particles. Maintain medium heat and stir with a wooden spoon or silicone spatula.
Blonde to Brown: Timing and Cues
A white roux sees minimal cook time and tastes mild—ideal for milk-based sauces. A blonde roux cooks a few minutes longer until a pale golden color develops and a subtle nutty aroma appears.
A brown roux takes 10–20 minutes at moderate heat and must be stirred constantly. Expect less thickening but a deeper, toasted flavor suited to dark gravies and Creole sauces such as gumbo. For cultural context on gumbo, consult gumbo.
Practical Uses and Creative Applications
Roux anchors classic sauces like béchamel, velouté, and espagnole, but chefs repurpose it across preparations to add silkiness or body. Use roux to stabilize cheese sauces, thicken stews, or enrich mashed potatoes.
Beyond traditional applications, a dark, cooled roux can be crumbled for a crunchy garnish, while a pale roux blends into batters to improve texture. Roux also extends to pastry kitchens where it contributes to structured fillings when precise thickening matters.
Scaling, Storage, and Make-Ahead Strategy
Prepare roux in larger quantities and cool it quickly for later use; it stores refrigerated for up to a week and freezes well in portioned blocks. Label containers with date and fat type to track quality and flavor expectations.
When reheating, warm slowly and whisk in hot liquid to reincorporate. Cold roux can clump if added without gentle heat, so temper it by adding a little warm stock first to loosen the mixture.
Troubleshooting Common Roux Problems
Burnt or bitter roux results from too-high heat or poor agitation. If scorching occurs, discard and start over—burnt flour gives persistent off-flavors that linger in sauces.
If your sauce becomes grainy or thin, reassess your roux color and the liquid temperature during incorporation. A darker roux often requires more roux volume or slower reduction to achieve the same final viscosity.
Expert Insight
Separate from the previous tip: when using butter, clarify it first to raise the smoke point and reduce the risk of burning at the stages where you want more color. Clarified butter gives a cleaner toasted note with less risk.
Pro-Caution
Chef’s Tips for Consistent Results
Use a wide pan to increase surface area and speed moisture evaporation for faster color development when making darker roux. Also, scrape the bottom and sides frequently; trapped flour fragments will char if left alone.
Sift flour and measure ingredients by weight. Small adjustments in ratio change thickening strength. For instance, a slightly higher flour-to-fat ratio increases body but can make the sauce feel pasty if overdone.
Serving Suggestions and Pairings
Match roux color to the dish: white or blonde roux suits delicate poultry and vegetable sauces, while brown roux pairs with roasted meats and richly spiced stews. Use fresh herbs or acid to brighten the final sauce.
Garnish with aromatic butter or a dash of citrus to cut richness when serving heavy roux-based sauces. A light sprinkle of toasted nuts can add pleasing texture where appropriate.
FAQ
What is the best fat for a beginner making roux?
For beginners, use unsalted butter because it melts and blends predictably and it introduces a familiar, pleasant flavor. Butter helps you sense when the mixture starts to brown due to its aroma and color changes, which makes timing easier.
How do I adjust a recipe that calls for roux when I need gluten-free?
Substitute rice or chickpea flour and test small batches first. These flours thicken differently and can introduce a distinct flavor, so reduce or increase quantity to match desired viscosity and taste.
Can I use roux in cold sauces or dressings?
Roux typically thickens hot liquids; use it to create warm emulsions or sauces that will cool. For cold dressings, consider starches like arrowroot or cornstarch dissolved and heated separately, then chilled, as roux-derived textures can tighten on cooling.
How long does roux need to cook to lose its raw flour taste?
A brief cook of 2–3 minutes removes raw flour taste for a white or blonde roux. Longer cooking deepens flavor but reduces thickening power, so balance color with the viscosity your recipe needs.
Is roux necessary for every sauce that needs thickening?
No. Roux is one effective thickener among many, including reduction, cornstarch slurry, egg liaison, and beurre manié. Choose roux when you want a stable, velvety texture and an integrated flavor base.
Understanding and practicing roux transforms sauce-making from guesswork into repeatable technique. Use the cues described here—color, aroma, and consistency—to control outcomes and expand your repertoire across classic French and regional cuisines.
See also: roux
]]>