

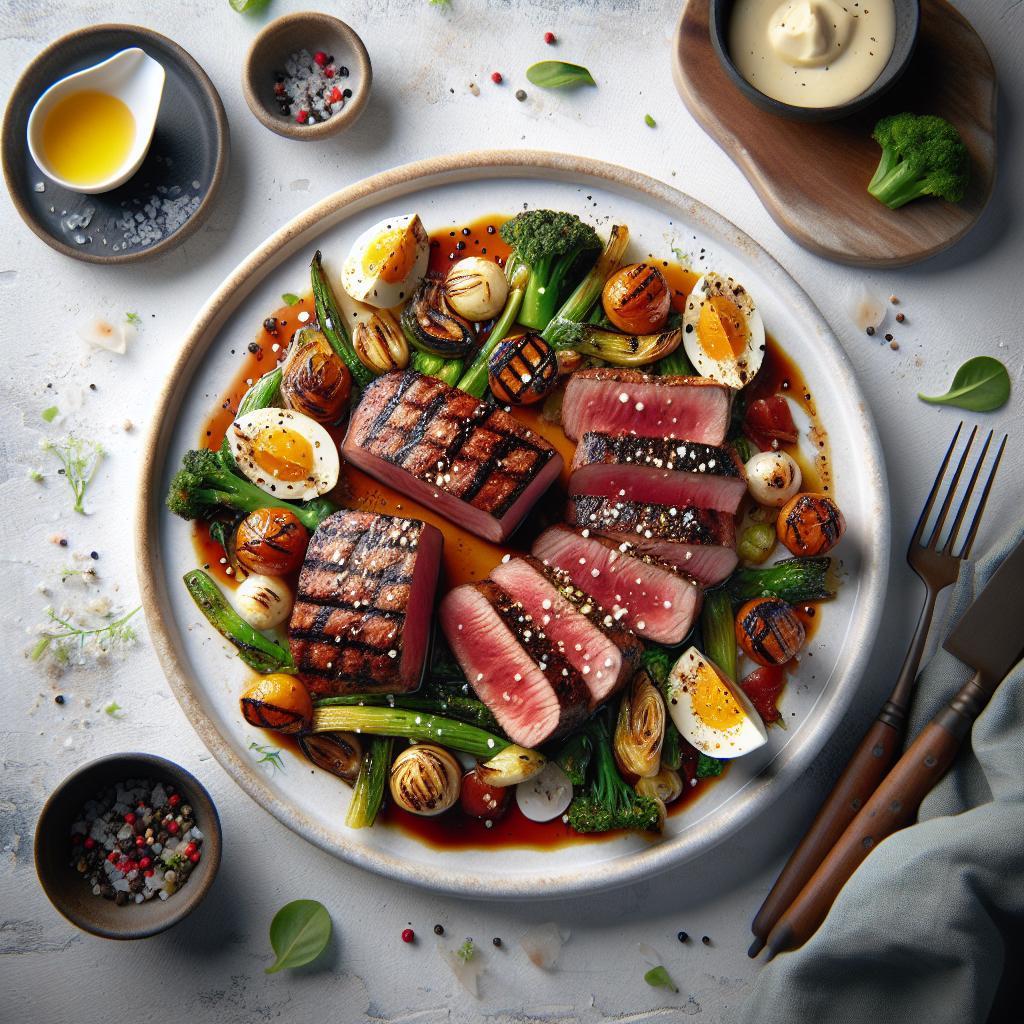
Unlocking the Sear
The sear signals a flavor shift: a thin, caramelized crust that adds texture and aroma to meat. Professional cooks use heat control and timing to create that crust reliably.
- Key insight: Searing produces flavor compounds via the Maillard reaction.
- Timing matters: High surface temperature and short contact yield the best crust.
- Tools matter: Heavy pans and oils with high smoke points give consistent results.
- Finish well: Resting and deglazing capture and concentrate flavor.
The notes below combine chemistry, equipment guidance, and a precise workflow you can apply tonight. Read the steps, follow the thermometer targets, and expect repeatable results.
What Is the Sear?
A sear forms when surface proteins and sugars undergo browning reactions under dry, high heat. That surface layer delivers contrast: a crisp exterior and a juicy interior.
Chefs describe the sear as both texture and flavor engineering. In practical terms, you want browning without burning and moisture control without steaming.
The Chemistry: Maillard Reaction and Browning
The dominant reaction in searing is the Maillard reaction, which forms dozens of volatile compounds that smell and taste savory. Those compounds appear once the surface reaches roughly 300°F (150°C).
Complementing Maillard chemistry is simple browning physics: remove surface moisture, sustain high heat, and avoid crowding so steam does not inhibit color development. Together these effects create the familiar golden crust.
Tools and Temperature
Choose a heavy pan that holds heat. A well-seasoned carbon-steel or cast-iron pan stores and delivers even contact heat for reliable browning.
For background on cookware behavior see the cast-iron skillet entry. Also, pick oils with high smoke tolerances and check the oil’s smoke point before heating.
Heat targets matter. Aim for a pan surface that triggers the Maillard reaction quickly while allowing you to control the process. Use an infrared thermometer if you have one, or test with a small water droplet: it should skitter and evaporate.
Oils differ in stability. Consult the smoke point concept when you choose fats; clarified butter, avocado oil, and grapeseed oil all cope better with high surface temperatures than regular butter.
Step-by-Step Technique
Successful searing follows a concise workflow: dry the meat, season, preheat the pan, add oil, sear undisturbed, finish with butter and aromatics, then rest. Each step contributes to crust, flavor, or juice retention.
Follow the thermometer targets: 125°F (52°C) for rare, 135°F (57°C) for medium-rare. Pull the steak slightly below the final desired temperature, then tent and rest to allow carryover cooking to finish the job.
Prep and Cook Time
- Preparation: 30–45 minutes (bring steaks to room temperature)
- Cooking: 8–12 minutes
- Resting: 5–7 minutes
- Total: ~25–35 minutes
Yield and Difficulty
- Serves 2–3 people
- Difficulty: Intermediate
Ingredients
- 2 thick-cut ribeye steaks (1.5-inch thick, ~12 oz each)
- 2 tbsp high smoke point oil (avocado, grapeseed, or refined sunflower)
- 1 tbsp unsalted butter
- 3 cloves garlic, crushed
- 2 sprigs fresh thyme
- Freshly ground black pepper, to taste
- Coarse sea salt, to taste
Instructions
- Bring steaks to room temperature. Remove from the fridge 30–45 minutes before cooking to promote even heat penetration and consistent crust formation.
- Season liberally. Pat steaks dry and apply coarse salt and pepper. Salt helps surface evaporation and enhances browning chemistry.
- Preheat the pan. Heat the skillet on medium-high for 4–6 minutes until it shimmers. A properly hot pan gives an immediate sear at contact.
- Add oil and sear. Add 2 tbsp oil and swirl. Place steaks without crowding; sear undisturbed 3–4 minutes per side for a deep crust.
- Finish with butter and aromatics. Add butter, garlic, and thyme in the last 1–2 minutes; baste the steaks to layer flavor and promote even color.
- Check temperature and rest. Use an instant-read thermometer. Remove at target temperature, transfer to a plate, tent loosely with foil, and rest 5–7 minutes before slicing.
After searing, deglaze the pan for a quick sauce. Add a splash of liquid and scrape the browned bits; they dissolve into a concentrated sauce.
For a clear description of the process and related techniques, see the deglazing entry.
Tips for Success: Maximizing the Perfect Sear
Start dry and stay patient. Moisture on the surface cools the pan and produces steam instead of a crust, so pat proteins dry and season right before cooking.
Don’t crowd the pan. Cook in batches if needed so each piece touches the hot surface fully. That practice preserves temperature and maximizes contact browning.
Use accurate tools. An instant-read thermometer and a heavy pan reduce guesswork and increase repeatability. Also, a pair of sturdy tongs avoids piercing meat and losing juices.
Serving Suggestions
Sliced against the grain, a seared steak pairs well with acid-bright condiments to cut the richness. Think chimichurri, a squeeze of lemon, or a sharp salad.
Also consider texture contrasts: creamy mashed potatoes or roasted vegetables add body, while pickled elements add lift. For guidance on post-cook handling, see Learn more about resting steaks.
Nutrition and Practical Notes
Typical nutrition for a 12-oz ribeye seared in oil and butter ranges near 600 kcal with about 55 g protein and 44 g fat per serving. Values vary by cut and trimming.
Keep portion sizes and side choices in mind for meal balance. Use leaner cuts or adjust sides for lower fat totals if needed.
Explore more techniques on perfect pan-searing
FAQ
What exactly is a sear?
A sear is the browned, caramelized surface that forms when proteins and sugars react under high, dry heat. It provides texture contrast and concentrated flavor.
The sear itself does not permanently lock in juices, but it slows moisture loss and improves overall mouthfeel.
Why does the Maillard reaction matter?
The Maillard reaction produces dozens of flavor compounds that define that browned, savory profile. It activates above roughly 300°F and accelerates with dry, hot contact.
Understanding this reaction helps you control color and taste through temperature, time, and moisture management.
What pan and oil work best?
Use a heavy-bottomed skillet that retains heat, such as cast iron or carbon steel. Choose oils with a high smoke point to prevent breakdown at searing temperatures.
Butter offers flavor but burns more easily; combine butter with an oil that tolerates higher heat, or add butter toward the end of the sear.
Does resting really matter?
Yes. Resting lets residual heat distribute and equalize internal juices, avoiding a dry slice. Tent loosely with foil for 5–7 minutes for steaks around 1.5 inches thick.
For technique variations and timelines, follow the internal guide on resting linked above.
How do I recover if my crust doesn’t form?
First, verify pan heat. If the pan wasn’t hot, dry it, reheat to a higher surface temperature, and finish the piece in a preheated oven if needed to reach the target internal temperature without burning the exterior.
Also check oil choice and surface moisture; correct those next time for reliable crust formation.
See also: perfect sear


