

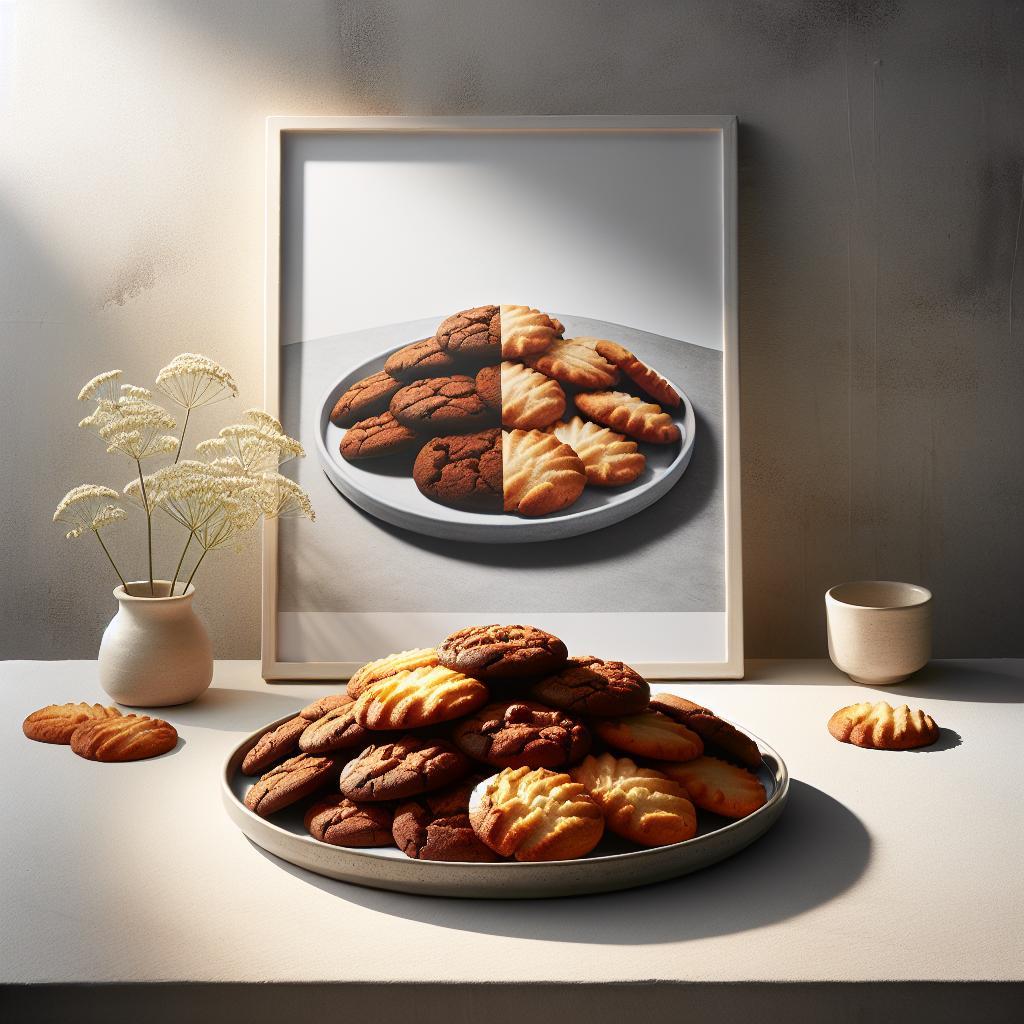
Chewy vs. Crispy Cookies: The Science Behind Each Bite
Chewy or crispy? The difference lies in measurable ingredient behavior and heat transfer during baking. Understanding those factors gives you repeatable control over texture.
- At a glance: Sugar type and moisture steer chewiness versus crispiness.
- Fat state and baking time control spread and edge crisp.
- Flour protein and mixing determine structure and chew.
- Small technique tweaks yield predictable texture changes.
How Ingredients Shape Texture
Every ingredient plays a mechanical or chemical role. Sugar, fat, flour, and eggs interact to set structure, hold water, and brown surfaces.
For example, sugar type alters moisture retention and caramelization, while all-purpose flour supplies protein for gluten formation. Those reactions directly affect chew and snap.
Key Chemical Players
Baking soda (sodium bicarbonate) encourages spread by producing CO2 and raising pH, which speeds browning. Use it when you want a broader, slightly chewier cookie profile.
Sodium bicarbonate reacts with acidic ingredients, shifting texture and color; control the amount to tune spread versus lift. Too much or too little changes the crumb abruptly.
Prep and Cook Time
Timing guides final moisture. Shorter bakes trap water for a tender, chewy center while longer bakes dry the dough and create crisp edges.
Typical ranges: prep 15 minutes, optional chill 30–60 minutes, bake 8–13 minutes; total time varies by oven and cookie size. Test-bake a small batch to dial in your oven’s idiosyncrasies.
- Preparation: 15 minutes
- Chilling dough (optional): 30–60 minutes
- Baking: 8–13 minutes
- Total time: Approx. 40–90 minutes
Yield and Difficulty
Typical yield for this formula is about 24 medium cookies. Skill level: intermediate—recommended for bakers ready to adjust ratios and time for specific texture goals.
Scaling is linear for small batch increases, but watch bake time and sheet crowding when you change batch size. Crowding alters heat flow and spread.
Ingredients
Use quality basics and measure precisely. Small shifts in sugar or fat percent produce predictable textural changes.
Core ingredients below include common pantry items; substitute deliberately and test. For deeper guidance, see our internal guide on the role of flour for protein choices.
- 2 1/4 cups all-purpose flour, sifted
- 1 teaspoon baking soda
- 1/2 teaspoon fine sea salt
- 3/4 cup unsalted butter, softened
- 1 cup packed light brown sugar
- 1/2 cup granulated sugar
- 1 large egg + 1 egg yolk (extra chewiness)
- 2 teaspoons pure vanilla extract
- 1 1/2 cups semisweet chocolate chips
- Optional: 1/2 cup chopped walnuts or pecans
Instructions
Follow these steps in sequence to control hydration and gluten development. Order matters: creaming, egg addition, and gentle mixing each affect final texture.
- Preheat the oven to 350°F (175°C). Line baking sheets with parchment for even browning and controlled bottoms.
- Combine dry ingredients: whisk flour, baking soda, and salt in a medium bowl to ensure even leavening.
- Cream butter and sugars: beat until fluffy, 3–4 minutes, to trap air for a lighter crumb when desired.
- Add eggs and vanilla: add whole egg and then yolk, mixing until homogenous; extra yolk increases tenderness and moisture retention.
- Fold in dry mix and mix-ins: fold by hand or low speed; stop when just combined to avoid overdeveloping gluten and toughness.
- Chill for chew: refrigerate dough 30–60 minutes to solidify fat and slow spread if aiming for a denser, chewier center.
- Scoop and bake: drop rounded tablespoons 2 inches apart. For chewy: 9–11 minutes; for crispy: 11–13 minutes, watching for golden edges.
- Cool briefly on the sheet: rest 5 minutes, then transfer to a rack to finish cooling and set texture.
Oven variance is real—document your times at a given rack position and temperature for reproducible results. Keep a small notebook or photo log to track changes.
Tips for Success
Small, consistent choices yield predictable results. Use a scale for precision when you change ratios or test variables.
Control butter temperature: softened but cool butter traps air without melting. Melted butter increases spread and can produce thinner, crisper cookies.
More brown sugar favors chew due to molasses content; more granulated sugar promotes crisp due to faster drying and caramelization. For texture experiments, change one variable at a time and record results.
Serving Suggestions
Serve warm for maximum texture contrast: slightly crisp edge, soft center. Add a small finishing sprinkle like flaky salt to emphasize flavor boundaries.
For presentations, pair with ice cream or milk to enhance perceived tenderness and contrast. For events, keep cookies on flat trays at room temperature to retain intended texture.
Nutrition and Visual Guide
Per-cookie nutrition varies by size and mix-ins. Use the table below as an approximate guide for a medium 24-cookie batch.
| Nutrient | Per Cookie (approx.) |
|---|---|
| Calories | 150 kcal |
| Protein | 2 g |
| Carbohydrates | 20 g |
| Fat | 7 g |
Adjust serving sizes to match your dietary goals. Swap some butter for applesauce or reduce chocolate to lower calories, but test texture after each change.
Further Reading and Internal Resources
For deeper technical detail on protein and hydration, read our internal guide on the role of flour. For practical troubleshooting and oven tips, see baking troubleshooting.
The linked pages include targeted experiments that pair well with the techniques in this recipe. Use them to build a testing plan and improve outcomes quickly.
FAQ
What makes a cookie chewy instead of crispy?
Chewiness results from retained moisture and a denser crumb structure. Use higher brown sugar, extra yolk, and shorter bake time to hold water in the crumb.
How do I get crisp edges and a soft center?
Bake until edges brown slightly while centers remain glossy and slightly underbaked; carryover heat will finish the center. A thinner dough or slightly longer bake commonly produces crisp edges.
Does flour type matter?
Yes. Higher-protein flours increase gluten and chew; lower-protein flours or blends reduce elasticity for a more tender bite. For precise swaps, measure by weight and test small batches.
Can I convert a chewy recipe to a crispy one?
Yes. Increase granulated sugar, reduce moisture or egg yolk, and extend bake time slightly. Also bake on darker pans or at a marginally lower temperature longer to dry the cookie evenly.
Why should I chill dough?
Chilling firms fats and allows the flour to hydrate, reducing spread and enriching flavor. Use chilling when you want a taller, chewier cookie or a more developed flavor profile.
Apply these principles methodically: change one variable, test, and log results. Over time you will refine a formula that produces the exact chew or crisp you prefer.

See also: cookie texture


