

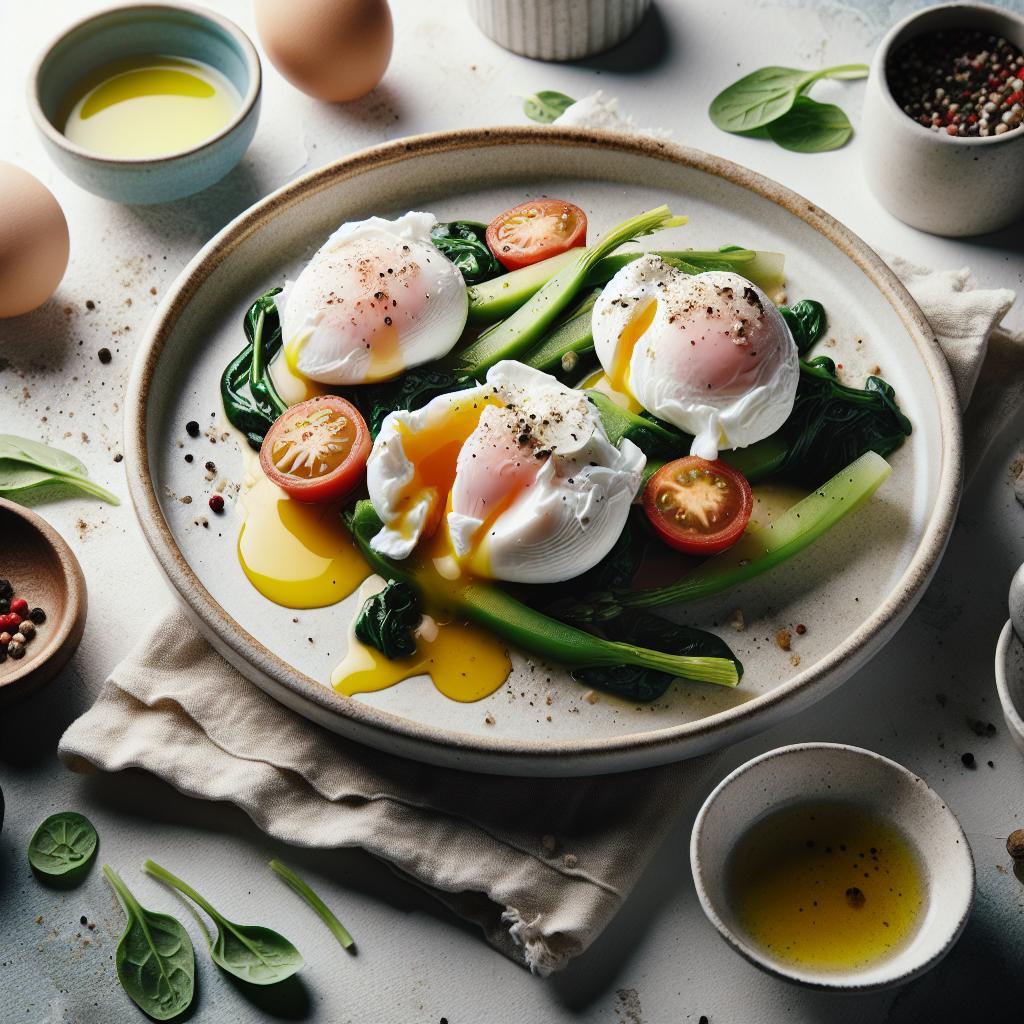
A perfectly poached egg delivers silk‑soft whites that hold a molten yolk. Many home cooks see the white unravel and the yolk escape; the solution lies in technique, timing, and ingredient quality.
- Fresh eggs and gentle heat reduce spread and improve shape.
- Mild acidity speeds coagulation without altering taste.
- Calm water motion and a careful transfer keep the white intact.
- Practice and method beat occasional failures into reliable results.
Overview: Why eggs fall apart
Egg white structure relies on proteins that relax as eggs age; loose whites are more likely to disperse in water. The interaction of temperature, motion, and acidity determines whether the white forms a neat envelope around the yolk.
When you control those variables, you control the outcome. For a technical grounding, consult the poached egg entry for precision terminology and common techniques.
Prep and Cook Time
Preparation: 5 minutes. Cooking: 3–4 minutes per egg for a soft yolk. Allow additional time if you poach multiple eggs in batches.
Keep a thermometer on hand if you want repeatable results; aim for a water temperature around 180°F–190°F (82°C–88°C). This range gives steady coagulation without turbulence that tears the white.
Yield
This recipe quantity targets two servings, roughly one to two eggs per person depending on appetite. Scale the water and pot size to avoid crowding; overcrowding is a common cause of broken shapes.
If you plan to poach larger batches, work in small groups and keep finished eggs warm in a shallow bowl of hot water to preserve texture. For menu planning, note that poached eggs reheat well for short-term service.
Difficulty Level
Poaching sits at an easy-to-medium skill level. The basic technique is simple, but consistency takes practice, especially when you aim for precise yolk set and tidy whites.
Expect a learning curve: minor errors happen even in pro kitchens. Each attempt teaches subtle control of temperature, motion, and timing.
Ingredients
2 large very fresh eggs, ideally refrigerated and not older than seven days for best white cohesion. For background on egg handling and quality, see the egg (food) article.
3 cups filtered water, plus a tablespoon of white vinegar (optional) and salt and pepper to taste. Vinegar provides acidity that helps the protein set quickly without imparting strong flavor; read more on vinegar.
Instructions
Follow a stepwise approach: heat the water, add a little acid, create gentle motion, and transfer the egg close to the surface. Each step minimizes the forces that unravel the white.
Work with one egg at a time until you master the flow; then you can scale up with confidence. Keep a slotted spoon, small ramekin, and a shallow bowl of warm water at hand for finishing.
Step 1: Prepare the water
Use a wide saucepan with enough depth for the egg to float without touching the bottom. Heat to a gentle simmer where small bubbles form on the pot floor and occasional small bubbles rise to the surface.
Maintain that steady temperature; avoid rolling boil. If you need numerical control, aim for 180°F to 190°F (82°C to 88°C) so convective currents stay gentle and predictable.
Step 2: Add acid and position
Add roughly 1 tablespoon of white vinegar per 3 cups of water; this acidity helps the albumen knit quickly around the yolk. The vinegar method works because acid lowers pH and accelerates protein denaturation and coagulation; see the science of protein for more detail.
Crack each egg into a small ramekin or cup first. This prevents shell fragments and lets you slide the egg close to the water surface to minimize drop height and shock to the white.
Step 3: Create a gentle whirlpool and cook
Stir the simmering water once to create a mild vortex, then slide the egg into the center of that swirl. The rotational motion encourages the white to fold inward, wrapping the yolk in a compact shape.
Let the egg cook undisturbed for 3–4 minutes for a soft yolk. Remove with a slotted spoon and rest briefly on paper towel to blot excess water before seasoning.
Tips for Success
Choose very fresh eggs. Fresh albumen stays close to the yolk and resists spreading; older eggs have thinner whites that disperse. Store eggs properly and use them within a week for reliable poaching.
Control water temperature and motion. Gentle simmering and calm stirring reduce tearing. Keep a consistent heat source and avoid adding cold eggs from the refrigerator directly into near-boiling water.
[p]
[/p]
Try alternative tools when eggs are fragile: silicone poaching cups, a wide ladle, or small parchment nests provide support. These aids remove the need for a whirlpool and work well for beginners or high-volume service.
[p]
[/p]
Before using a new technique, run a small test egg to adjust timing and method. Minor differences in egg size, altitude, and pot geometry affect the exact cook time.
Serving Suggestions
Serve poached eggs on buttered toasted sourdough with chopped chives or tarragon for a classic presentation. The contrast between crisp bread and velvet egg enhances texture and mouthfeel.
For brunch variations, top eggs with hollandaise, salsa verde, or a light drizzle of olive oil. Pair with sautéed spinach, avocado slices, or roasted asparagus for balanced plates.
Storing and Reheating
You can poach eggs slightly under and chill them in cold water, then store in the refrigerator for up to 24 hours. Keep them submerged to maintain shape and prevent drying.
Reheat in gently simmering water for 30–45 seconds until warm. Avoid microwave reheating; it often overcooks the yolk and alters texture.
Common Problems and Fixes
If whites separate into strands, the egg is likely past its prime or the water was too turbulent. Check egg freshness with a simple float test and calm the heat source if you see heavy movement.
Broken yolks usually result from cracking too close to the water or using a sharp edge. Crack into a cup and slip the egg in low and slow; that small extra control prevents punctures.
Nutrition
One poached large egg provides roughly 70 calories with high-quality protein and essential micronutrients. Poaching keeps added fat minimal compared with frying, making it a lean cooking method.
Pairing eggs with vegetables, whole grains, or healthy fats balances the meal for sustained energy. For a quick reference, use the table below to plan servings.
| Nutrition | Per Egg (approx.) |
|---|---|
| Calories | 70 |
| Protein | 6g |
| Carbs | 0.6g |
| Fat | 5g |
Tools and Alternatives
Use a slotted spoon with wide, shallow holes to lift eggs without tearing. A narrow-lipped ramekin helps you control the release of the egg into the water.
For consistent service, silicone cups or an oven muffin tin with water can produce multiple even poaches at once. If you want more technique options, visit our Guide to Egg Cooking Techniques for step-by-step variations.
For tool recommendations and broader kitchen advice, check our article on Kitchen Tools and Techniques. Those resources pair well with this method to build repeatable results.
FAQ
Why do poached eggs sometimes fall apart?
Egg whites become loose as eggs age, which makes them prone to spreading in the water. Excessive water movement or too-high heat also tears the white, so keep the water calm and the temperature steady.
Is vinegar necessary when poaching eggs?
Vinegar accelerates protein coagulation, which helps the white firm quickly around the yolk. Use a modest amount (about 1 tablespoon per 3 cups of water) to avoid altering taste.
What is the ideal water temperature for poaching?
Target 180–190°F (82–88°C) for a gentle simmer. This range provides steady heat transfer without disruptive currents that can break the egg apart.
Can I poach eggs ahead and reheat them?
Yes. Chill poached eggs in cold water, store refrigerated for up to 24 hours, and reheat in hot water for 30–45 seconds. This preserves texture better than microwave reheating.
What if my poached egg breaks despite careful technique?
Rescue the egg with a slotted spoon by gathering stray whites and draining them well. Serve as a rustic topper over toast, salad, or grains while you practice the refined steps for next time.
With the practical adjustments above, poaching becomes a reliable technique rather than a gamble. Practice controlled heat, fresh eggs, and gentle handling to produce restaurant-quality results. For more methods and step-by-step photos, visit our internal guides linked above.
See also: Poached Eggs


