

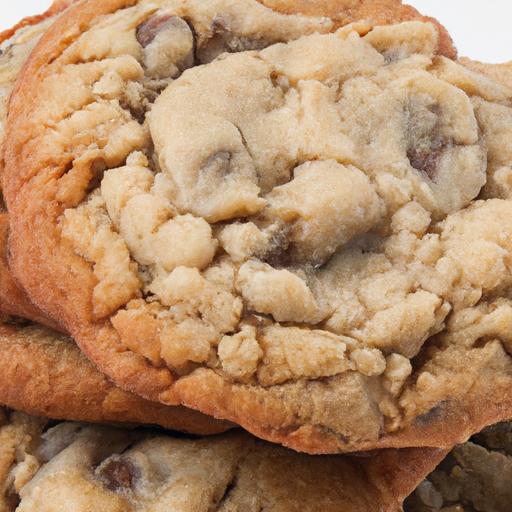
Picture this: you pull a tray of freshly baked cookies from the oven, only to find them flat as pancakes and glistening with an unappetizing sheen of grease. It’s a baking disappointment that many of us know all too well. But fear not-your cookie woes are not a mystery, and with a few simple tweaks, you can transform those sunken, oily disks into perfectly puffy, golden treats. In this article, we’ll dive into the common culprits behind flat and greasy cookies and reveal the science-backed fixes that will have you baking like a pro in no time. Ready to rescue your cookie game? Let’s get started!
Why Are My Cookies Flat and Greasy? Baking Fixes Explained
Why are my cookies flat and greasy? This common baking dilemma often stems from subtle yet impactful ingredient imbalances, particularly in the butter and sugar ratios. Achieving the perfect cookie texture is a beautiful science-one where every gram counts. I still recall my early baking mishaps when my dough would spread too thin, leaving me with shiny, sad cookies instead of the chewy delights I envisioned. Understanding how these factors interplay empowers you to bake with confidence and creativity.
Prep and Cook Time
- Preparation Time: 15 minutes
- Chilling Time: 30 minutes (optional but recommended)
- Baking Time: 10-12 minutes
Yield
- About 24 classic cookies
Difficulty Level
- Easy to Medium
Ingredients
- 1 cup unsalted butter, softened (not melted)
- ¾ cup granulated sugar
- ½ cup packed light brown sugar
- 2 large eggs, room temperature
- 2 tsp pure vanilla extract
- 2 ¼ cups all-purpose flour, sifted
- 1 tsp baking soda
- ½ tsp salt
- 1 cup semi-sweet chocolate chips (optional)
Instructions
- Preheat your oven to 350°F (175°C). Line baking sheets with parchment paper or silicone mats for easy cleanup and even baking.
- In a large bowl, cream the softened butter, granulated sugar, and brown sugar together using a mixer on medium speed until light and fluffy-this creates tiny air pockets critical for texture.
- Add the eggs one at a time, beating well after each addition, then stir in the vanilla extract.
- In a separate bowl, whisk the sifted flour, baking soda, and salt together to ensure even distribution of leavening agents.
- Gradually add the dry ingredients to the wet mixture, mixing on low speed until just combined. Avoid overmixing to prevent tough cookies.
- Fold in the chocolate chips if using.
- If your dough feels too soft or sticky, refrigerate for 30 minutes before baking-this controls spread and greasiness.
- Scoop dough using a cookie scoop or tablespoon, spacing them 2 inches apart on the prepared baking sheets.
- Bake for 10-12 minutes until edges are golden but centers look slightly underbaked-carryover heat will perfect the texture.
- Remove from oven and allow cookies to cool on the baking sheet for 5 minutes before transferring to a wire rack.
Tips for Success
- Butter temperature matters: Using softened, not melted butter controls fat distribution, preventing greasy puddles.
- Balance sugar types: Brown sugar adds moisture and chewiness, while granulated sugar aids in spreading. Adjust ratios carefully.
- Mind your oven temperature: An oven running too low causes excessive spreading, resulting in flat, greasy cookies. Use an oven thermometer for accuracy.
- Chill your dough: Cooling solidifies butter fats, limiting dough spread and producing thicker cookies with a tender crumb.
- Watch your baking time: Baking just until edges set and centers are soft ensures chewiness without greasiness.
Serving Suggestions
Serve your cookies slightly warm adorned with a sprinkling of flaky sea salt to heighten contrasting flavors. Pair them with a cold glass of milk, a scoop of vanilla ice cream, or a cup of freshly brewed coffee for an indulgent experience. Garnish with a few extra chocolate chips artistically placed on top just after baking, or drizzle with melted dark chocolate for a decadent finish.

| Nutrient | Per Cookie |
|---|---|
| Calories | 120 |
| Protein | 1.5 g |
| Carbohydrates | 15 g |
| Fat | 6 g |
For further reading on ingredient science and how to troubleshoot baking woes, check out our comprehensive guide to fixing flat cookies. Additionally, for expert advice on oven calibration and baking temperatures, refer to the King Arthur Baking temperature guide.
Q&A
Q&A: Why Are My Cookies Flat and Greasy? Baking Fixes Explained
Q1: Why do my cookies spread out so much and turn out flat?
A1: Flat cookies usually mean your dough is too warm, or you used too little flour or too much butter. When the dough’s temperature is high, butter melts quickly in the oven, causing the cookies to spread before they have a chance to set. Using a spoonful less butter or chilling the dough can help your cookies hold their shape.
Q2: My cookies are greasy and oily on top-what’s going wrong?
A2: Greasiness is often a sign of excess fat that hasn’t fully incorporated into the dough or melted too rapidly in the oven. Overmixing butter can cause it to break down and release excess fat, and using low-quality butter with higher water content can also contribute. Try mixing just until combined, and use high-quality, unsalted butter.
Q3: How does flour type affect cookie spread and texture?
A3: Flour gives cookies structure. Using a low-protein flour, like cake flour, can make them tender but may increase spreading. All-purpose flour is usually the best balance. Also, measuring flour accurately-preferably by weight-ensures you have enough to keep cookies from going flat.
Q4: Can too much sugar cause flat, greasy cookies?
A4: Absolutely! Sugar liquefies as it melts, which thins out cookie dough. Too much sugar means more spreading and a greasy sheen. Stick to the recipe, and if your cookies are flattening, try reducing sugar by a tablespoon or two.
Q5: What role does baking soda or baking powder play in cookie rise?
A5: Baking soda and baking powder release gases that lift the dough. If you add too little, cookies won’t puff up; too much can cause odd textures or cracks. Make sure your leavening agents are fresh and measure accurately to get that perfect rise!
Q6: Can oven temperature cause flat, greasy cookies?
A6: Yes! If the oven is too hot, the butter melts too quickly, making cookies spread thin. Too low, and cookies won’t set properly before spreading. Using an oven thermometer ensures the perfect baking environment.
Q7: How can I fix my cookie dough if it’s already wet and greasy?
A7: Chill it! Pop your dough in the fridge for at least 30 minutes. Cooling solidifies the fat and tightens the flour’s gluten, preventing excessive spread and greasiness. If that’s not enough, sprinkle in a little extra flour and mix gently.
Q8: Why does chilling dough make a difference?
A8: Think of chilling as a time-out for your dough-fat firms up, making it sturdier and slower to melt in the oven. This means your cookies keep their shape better and don’t turn into greasy puddles.
Q9: Are there any ingredient swaps that can help prevent flat, greasy cookies?
A9: Try substituting part of your butter with shortening or coconut oil-they melt differently and can help control spread. Also, adding a tablespoon of cornstarch or oat flour can boost structure and reduce greasiness.
Q10: What’s the big takeaway to fix flat and greasy cookies once and for all?
A10: Balance is key: proper flour measurement, quality butter, correct sugar ratio, accurate leavening, and dough chilling. Baking is chemistry with a pinch of patience-tweak your process, and soon you’ll have perfectly plump, non-greasy cookies to enjoy!
The Conclusion
In the grand adventure of baking, flat and greasy cookies may feel like a detour, but armed with the right knowledge, you’re more than equipped to turn those mishaps into mouthwatering successes. From the science behind your ingredients to the subtle art of mixing and baking times, each tweak brings you closer to that perfect, golden-brown batch. So next time your cookies threaten to flop, remember: a little patience and a sprinkle of baking wisdom can rescue your treats-and your taste buds. Happy baking, and may your cookies always rise to the occasion!


