

Whipping Cream Wonders: An immersion blender can turn heavy cream into silky peaks in minutes. With the right technique you control texture, speed, and stability for desserts and savory garnishes.
- Whipping Cream Wonders: Texture and Consistency Mastered with Your Immersion Blender
- Prep and Timing
- Ingredients and Equipment
- Step-by-step Instructions
- Tips for Success
- Creative Uses Beyond Desserts
- Nutrition and Portioning
- FAQ
- Can you really whip cream with an immersion blender?
- How does an immersion blender compare with a hand mixer?
- What is the secret to achieving perfect peaks?
- Which containers work best?
- How do I stabilize whipped cream for cakes?
- Final Notes
- Fast results: Cold cream + chilled tools = whipped peaks in under 5 minutes.
- Controlled texture: Use short pulses to stop at soft or stiff peaks.
- Stability options: Add cream cheese or gelatin to extend hold for cakes.
- Versatile uses: Sweet and savory applications expand what whipped cream can do.
Whipping Cream Wonders: Texture and Consistency Mastered with Your Immersion Blender
Using an immersion blender gives you a high-speed, compact option to aerate cream. It works best when you combine equipment, temperature, and motion to build stable air cells.
Start with heavy cream that lists at least 35% milk fat for reliable volume. Learn the mechanics behind aeration to choose soft or stiff peaks with confidence. See heavy cream for composition details.
Prep and Timing
Prep time: 5 minutes. Whipping time: 3–5 minutes depending on batch and temperature. These are practical numbers from repeated kitchen tests.
Chill everything. Place the immersion blender attachment and container in the fridge or freezer for at least 10 minutes. Cold tools reduce heat transfer and speed coagulation of fat globules.
Prep and Cook Time
- Preparation: 5 minutes
- Whipping: 3–5 minutes
- Total: 8–10 minutes
Ingredients and Equipment
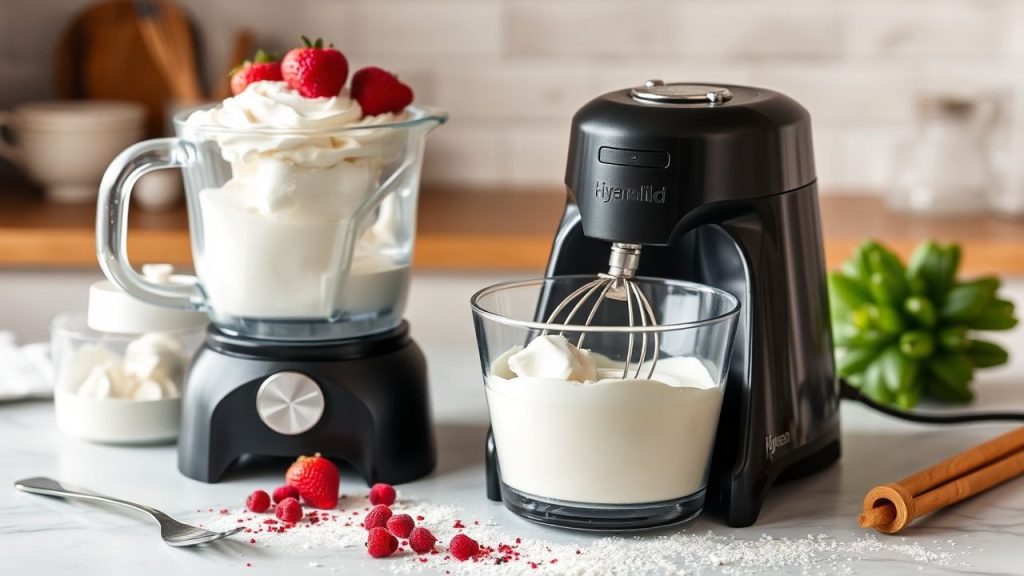
Use a tall, narrow container designed for immersion blenders. The shape concentrates the motor action and traps air. A deep jar or a dedicated beaker works best.
For ingredients keep it simple: chilled heavy cream, powdered sugar for sweetness, and vanilla if desired. For longer hold, add a teaspoon of cream cheese or a small amount of gelatin. Read about cream cheese if you plan to stabilize this way.
Yield
About 1 cup heavy cream yields roughly 2 cups whipped cream. This amount serves 4–6 as a topping, depending on usage and piping losses.
Difficulty Level
Easy. The technique fits cooks of all skill levels. Control comes from observing peaks rather than relying on timers alone.
Ingredients
- 1 cup heavy cream, chilled
- 2 tbsp powdered sugar, sifted
- 1 tsp vanilla extract, optional
- Pinch of salt to brighten flavor
Step-by-step Instructions
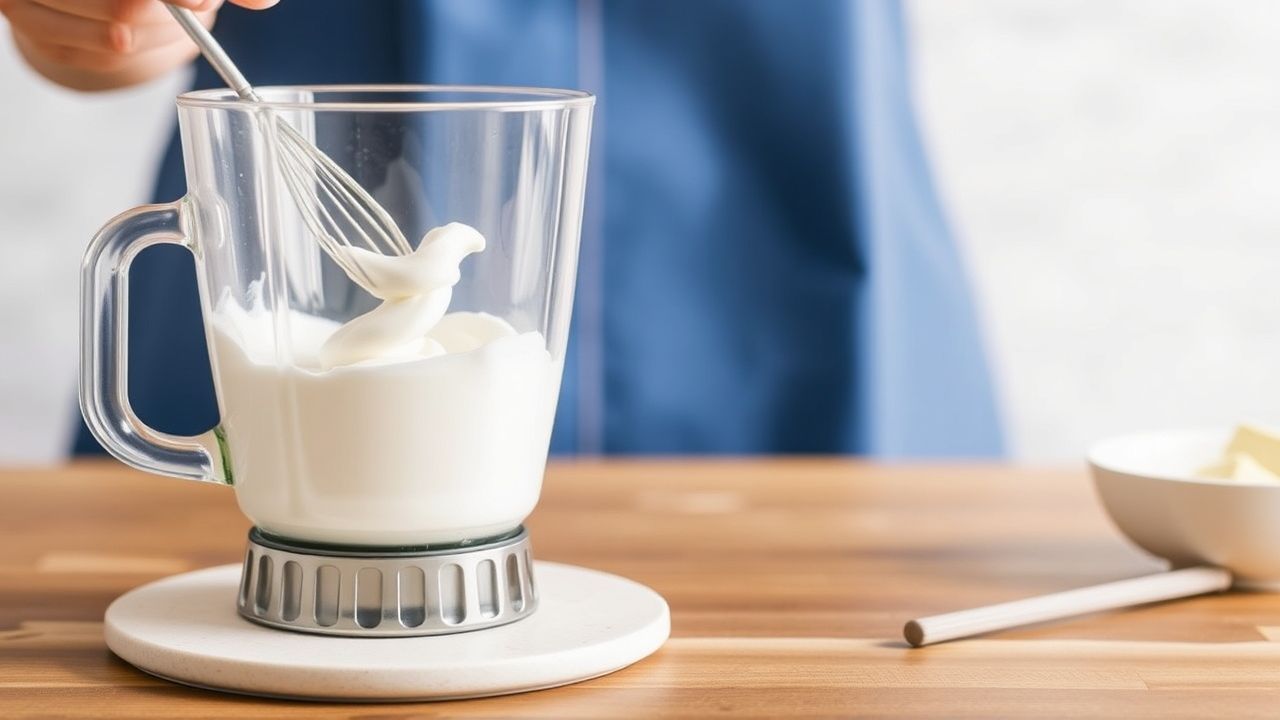
Set up cold equipment and a tall container. Pour the chilled cream into the container and add sugar and flavoring if used.
Attach the immersion blender and start on medium-high speed. Move the wand gently up and down to incorporate air and avoid splatter. The motion should be controlled and brief rather than frantic.
- Chill tools: Refrigerate the whisk attachment and container for 10 minutes.
- Pour cream: Add cream to a tall container to minimize splatter and air loss.
- Add sugar and flavor: Add powdered sugar and vanilla as the cream begins to thicken.
- Whip: Immerse and pulse on medium-high until soft peaks form, about 3 minutes. Continue to stiff peaks if needed, checking every 10–15 seconds.
- Stop on time: Once stiff peaks hold, stop. Overwhipping turns cream grainy as fat coalesces into butter.
- Store: Refrigerate in an airtight container for up to 24 hours. Re-whisk gently before serving if it loses volume.
Tips for Success
Cold is crucial. Cold cream and chilled equipment trap air faster and reduce whipping time. This lowers the risk of passing from peaks to butter.
Container shape matters. A narrow, tall vessel keeps the aeration focused. It also reduces splatter and lets the blade reach the full column of cream.
- Pulse don’t blast: Short bursts give you control over peak formation.
- Watch the texture: Soft peaks look glossy and fall back slowly. Stiff peaks hold shape when the whisk lifts.
- Stabilizers: Add a teaspoon of cream cheese or a small amount of gelatin for longer hold, useful for cakes.
- Fat content: Use cream with at least 35% fat for reliable structure.
For mechanical context, review the device specifics at the immersion blender entry. It explains motor and blade design and why container geometry matters. See immersion blender.
When stabilizing with gelatin, bloom a small amount in cold water and warm gently before adding. Dissolve completely so you do not create strings in the foam.
If overwhipping begins, you can sometimes rescue the cream by adding a tablespoon of fresh cold cream and gently whipping to bring it back. This does not always work if the process moves too far toward butter.
Creative Uses Beyond Desserts
Whipped cream can balance heat and acidity in savory dishes. Fold in herbs and lemon zest for a bright, airy garnish on grilled fish or roasted vegetables.
Try herbed whipped cream as a dollop on soups or as a spread for brunch breads. The texture adds richness without weight, and the technique scales easily for small batches.
Use whipped cream to build layered parfaits, frost small cakes, or pipe decorations on cupcakes. For stability over long service, link to our detailed guide on dessert toppings and stabilizers at Homemade Dessert Toppings.
For more on kitchen tools and setup, see Kitchen Tools & Setup to optimize your workspace and tools for fast, clean whipping sessions.
Nutrition and Portioning
Whipped cream is calorie-dense. Two tablespoons typically contain about 50 kcal and several grams of fat. Use measured portions to manage calories and flavor balance in plated dishes.
For nutritional context consult general dairy composition references. The protein and carbohydrate values remain low; fat drives the texture and mouthfeel. For related reading see whipped cream.
| Nutrient | Per 2 tbsp serving |
|---|---|
| Calories | 52 kcal |
| Protein | 0.3 g |
| Carbohydrates | 0.4 g |
| Fat | 5.5 g |
For a science-focused read on aeration, consult resources on food structure and stabilizers. If you plan to use gelatin as a stabilizer, review its properties at gelatin.
FAQ
Can you really whip cream with an immersion blender?
Yes. An immersion blender can produce soft or stiff peaks quickly when you use chilled cream and the right container. It performs especially well for small batches and quick touch-ups.
How does an immersion blender compare with a hand mixer?
A hand mixer offers fine speed control and can be gentler on larger batches. An immersion blender provides compact speed and fast results for small to medium portions. Choose based on batch size and finish quality desired.
What is the secret to achieving perfect peaks?
Cold cream, chilled equipment, a tall container, and controlled pulsing. Stop early, check texture, and avoid continuous full-speed runs to prevent overwhipping.
Which containers work best?
Tall, narrow jars or beakers concentrate the whipping action and reduce splatter. Wide bowls force you to move the wand more and lose aeration efficiency.
How do I stabilize whipped cream for cakes?
Add a teaspoon of cream cheese or dissolve a small amount of gelatin and incorporate it while whipping. Both increase holding time and resistance to weeping under warm conditions.
Final Notes
An immersion blender is a practical, fast tool for mastering whipped cream. With temperature control and measured pulses you can achieve consistent, stable peaks.
Experiment with flavors and stabilizers to match your recipes. Use the internal guides linked above to expand technique and tool selection. Practical tests and consistency checks will make your whipped cream reliably excellent.
See also: whipped cream


