

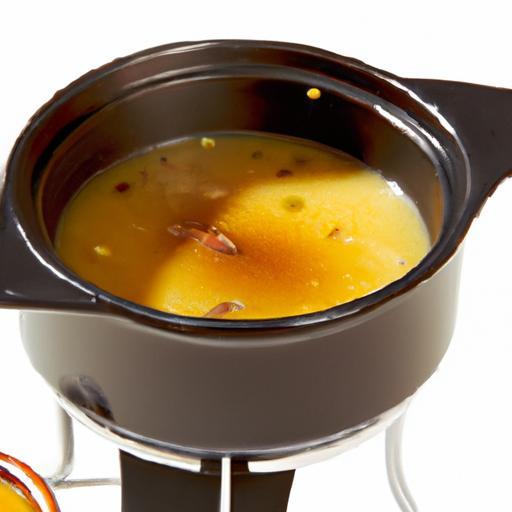
Imagine gathering around a bubbling pot of molten cheese or rich, velvety chocolate, the heart of any fondue feast. But as delightful as fondue is, one secret to its success lies hidden beneath the surface: those elusive hot spots within the pot. These sizzling zones can turn your perfectly melted masterpiece into a scorched or unevenly cooked disappointment. In this creative guide, we’ll dive into the art and science of detecting hot spots in fondue pots-arming you with clever, hands-on testing techniques that ensure every dip is smooth, every bite balanced, and every meal a delicious triumph. Whether you’re a casual diner or a fondue fanatic, mastering this skill will elevate your culinary experience to a whole new level of comfort and control. Let’s turn up the heat-just the right way!
Detecting Hot Spots: A Creative Guide to Testing Fondue Pots
Detecting hot spots in your fondue pot is essential for achieving a perfectly melted and evenly heated dipping experience. Discovering how heat distributes within your pot not only prevents burnt bites but elevates your fondue game to a new level of culinary precision. Using innovative techniques with everyday household tools, you can become an expert at maintaining that ideal temperature, ensuring every dip delights your guests.
Prep and Cook Time
Preparation: 10 minutes
Testing and Heat Monitoring: 20 minutes
Total Time: 30 minutes
Yield
Suitable for 4-6 servings of fondue experience
Difficulty Level
Medium – requires careful observation and temperature control
Ingredients
- 1 fondue pot, preferably ceramic or cast iron
- 2 cups water, room temperature
- Food-safe thermochromic liquid or heat-sensitive paint (optional for visual heat mapping)
- Several small drops of vegetable oil for testing hot spots through movement
- Digital cooking thermometer with a probe
- Aluminum foil, cut into small strips
- Kitchen timer or stopwatch
Instructions
- Set up your fondue pot on the heat source you normally use (stove burner, electric base, or fuel burner). Add 2 cups of water to simulate fondue consistency and prevent immediate burning during testing.
- Place the digital cooking thermometer probe into the center of the water. Set your timer to track intervals of 5 minutes as you monitor heat stability.
- For innovative heat distribution detection, lightly scatter a few drops of vegetable oil on the water’s surface-these will drift toward hotter areas, revealing hotspots visually.
- Use small strips of aluminum foil laid flat on the inner bottom surface after cooling slightly between tests. These strips will darken faster in hotter zones when the pot is reheated.
- If available, paint sections of the pot’s interior with thermochromic paint before adding water. Watch for color shifts that indicate temperature variations and precisely pinpoint uneven heat.
- Record temperature readings at the center, edges, and various spots along the pot’s sides every 5 minutes, noting times when your thermometer dips or soars unexpectedly-this flags inconsistent heat zones.
- Adjust your heat source accordingly, lowering or raising flame or setting to create a stable, even warmth without scorching. Repeat step 6 for confirmation.
- Once optimal heat distribution is achieved, empty the water and season your fondue pot appropriately before use to enhance flavor retention and surface durability.
Tips for Success
- Test in small intervals: Continuous monitoring avoids overheating and sudden hot spots.
- Use silicone mats below fuel burners to protect surfaces and prevent heat concentration.
- Don’t overcrowd the pot with too much cheese or chocolate; this encourages uniform melting and fewer burnt patches.
- Maintain your fondue pot: Regular cleaning and seasoning prevent residue buildup, which can contribute to uneven heating.
- Substitutions: If a thermometer isn’t handy, use a candy or infrared thermometer to acquire surface heat levels quickly.
- Make-ahead: Pre-test your fondue pot before guests arrive to streamline service and perfect your heat control.
Serving Suggestions
Once you’ve mastered evenly distributed heat, serve your fondue with an array of vibrant dippers to complement every bite. Consider crusty artisan bread cubes, crisp vegetables like blanched broccoli or asparagus, and succulent cured meats. Garnish with fresh chopped herbs like chives or parsley sprinkled atop your cheese or chocolate mixture for a burst of color and freshness. Place small ramekins of coarse sea salt, crushed red pepper, or smoked paprika on the side to encourage personalized seasoning experiences at the table.
| Nutrient | Per Serving |
|---|---|
| Calories | 320 kcal (avg.) |
| Protein | 10 g |
| Carbohydrates | 25 g |
| Fat | 20 g |
For additional insights about maintaining kitchen tools and temperature accuracy, check out our detailed guide on kitchen tool care. For authoritative science on heat conduction in cookware, visit Cook’s Illustrated.

Q&A
Q&A: Detecting Hot Spots – A Creative Guide to Testing Fondue Pots
Q1: What exactly are “hot spots” in a fondue pot, and why should I care?
A1: Hot spots are tiny patches within your fondue pot where the heat concentrates unevenly, causing some cheese or chocolate to scorch or bubble too aggressively while other areas barely melt. Imagine a fondue party where parts of your dip are burnt while others sit cold-definitely a no-go for smooth, luscious indulgence!
Q2: How can I creatively test if my fondue pot has hot spots before inviting guests?
A2: Here’s where your inner scientist and artist collide! One playful method is the “Color Swirl Test.” Melt some chocolate or cheese and gently streak in a few drops of food coloring in different spots. Watch as the heat plays with the colors-areas that bubble or caramelize faster show their hot spot secrets in vivid dance. Another cool trick is the “Marble Glide” test: put a few small, heat-safe marbles in the pot with a thin layer of butter or oil and swirl. Where the marbles speed up or roast unevenly-there’s a hotspot’s lair.
Q3: Is there an easy way to spot hot spots without melting anything?
A3: Absolutely! Heat a shallow layer of water in your fondue pot on low to medium heat and observe closely. Bubbles first popping up or faster steam bursts reveal the intimate whispers of hotspots. It’s like watery Morse code for fondue fanatics.
Q4: Can the type of fondue pot affect hot spot formation?
A4: Definitely. Materials like ceramic, stainless steel, and cast iron each play their own symphony of heat conductivity. Ceramic pots often heat slowly and evenly but can have spots depending on thickness, while stainless steel might create hotspots faster due to thin metal walls. Know your pot’s personality to keep your fondue flowing smoothly!
Q5: What’s the best way to fix or minimize hot spots once detected?
A5: Prevention is an art-using a diffuser plate or selecting a pot designed for max heat distribution helps. During the melt, stir frequently, embracing your role as the fondue conductor orchestrating a perfect harmony between heat and dip. Sometimes simply lowering the heat and patience can turn those rogue hot spots into gentle warmth.
Q6: Why is detecting hot spots crucial beyond just taste?
A6: Uneven heat can affect texture, safety, and even the longevity of your fondue pot. Burnt cheese or chocolate isn’t just unhappy on the palate-it can harden on the surface, making cleaning a nightmare and potentially damaging your pot. Detecting hot spots early keeps your fondue parties delicious and your equipment happy.
Q7: Any creative tips for a fun fondue night after mastering hotspot detection?
A7: Turn testing into a game! Invite friends to bring different dips, test their pots for hot spots together, and share quirky “fondue fail” stories. Use colorful ingredients and don’t be afraid to experiment-you might invent the next legendary fusion dip while mastering the science of smooth melting.
This creative Q&A not only guides fondue lovers through the practical steps of detecting and handling hot spots but also adds a sprinkle of fun and artistry to the delicious science of fondue making!
Future Outlook
As the final bubbles burst and your fondue pot glows with perfectly melted goodness, remember that detecting those hidden hot spots is more than just a safety check-it’s an art form. With a little creativity, keen observation, and a dash of patience, you can transform your fondue experience from a simple dip into a seamless, delightful ritual. So next time you gather around that bubbling cauldron, take a moment to test, adjust, and savor the science behind the heat. After all, in the world of fondue, mastering the hot spots is the secret ingredient to melting hearts and elevating every bite. Happy dipping!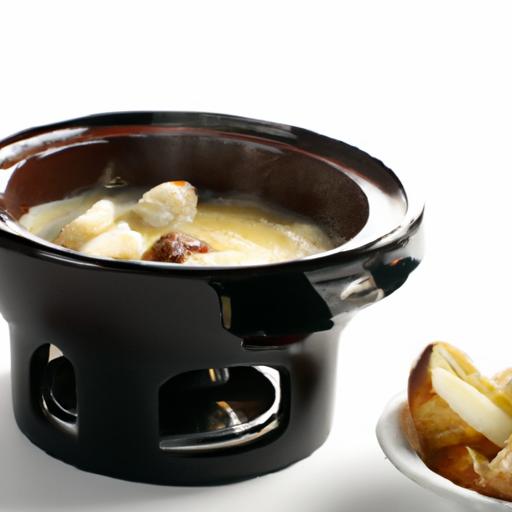


