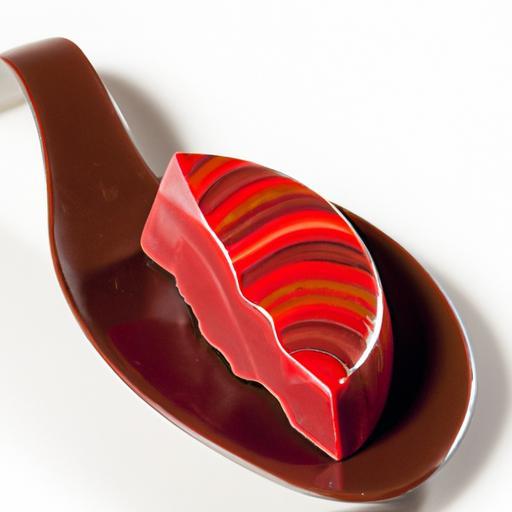
In the world of chocolate, there’s a magical moment when a glossy, perfectly smooth bar or a delicate, crisp-edged bonbon emerges from what seems like alchemy rather than mere cooking. This enchanting process, known as tempering, is the secret handshake between science and artistry that transforms simple melted chocolate into a masterpiece of texture, sheen, and snap. But what exactly is tempering chocolate? Beyond just melting and cooling, tempering is a precise dance of temperature and timing that aligns cocoa butter crystals to unlock chocolate’s finest qualities. Join us as we unravel the mysteries behind this essential technique and discover how mastering tempering can elevate your chocolate creations from ordinary to extraordinary.
Mastering the Art: What Is Tempering Chocolate Exactly? unlocks the secret to transforming ordinary chocolate into a glossy, crisp masterpiece that melts perfectly on the tongue. This culinary technique, steeped in rich history, elevates your chocolate creations with a professional finish, making it indispensable for any chocolatier passionate about precision and beauty.
Prep and Cook Time
- Preparation: 15 minutes
- Tempering: 20 minutes
- Total Time: 35 minutes
Yield
Tempered chocolate amount: Approximately 300 grams (enough for coating or molding small batches)
Difficulty Level
Medium – Requires attention to detail and temperature control, but accessible with practice.
Ingredients
- 300g couverture chocolate (at least 55% cocoa for best tempering results)
Instructions
- Chop the chocolate into small, uniform pieces. This ensures even melting and temperature control.
- Gently melt two-thirds of the chocolate in a heatproof bowl over a simmering water bath (double boiler). Stir constantly to avoid burning, until smooth reaching 45-50°C (113-122°F) for dark chocolate.
- Remove the bowl from heat and add the remaining third of chopped chocolate (called “seeding”). Stir continuously to cool the mixture down to 27-28°C (80-82°F). This step crystallizes the cocoa butter to form stable beta crystals.
- Warm the chocolate back up slightly to the working temperature of 31-32°C (88-90°F). Stir gently and test the consistency.
- Test temper: Spread a small spoonful of chocolate on parchment paper or the edge of a marble slab. It should set within 5 minutes, appearing shiny and snapping cleanly without streaks.
- Use immediately for coating or molding. Keep chocolate at working temperature by placing the bowl on a slightly warm surface or using a controlled warming device to prevent overheating.
Tips for Success
- Use a precision thermometer to monitor temperature closely-accuracy is essential for flawless tempering.
- Avoid moisture: Water causes chocolate to seize. Ensure all utensils and bowls are completely dry.
- Choose couverture chocolate with a higher cocoa butter content, which tempers more reliably and yields a better finish.
- Try alternative tempering methods such as tabling (cooling and manipulating on marble) or using a chocolate tempering machine for larger batches.
- Keep your workspace cool and draft-free-excessive heat or cold can affect crystal formation.
- If chocolate thickens or loses shine, gently reheat carefully to restart tempering – do not exceed max temperatures.
Serving Suggestions
Present your perfectly tempered chocolate as elegant shards sprinkled on a dessert plate, smooth-coated truffles, or as the glossy shell for molded chocolates. Accent with edible gold leaf, crushed nuts, or a light dusting of cocoa powder for an exquisite touch. Serve alongside a bold espresso or a delicate dessert wine to heighten the sensory experience.

Nutritional Information (per 100g)
| Calories | Protein | Carbs | Fat |
|---|---|---|---|
| 550 kcal | 7 g | 45 g | 35 g |
For more advanced chocolate crafting techniques, check out our guide on chocolate molding. To deepen your scientific understanding of cocoa crystallization, explore the comprehensive article on the polymorphic crystallization of cocoa butter.
Q&A
Q&A: Mastering the Art: What Is Tempering Chocolate Exactly?
Q1: What does it mean to temper chocolate?
A1: Tempering chocolate is the magical process of carefully melting and cooling chocolate to stabilize its fat crystals. Think of it as giving chocolate a spa treatment-cooling it down and then warming it up just right-so it ends up shiny, snap-worthy, and perfectly smooth.
Q2: Why can’t I just melt chocolate and pour it?
A2: Melting chocolate without tempering often leads to dull, blotchy, or soft results. Untempered chocolate can bloom, meaning white streaks or spots appear as the cocoa butter separates. Tempering ensures it sets with that irresistible glossy finish and satisfying crunch.
Q3: How does tempering affect the texture?
A3: Tempering aligns the cocoa butter crystals into a stable form. This alignment gives chocolate a crisp snap when broken and a smooth, melt-in-your-mouth feel-qualities chocolate lovers dream about.
Q4: Is tempering a science or an art?
A4: It’s both! Tempering chocolate is a careful dance of temperature control-a blend of precise science and intuitive artistry. Mastery comes from understanding the temperature stages and watching the chocolate’s behavior closely.
Q5: What are the basic temperature steps in tempering?
A5: Typically, tempering involves three temperature phases: heating chocolate to melt all crystals (around 45-50°C/113-122°F), cooling it down to allow stable crystals to form (around 26-28°C/79-82°F), and then gently reheating to working temperature (around 31-32°C/88-90°F) for dark chocolate.
Q6: Can I temper chocolate without fancy equipment?
A6: Absolutely! With a bit of patience, a good thermometer, and techniques like seeding (adding solid chocolate chunks to melted chocolate), even a home cook can temper chocolate beautifully.
Q7: What types of chocolate need tempering?
A7: Chocolate containing cocoa butter-dark, milk, and white chocolates-all benefit from tempering. Compound chocolates with vegetable fats don’t require this process because their fat doesn’t crystallize the same way.
Q8: How can I tell when my chocolate is perfectly tempered?
A8: Perfectly tempered chocolate shines like a mirror, feels smooth to the touch, and cracks crisply when broken. It also sets quickly at room temperature and doesn’t melt too easily when handled.
Q9: What are some creative ways to use tempered chocolate?
A9: Once mastered, tempered chocolate becomes your canvas! Create glossy chocolate bars, stunning decorations, molded candies, elegant truffles, or even chocolate-dipped fruits and nuts that wow at any event.
Q10: Any final tips for mastering tempering?
A10: Patience is your best friend! Use a reliable thermometer, avoid water contact, don’t overheat, and practice regularly. Each batch teaches you something new, bringing you closer to chocolate perfection.
Tempering chocolate isn’t just a technique-it’s an artistry that transforms humble cocoa into an enchanting masterpiece. Ready to start your chocolate adventure?
In Retrospect
As you close the chapter on tempering chocolate, remember that this ancient dance of heat and chill is more than a culinary technique-it’s an art form that transforms mere cocoa into glossy, snap-worthy perfection. Mastering tempering isn’t just about precision; it’s about embracing patience, understanding chocolate’s temperament, and coaxing out its natural brilliance. Whether you’re crafting delicate truffles or sculpting edible masterpieces, the secrets of tempering open the door to cocoa creations that shine with both beauty and flavor. So, next time you melt that bar of chocolate, think of it as a canvas waiting for your skillful touch to bring it to life.


