

In the world of culinary technique, few transformations excite both palate and plate like caramelization. This heat-driven process converts fruit sugars into amber color, concentrated flavor, and intensified aroma.
- Understanding the Flavor Profiles That Emerge When Fruits Caramelize
- The Science Behind Caramelization versus Maillard Reaction
- Recipe: Caramelized Peaches — Practical Steps and Timing
- Tips for Success from an Experienced Pastry Chef
- Common Errors and How to Fix Them
- Serving Suggestions and Pairings
- Nutritional Notes and Storage
- Practical Variations and Fruit Selection
- Related Techniques and Further Reading
- Q&A
- What exactly is caramelization, and why does it matter in cooking fruit?
- How does caramelization differ from roasting or baking?
- Which fruits caramelize best and why?
- Can I caramelize fruit at home without special tools?
- How can I use caramelized fruit beyond desserts?
- Wrapping Up
- Key takeaway: Caramelization deepens sweetness while adding toasty, nutty notes.
- Technique focus: Dry heat, correct temperature, and pan spacing control outcome.
- Best fruits: High-sugar fruits such as peaches, apples, pears, and pineapple respond best.
- Storage: Caramelized fruit keeps 48 hours refrigerated and reheats gently.
Understanding the Flavor Profiles That Emerge When Fruits Caramelize
Caramelization occurs when monosaccharides and disaccharides break down under heat to form new volatile and non-volatile compounds. For a technical primer, read about caramelization, which explains the sequential reactions that create color and complex aromas.
As sugars decompose, they yield hundreds of distinct flavor molecules that taste buttery, toffee-like, and slightly bitter at higher degrees. These compounds interact with natural fruit acids and pectins to balance sweetness and texture.
The Science Behind Caramelization versus Maillard Reaction
Caramelization strictly involves sugars and heat, while the Maillard reaction requires amino acids and reducing sugars, producing different savory notes. Understanding both pathways helps you choose the right method for fruit or savory pairings.
Temperature control distinguishes outcomes: caramelization begins near 110–160°C depending on sugar type, and it accelerates above that range. Therefore, use moderate, steady heat to encourage controlled browning without burning.
Recipe: Caramelized Peaches — Practical Steps and Timing
This recipe demonstrates how controlled caramelization elevates a simple fruit. It focuses on technique, timing, and finishing to keep texture intact while maximizing flavor.
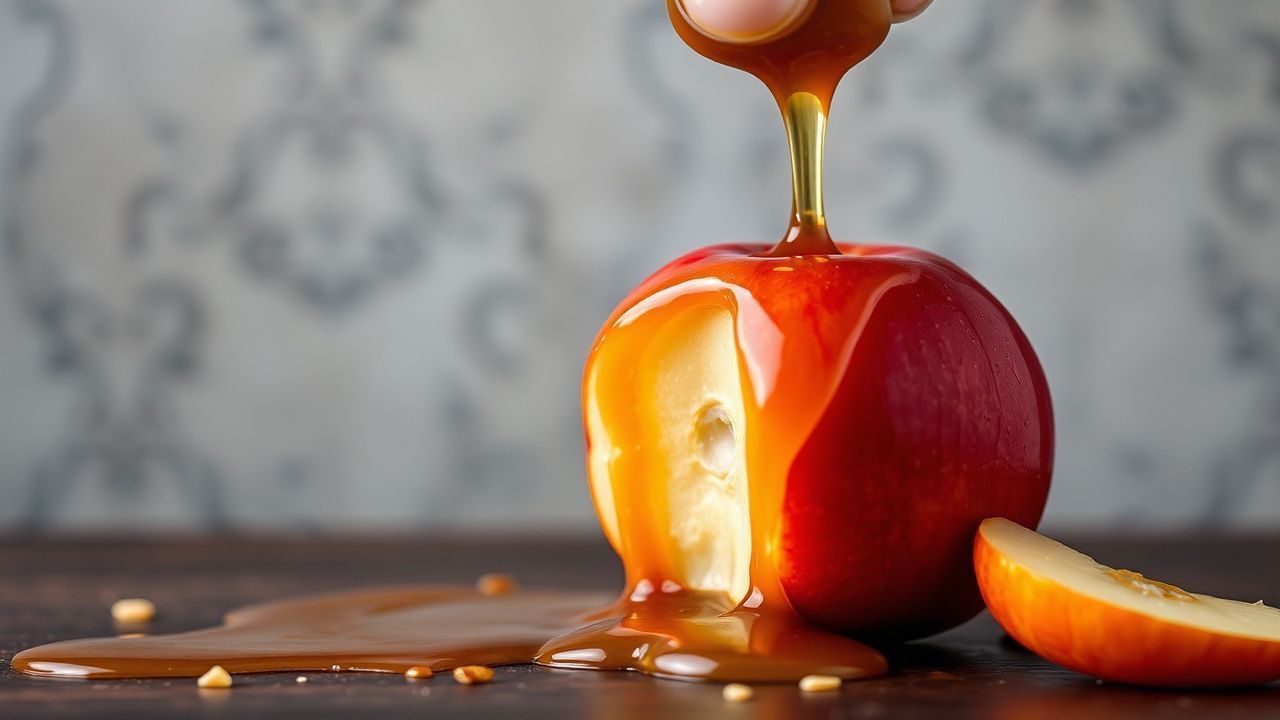
Prep and cook times below assume household stovetop equipment and ripe but firm peaches. For additional fruit-specific guidance, see our internal guide on caramelizing apples which shares related technique adjustments.
Prep and Cook Time
Preparation: 10 minutes. Slice evenly to ensure uniform heat exposure.
Cooking: 15 minutes. Work in batches if necessary to avoid overcrowding.
Yield and Difficulty
Yield: 4 servings. The recipe scales easily for larger portions.
Difficulty: Easy to medium. Key skills are temperature awareness and attentive basting.
Ingredients
4 large ripe peaches, halved and pitted; keep halves consistent in size for even browning.
2 tbsp unsalted butter, 1/4 cup light brown sugar, 1 tsp lemon juice, 1/2 tsp ground cinnamon, pinch of sea salt, optional 1 tsp vanilla extract, and fresh mint to garnish.
Instructions
1. Pat peach halves dry to reduce surface moisture; moisture prevents effective caramel crust formation. Arrange peaches cut-side down in a single layer in a heavy skillet.
2. Melt butter over medium heat until foamy, then stir in brown sugar, lemon juice, cinnamon, and salt to form a bubbling caramel. Add peaches and cook without moving them for 3–4 minutes until a golden crust forms.
3. Gently turn each half and cook an additional 3–4 minutes, basting with the pan sauce until the caramel glazes the fruit. Finish with vanilla in the last minute, if using, and remove from heat while glossy.
Tips for Success from an Experienced Pastry Chef
Choose ripe but firm fruit so pieces hold shape under heat. Fruit that is too soft will disintegrate and produce syrup rather than a caramelized surface.
Control moisture: pat dry, and avoid wet marinades prior to pan work. Steam prevents browning, therefore maintain a dry pan surface and moderate heat.
Do not overcrowd the pan; leave space so each piece sees direct heat. If the pan is crowded, fruit steams and loses the Maillard-like crunch that complements caramel flavors.
Common Errors and How to Fix Them
If fruit releases too much juice and the caramel thins, increase heat briefly while stirring the sauce to reduce liquid, then return fruit to pan to glaze. This rescues texture while concentrating flavor.
If sugar crystallizes, add a small splash of citrus or water and gently warm to dissolve crystals, then proceed with controlled heat. Avoid vigorous stirring that promotes recrystallization.
Serving Suggestions and Pairings
Caramelized fruit pairs excellently with neutral dairy elements like vanilla ice cream or plain Greek yogurt, which highlight contrasting temperatures and textures. For savory balance, serve alongside roasted nuts or a sharp cheese.
Use caramelized peaches as a topping for oatmeal, pancakes, or a slice of warm galette. You can also add them to salads for a sweet-savory counterpoint with bitter greens and vinaigrette.
Nutritional Notes and Storage
Caramelization concentrates sugar but does not add substantial fat beyond the butter used in cooking. Per serving estimates will vary with portion size and added toppings.
Store cooled caramelized fruit in an airtight container in the refrigerator for up to 48 hours. Reheat gently in a skillet or microwave at low power to restore gloss without overcooking.
Practical Variations and Fruit Selection
Use high-sugar, moderate-acid fruits: peach, pear, apple, pineapple, banana, and fig respond predictably. Each fruit requires small timing adjustments due to water content and cell structure.
For pineapple, increase heat slightly and shorten contact time to avoid drying. For apples and pears, a slightly longer cook at moderate heat brings out caramel depth while preserving structure.
Related Techniques and Further Reading
Complement your caramelization skills by understanding sugar chemistry and kitchen heat management. Review basic information about common sweeteners at sugar and practical cooking principles at cooking.
For technique cross-references within our kitchen guides, see the internal recipe for caramelized peaches recipe and the method notes in fruit-cooking techniques to refine timing by fruit type.
Q&A
Q&A: Unlocking Sweet Science – How Caramelization Transforms Fruit
What exactly is caramelization, and why does it matter in cooking fruit?
Caramelization is the thermal decomposition of sugars that produces new flavor and color compounds. It matters because it enhances natural sweetness and creates aromatic complexity that raw fruit does not exhibit.
How does caramelization differ from roasting or baking?
Roasting and baking often invoke caramelization as part of a larger process. However, caramelization specifically targets sugar breakdown, while baking may combine Maillard reactions, moisture changes, and structural cooking of the whole fruit.
Which fruits caramelize best and why?
Fruits with higher sugar content and moderate acidity caramelize best because they supply substrate and pH balance for flavorful browning. Apples, pears, peaches, pineapple, figs, and bananas are reliable choices.
Can I caramelize fruit at home without special tools?
Yes. A heavy skillet, moderate stovetop heat, and attention are sufficient. Use a torch only for surface finishing; it is not required for successful caramelization.
How can I use caramelized fruit beyond desserts?
Caramelized fruit pairs well with cheeses, roasted meats, grain bowls, and salads to introduce concentrated sweetness and toasty notes that balance savory components. Use it to add depth to marinades, glazes, or composed plates.
Wrapping Up
Caramelization turns simple fruit into something richer by transforming sugars into complex flavor and color compounds. Apply temperature control, proper pan technique, and fruit selection to achieve consistent results.
Practice with small batches and observe each stage of browning; with experience, you will time caramelization to match texture and flavor goals. Enjoy experimenting and refining your approach.
See also: Caramelization

