

In the world of cooking, moisture is more than just a liquid-it’s the silent artist that shapes every bite, turning ordinary dishes into culinary masterpieces. Basting, the age-old technique of spooning or brushing liquids over food during cooking, holds the secret to unlocking juiciness, flavor, and that coveted golden crust. But beyond the simple act of wetting the surface lies a transformative magic: moisture orchestrates a perfect harmony between heat and texture, coaxing meats to tenderness and vegetables to vibrant succulence. Join us as we dive into the science and subtle artistry of basting, revealing how a little moisture can elevate your cooking from good to unforgettable.
- The Science Behind Basting: Why Moisture is a Game Changer
- Choosing the Perfect Basting Liquid
- Tips for Flavorful and Juicy Results
- Timing and Technique: How to Baste Like a Pro Without Losing Heat
- Common Mistakes to Avoid When Basting for Maximum Moisture Retention
- Prep and Cook Time
- Yield
- Difficulty Level
- Ingredients
- Instructions
- Chef’s Notes & Tips for Success
- Serving Suggestions
- Q&A
- In Summary
The Science Behind Basting: Why Moisture is a Game Changer
Basting secrets unlock the true potential of your culinary creations, turning a simple roast or grilled dish into a juicy, flavorful masterpiece. The key lies in the intimate relationship between moisture and heat – by continuously coating your protein or vegetables with liquid, you prevent drying, enhance caramelization, and build complex layers of taste.
Choosing the Perfect Basting Liquid
Not all liquids are created equal when it comes to basting. Classic choices like butter and olive oil provide richness and help brown the surface beautifully. For an additional flavor punch, liquids infused with herbs, garlic, or citrus infuse every bite with aromatic complexity. Alternatively, fruit juices or broths add subtle sweetness and umami, perfect for poultry or pork.
Tips for Flavorful and Juicy Results
- Balance fat and acidity: Combine a bit of fat like melted butter with acidic ingredients such as lemon juice or vinegar to tenderize and amplify taste.
- Warm your basting liquid: Cold liquid will lower the pan’s temperature and interrupt cooking, so keep it warm in a small saucepan nearby.
- Use fresh herbs and aromatics: Adding rosemary, thyme, garlic, or shallots right before basting intensifies flavor and adds a fresh pop.
Timing and Technique: How to Baste Like a Pro Without Losing Heat
Timing is everything when mastering these basting secrets. Begin basting once the surface develops a golden crust, usually after 10-15 minutes of cooking. Frequent basting every 5-7 minutes helps maintain moisture but avoid overdoing it-lifting the lid or opening the oven door too often causes temperature drops.
Use a long-handled spoon or a bulb baster for precision pouring. Tilt your pan to pool the juices at one side, and gently spoon it over your food. This gentle, rhythmic motion ensures every bite is saturated in luscious juices and enhances the Maillard reaction for perfect browning.
Common Mistakes to Avoid When Basting for Maximum Moisture Retention
- Don’t baste cold: Always keep your basting liquid warm to avoid cooling the cooking surface.
- Avoid excessive opening of the oven/grill: Repeated temperature drops can disrupt cooking and dry out your dish.
- Don’t over-baste: Too much moisture on the surface can prevent browning, leaving a soggy texture.
- Don’t neglect seasoning your baste: A simple salted liquid will do little; incorporate herbs, citrus, or spices for maximum flavor.
Prep and Cook Time
- Prep time: 15 minutes
- Cook time: 45 minutes (dependent on dish and size)
Yield
Serves 4-6, depending on the recipe
Difficulty Level
Medium – requires attention to timing and temperature control
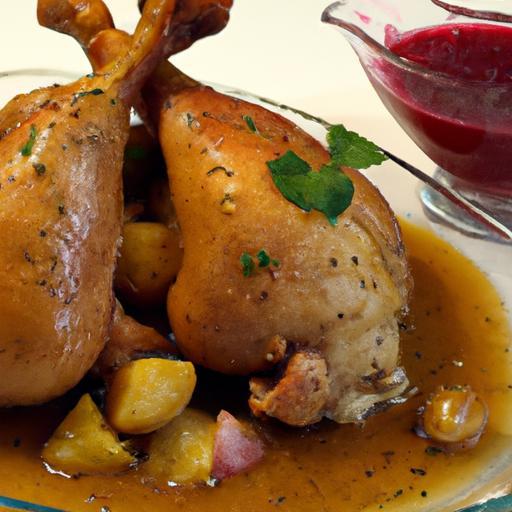
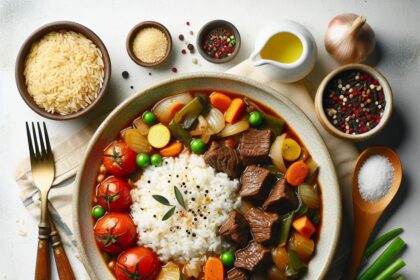
Ingredients
- 4 tbsp unsalted butter, melted
- 1/4 cup chicken broth
- 2 tbsp fresh lemon juice
- 2 cloves garlic, minced
- 2 tbsp fresh rosemary, chopped
- Salt and freshly ground black pepper, to taste
- Optional: 1 tbsp honey or maple syrup for sweetness
Instructions
- Prepare your basting liquid: In a small saucepan, gently warm the butter, chicken broth, lemon juice, garlic, rosemary, salt, and pepper. Keep it warm but avoid boiling.
- Preheat your oven or grill: Aim for a steady temperature of 375°F (190°C) to allow slow caramelization and even cooking.
- Start cooking your main dish: Place your meat or vegetables on a roasting pan or grill pan and cook uncovered for the first 15 minutes to develop a crust.
- Baste carefully: Using a spoon or bulb baster, pour the warm basting liquid gently over the food every 5-7 minutes. Tilt the pan if necessary to pool the liquid.
- Rotate and monitor: Turn your dish midway for even browning and continue basting without opening the oven door more than needed.
- Rest before serving: Once cooked to your desired doneness, let the food rest for 5-10 minutes, allowing the juices to redistribute for maximum moisture retention.
Chef’s Notes & Tips for Success
- For a vegetarian friendly option, swap chicken broth with a rich vegetable broth.
- Experiment with infused oils such as chili or garlic for unique flavor profiles.
- If cooking delicate fish, reduce basting frequency to avoid breaking the flesh.
- Make-ahead tip: Prepare your basting liquid a day in advance and gently rewarm before use to save time.
- Use kitchen thermometers to avoid overcooking and drying out your dish.
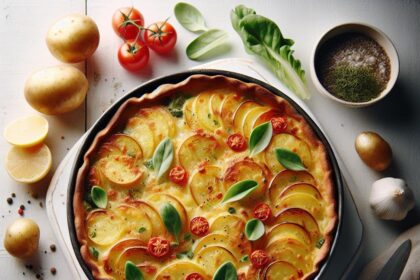
Serving Suggestions
Serve basted meats garnished with fresh thyme or chopped parsley and a light drizzle of the seasoned basting liquid. Pair with roasted root vegetables or a crisp salad tossed in a lemon vinaigrette for a harmonious balance of flavors. For extra elegance, add a sprinkle of toasted nuts or a hint of freshly grated lemon zest atop your plate.
| Nutrient | Per Serving |
|---|---|
| Calories | 220 |
| Protein | 25g |
| Carbohydrates | 3g |
| Fat | 12g |
Discover more advanced basting techniques here
For additional scientific insight on moisture retention, visit the ScienceDaily article on moisture and meat cooking.

Q&A
Q&A: Basting Secrets – How Moisture Transforms Your Cooking
Q1: What exactly is basting, and why do chefs swear by it?
A1: Basting is the art of spooning or brushing liquid-like juices, melted butter, or marinade-over your food as it cooks. This simple act keeps the surface moist, enhances flavor, and helps build that irresistible golden crust everyone loves. Think of it as a gentle mist that nudges your dish from ordinary to extraordinary.
Q2: How does moisture affect the texture of meats during cooking?
A2: Moisture acts like a tender hug for your meat. It prevents the outer layers from drying out and forming a hard shell too quickly. By continuously basting, you encourage even cooking and preserve juiciness, resulting in a tender, succulent bite that practically melts on your tongue.
Q3: Is basting only for meats, or can it work its magic on other dishes?
A3: Basting is a versatile technique that works wonders beyond just meat. Roasted vegetables, poultry, and even some baked goods benefit from periodic brushing or spooning of flavorful liquids. It adds a glossy sheen, locks in moisture, and layers in subtle nuances of flavor.
Q4: What types of liquids make the best basting mediums?
A4: The best bastes are a harmonious blend of fat and flavor. Melted butter, flavorful stocks, pan drippings, infused oils, and even wine or citrus juices can be used. The goal is to enrich the food’s natural taste while keeping it moist and glossy-think of it as an edible spa treatment.
Q5: Can basting help prevent burnt or overcooked food?
A5: Absolutely! Basting acts like a protective shield, slowing down surface drying and burning. It cools the outer layer slightly while delivering flavorful moisture, helping you avoid that bitter char and instead achieve a beautifully caramelized finish.
Q6: How often should you baste during cooking?
A6: Timing depends on the dish and cooking method, but a good rule of thumb is every 15 to 20 minutes. This interval is frequent enough to keep moisture levels up without interrupting cooking or dropping oven temperatures too much. For quicker cooks, baste once or twice at critical moments.
Q7: What’s the secret to basting without losing heat or extending cooking time?
A7: Warm your basting liquids before applying them, and use a long-handled spoon or brush to minimize oven door openings. Some chefs baste swiftly and efficiently, turning it into a rhythmic dance with the heat-this helps maintain temperature and keeps cooking times on track.
Q8: Can basting add flavor layers besides moisture?
A8: Definitely! Each baste is an opportunity to infuse complexity-herbs, spices, citrus zest, garlic, or honey can be incorporated into your basting liquid. With every spoonful, flavor seeps deeper, creating a rich, multi-dimensional taste experience.
Q9: What common mistakes should be avoided when basting?
A9: Over-basting or opening the oven too often can cause heat loss and uneven cooking. Using cold liquids straight from the fridge can shock your food and lower oven temperature. Also, avoid using too watery a baste, which can dilute flavors instead of enhancing them.
Q10: Can I baste in a grill or on a barbecue?
A10: You bet! Basting on a grill is a game-changer, especially for thicker cuts. Just be mindful of flare-ups-apply your baste carefully and keep a spray bottle handy for grease fires. It’s a surefire way to turn up the juiciness and flavor outdoors.
Basting is more than a kitchen chore-it’s a secret weapon that transforms ordinary recipes into luscious, mouthwatering masterpieces. With moisture as your ally, every dish can shine with soaked-in flavor and tender textures that impress from the first bite to the last.
In Summary
As the final droplets of flavorful liquid brush over your dish, remember that basting is more than a simple technique-it’s an art of transformation. By inviting moisture to weave its magic, you unlock juiciness, deepen flavors, and craft textures that sing with every bite. Whether you’re roasting, grilling, or pan-searing, this age-old secret elevates cooking from routine to remarkable. So next time you baste, do it with intention and watch as moisture breathes life into your culinary creations, turning the ordinary into the extraordinary.


