

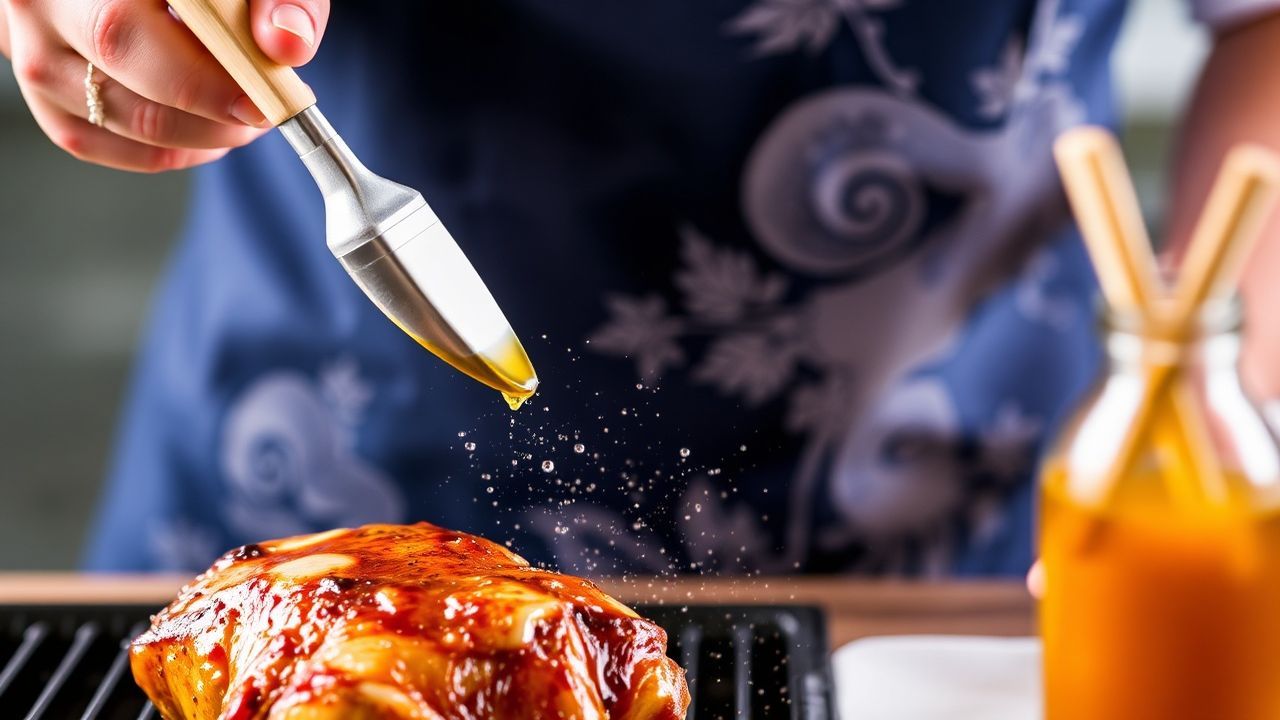
Basting is the simple, repeatable action that preserves juiciness and builds layered flavor during roasting, grilling, and pan-searing. When applied with control, moisture protects the surface, encourages even heat transfer, and enhances browning for a superior texture.
- The Science Behind Basting: Why Moisture is a breakthrough
- Timing and Technique: How to Baste Like a Pro Without Losing Heat
- Common Mistakes to Avoid When Basting for Maximum Moisture Retention
- Prep and Cook Time
- Yield
- Difficulty Level
- Ingredients
- Instructions
- Chef’s Notes & Tips for Success
- Serving Suggestions
- References and Further Reading
- FAQ
- Basting preserves moisture and delays surface drying for tender results.
- Warm, fat-based bastes improve browning and carry aromatic ingredients.
- Timing matters: baste after initial crust formation and at steady intervals.
- Tools and motion determine coverage and speed without losing oven heat.
The Science Behind Basting: Why Moisture is a breakthrough
Basting affects heat flow and surface chemistry. By reintroducing liquid and fat to the outer layers, you slow surface dehydration while promoting reactions that generate flavor and color.
Specifically, controlled moisture supports the Maillard reaction and limits hard surface formation that blocks even cooking. Both outcomes yield a tender interior and well-browned exterior.
Choosing the Perfect Basting Liquid
Choose a base of fat plus a flavorful carrier. Melted unsalted butter or neutral oil provides lubricity and heat transfer, while stocks or citrus add taste and acidity to balance richness.
When you add sugar or syrups, monitor color closely because sugars accelerate caramelization. Use less sweet ingredients for long profiles and add small amounts near the end for glaze-like gloss.
Tips for Flavorful and Juicy Results
Balance is the goal. Combine fat, acid, and aromatics so each baste layers flavor without overpowering the protein.
- Warm your baste: Keep it at serving temperature to avoid dropping oven heat.
- Add aromatics late: Fresh herbs and citrus zest in the final baste preserve volatile flavors.
- Control sweetness: Use honey or maple sparingly to prevent excessive browning.
Timing and Technique: How to Baste Like a Pro Without Losing Heat
Start basting after the surface has set and a light crust forms. For many roasts that takes 10–20 minutes at moderate oven temperature; for quick sears reduce frequency.
Baste at consistent intervals to maintain surface moisture but avoid continuous wetting that prevents browning. Frequent, brief basting keeps temperatures steady and encourages even color development.
Tools and Motion
Use a long-handled spoon, ladle, or bulb baster to reach into deep pans without tilting the oven or grill excessively. A steady, rhythmic pour covers the surface evenly.
Tilt the pan to gather juices and spoon over the highest points. This motion increases contact between liquid and meat, improving heat transfer and glazing the surface.
Common Mistakes to Avoid When Basting for Maximum Moisture Retention
Avoid common errors that undo the benefit of basting. The most frequent mistakes are temperature shock, over-basting, and using baste mixtures that interfere with browning.
Cold liquids lower the pan temperature and stall reactions. Opening the oven repeatedly creates heat loss. Excessively watery bastes dilute surface flavors and slow Maillard chemistry.
Practical fixes for each mistake
If you see soggy surfaces, reduce basting frequency and raise pan temperature slightly to encourage drying between applications.
For flare-ups on the grill, apply baste quickly and keep a spray bottle of water nearby. Use oil-based bastes sparingly when grilling over direct flame.
Prep and Cook Time
Estimate times based on cut, size, and method. Basting adds minimal time if you plan intervals and keep liquids warm.
Typical guideline: Prep: 10–20 minutes. Cook: 30–90 minutes depending on protein and desired doneness.
- Prep time: 15 minutes
- Cook time: 45 minutes (dependent on dish and size)
Yield
Serves 4–6 as written. Adjust the basting volume proportionally for larger pieces.
For small roasts or poultry, plan 1–1.5 tablespoons of baste per baste cycle; larger cuts may need more to maintain surface coverage.
Difficulty Level
Medium. The technique requires attention to timing, temperature control, and choice of baste. Those skills are transferable to many cooking methods.
Use a probe thermometer to avoid overcooking and to decide when to rest—this preserves moisture and ensures consistent doneness.
Ingredients
The following amounts make a versatile basting liquid for a mid-sized roast or poultry. Scale as needed and keep the mix warm during cooking.
- 4 tbsp unsalted butter, melted
- 1/4 cup chicken broth
- 2 tbsp fresh lemon juice
- 2 cloves garlic, minced
- 2 tbsp fresh rosemary, chopped
- Salt and freshly ground black pepper, to taste
- Optional: 1 tbsp honey or maple syrup for sweetness
Instructions
Follow these steps for consistent results. Each step focuses on preserving moisture while building flavor through controlled heat and repeated glazing.
- Prepare the basting liquid: Gently warm butter, broth, lemon, garlic, rosemary, salt, and pepper in a small saucepan. Hold warm, do not boil.
- Preheat: Set oven or grill to 375°F (190°C) for even caramelization without too-rapid drying.
- Initiate cooking: Place protein or vegetables on a roasting pan and cook uncovered for 10–20 minutes to develop a crust.
- Baste carefully: Use a long-handled spoon or baster to apply warm liquid every 5–15 minutes depending on the item and method.
- Rotate and monitor: Turn the dish midway for even color. Limit door openings to reduce temperature fluctuations.
- Rest before serving: Let the cooked food rest 5–10 minutes to redistribute juices for maximum tenderness.
Chef’s Notes & Tips for Success
Small technique changes produce large improvements. Use these notes to refine your routine and adapt for specific proteins or vegetables.
- Swap chicken broth for a rich vegetable stock for vegetarian options.
- Infuse oil with chili or garlic for a different flavor profile on the grill.
- For delicate fish, baste once or twice near the end to avoid breaking the flesh.
- Prepare the basting liquid a day ahead and rewarm gently to save time on service day.
Serving Suggestions
Finish basted meats with a final spoonful of warm baste and a sprinkle of fresh herbs to brighten the plate. Presentation matters: glossy surfaces signal succulence.
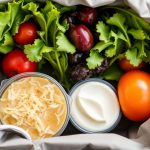
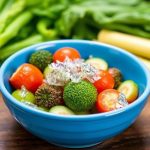
Pair basted proteins with roasted root vegetables or a crisp salad dressed with lemon vinaigrette for contrast. For texture, add toasted nuts or fresh citrus zest as a final touch.
| Nutrient | Per Serving |
|---|---|
| Calories | 220 |
| Protein | 25g |
| Carbohydrates | 3g |
| Fat | 12g |
For additional technique practice, review our internal guides on how to master basting techniques and check the step-by-step notes in our roasting tips collection.
References and Further Reading
For foundational chemistry and cooking science, consult the following resources that explain the reactions and methods discussed above.
- Maillard reaction — the chemical pathway that creates browning and complex flavor.
- Caramelization — sugar-driven browning relevant when using honey or syrups.
- Grilling — method notes for basting over open flame and managing flare-ups.
- Roasting — high-heat, dry-heat technique where basting most often applies.
- Butter — why this fat carries flavor and browns surfaces effectively.
FAQ
How often should I baste different proteins?
Frequency depends on size and method. For large roasts, baste every 10–15 minutes after the crust forms. For quick-roasted poultry, basting every 5–10 minutes during the middle phase works well. Fish benefits from only one or two applications near the end.
Can I use pan drippings as a baste?
Yes. Pan drippings concentrate flavor and natural juices. Strain fat and adjust seasoning. Warm the collected juices before applying to avoid temperature loss.
Will basting make meats too salty?
Basting itself does not increase saltiness unless your baste contains high-sodium stock. Taste your baste and the meat, then adjust salt sparingly to maintain balance.
Is basting necessary for every roast?
No. Slow-roasted, tightly wrapped, or braised dishes retain moisture through other means and may not benefit from frequent basting. Use the technique when you want a glossy finish, layered aromas, and improved browning.
What tools work best for even coverage?
Long-handled spoons, basters, and small ladles provide speed and control. Use a baster for focused application and a spoon for broader coverage. Keep a small heatproof pot near your station to hold warm baste.
Basting is a high-return technique: a modest investment in attention yields visibly better texture and flavor. Apply warm, balanced bastes and consistent motion to preserve juices, enhance browning, and deliver more reliable results across proteins and vegetables.
See also: Basting
