

There’s nothing quite as decadent and satisfying as a perfectly smooth, silky cheesecake-creamy and rich, with just the right balance of sweetness and tang. Yet, for many bakers, the path to cheesecake perfection is often marred by the dreaded cracks that mar its delicate surface. Fear not, dessert enthusiasts! Behind every flawless cheesecake lies a treasure trove of baking secrets and expert techniques designed to keep your creation pristine and irresistibly inviting. In this article, we’ll unlock the mysteries of crack-free cheesecakes, sharing insider tips and foolproof methods to help you achieve that picture-perfect slice every time. Get ready to transform your cheesecake game from shaky to spectacular!
Crack-Free Cheesecake Secrets start by unraveling the delicate balance between texture, technique, and ingredient selection. This luscious dessert traces its roots to ancient Greece, evolving into a beloved classic for any celebration. Achieving a flawlessly smooth, silky cheesecake means understanding why cracks happen and mastering subtle adjustments that elevate your baking experience from good to extraordinary. Let’s explore these essentials so your cheesecake emerges perfectly creamy and irresistibly beautiful every time.
Prep and Cook Time
- Preparation: 20 minutes
- Baking: 1 hour 10 minutes
- Cooling: 4 hours (including refrigeration)
Yield
Serves 12 generous slices
Difficulty Level
Medium – approachable for bakers with some experience, with tips to ensure success
Ingredients
- 900g full-fat cream cheese, softened to room temperature
- 1 1/4 cups granulated sugar
- 3 large eggs, at room temperature
- 1 cup sour cream, room temperature
- 2 tsp pure vanilla extract
- 2 tbsp all-purpose flour, sifted
- 1/4 tsp fine sea salt
- 1 tbsp lemon juice (freshly squeezed)
- Butter for greasing the pan
- 1 9-inch springform pan
Instructions
- Prep your pan: Generously butter your 9-inch springform pan, then line the bottom with parchment paper for easy removal. This prevents sticking and helps the crust set evenly.
- Beat cream cheese: Using a stand mixer or electric hand mixer, whip the softened cream cheese on medium speed until completely smooth and without lumps, about 3 to 4 minutes. This step is crucial for that silky texture.
- Add sugar gradually: With the mixer on low, slowly incorporate the granulated sugar, ensuring full integration. Stop and scrape the bowl if necessary to avoid gritty spots.
- Blend eggs gently: Add eggs one at a time, mixing just until combined after each addition. Overbeating here introduces air, leading to cracks during baking.
- Mix in sour cream and vanilla: Fold in the sour cream and vanilla extract using a spatula or low mixer speed. These create moisture and richness.
- Sift and add flour and salt: Incorporate the flour and salt, combined and sifted beforehand, to stabilize the batter without toughening it.
- Final flavor touch: Stir in lemon juice to balance richness with a subtle zing, enhancing overall flavor depth.
- Bake in a water bath: Pour batter into the pan, then place the pan inside a larger baking dish. Pour boiling water into the outer dish until halfway up the sides of the springform pan. This gentle heat prevents rapid bubbles that cause cracks.
- Bake carefully: Bake at 325°F (163°C) for 65-70 minutes. The cheesecake is done when the edges are set but the center still jiggles slightly-residual heat will finish cooking.
- Cool gradually: Turn off the oven and crack the door open to allow the cheesecake to cool inside for 1 hour. Rapid temperature changes cause cracking.
- Chill thoroughly: Refrigerate uncovered for at least 4 hours, preferably overnight, to let flavors meld and texture firm beautifully.
Tips for Success
- Ingredient temperature matters: Room temperature eggs, cream cheese, and sour cream ensure even mixing and prevent clumps.
- Low-speed mixing: Overbeating incorporates air, which disrupts structure and creates cracks.
- Water bath technique: Use a tightly wrapped foil around the bottom of your springform pan to avoid water leaks.
- Oven temperature accuracy: Use an oven thermometer to maintain steady heat; fluctuations lead to imperfections.
- Make ahead: Cheesecake flavors improve with time; bake a day before serving and store covered in the fridge.
- Troubleshooting: If cracks appear, fill them with a dollop of sour cream mixed with a teaspoon of sugar and lightly broil for a minute for a seamless fix.
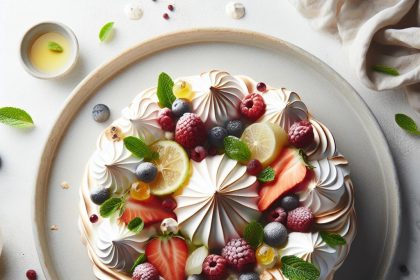
Serving Suggestions
Present your cheesecake on a beautiful platter, topped with a delicate dusting of powdered sugar and fresh berries such as raspberries or blueberries for a pop of color and tartness. A drizzle of homemade berry coulis or a dollop of whipped cream adds luxurious flair. For a textural contrast, sprinkle crushed pistachios or toasted almonds around the edges. Pair with a glass of lightly chilled dessert wine or fresh espresso for a memorable dining experience.

| Nutrient | Per Serving |
|---|---|
| Calories | 420 |
| Protein | 7g |
| Carbohydrates | 32g |
| Fat | 30g |
For related techniques on baking desserts with precision, check our Perfect Baking Techniques article. For detailed scientific background on dairy chemistry, visit the International Dairy Science Center.
Q&A
Q&A: Crack-Free Cheesecake Secrets – Smooth, Silky, Perfect Every Time
Q1: Why does my cheesecake always crack on the surface?
A: Cheesecake cracks happen primarily due to rapid temperature changes, overbaking, or too much air incorporated into the batter. When the outer edge sets faster than the center, the center expands and creates cracks. Overmixing can whip in air bubbles that burst during baking, ruining the smooth texture.
Q2: What’s the secret to a silky, crack-free cheesecake texture?
A: The magic lies in gentle mixing to avoid over-incorporating air, using room temperature ingredients for even blending, and baking with precise, low heat – often in a water bath. This slow, moist cooking environment prevents sudden temperature shifts and keeps the cheesecake creamy and smooth.
Q3: How does baking in a water bath help prevent cracks?
A: A water bath (bain-marie) surrounds your cheesecake pan with gentle, moist heat, reducing the risk of the edges overcooking before the center is set. It creates a steamy oven atmosphere that promotes even baking, which is crucial for that flawless, crack-free surface.
Q4: Can I fix cracks if they appear after baking?
A: Absolutely. One creative trick is to cover cracks with toppings like fruit compotes, chocolate ganache, or whipped cream. For a more seamless fix, before serving, you can gently smooth cracks with a thin layer of sour cream frosting or a light glaze to restore a pristine finish.
Q5: How important is chilling, and what’s the best way to do it?
A: Chilling is essential! Once baked, cool your cheesecake gradually: first at room temperature, then refrigerated for at least 4 hours or overnight. This gradual cooling solidifies the texture and prevents cracking from rapid temperature changes. Wrap your cheesecake loosely with plastic wrap to keep it moist.
Q6: Are there ingredient swaps that help in crack prevention?
A: Yes! Incorporating ingredients like sour cream, heavy cream, or even a bit of cornstarch can create a more tender cheesecake that resists cracking. Sour cream adds moisture and tang, while cornstarch stabilizes the batter’s structure without making it dense.
Q7: Any tips for mixing the batter perfectly?
A: Mix just until combined! Use an electric mixer on low speed or mix by hand to avoid whipping air. Start by blending the cream cheese until smooth, then gradually add sugar, eggs, and flavorings. Keep the batter dense but silky smooth – that’s the key to no cracks.
Q8: What oven temperature should I use for the best result?
A: Bake at a low temperature, typically around 325°F (160°C). High heat causes the cheesecake to puff up and crack as it cools. If your oven runs hot, consider lowering the temperature slightly and extending the baking time for gentle, even cooking.
Q9: Can I use a springform pan for crack-free cheesecakes? Any tips?
A: A springform pan is a must-have! To prevent cracks and leaks, wrap the pan’s base with foil when using a water bath. This prevents water from seeping in and ensures even heat distribution. Also, avoid overfilling-leave some room for the batter to rise gently.
Q10: Any final pro tips for cheesecake perfection?
A: Treat your cheesecake like a delicate souffle-handle with care and patience. Don’t rush cooling or cutting into it too soon. Remember, practice makes perfect; every oven and ingredient batch behaves slightly differently. With these secrets in hand, your next cheesecake will be a silky masterpiece, free of cracks and full of wow!
In Retrospect
Achieving that flawless, crack-free cheesecake isn’t just a stroke of luck-it’s a blend of art and science, patience and precision. Armed with these secrets, you can confidently transform your next baking adventure into a masterpiece of smooth, silky perfection. Remember, every crack-free cheesecake tells a story of thoughtful preparation and gentle care. So go ahead, bake boldly, and let your cheesecake shine-perfect every time, just like a true culinary work of art.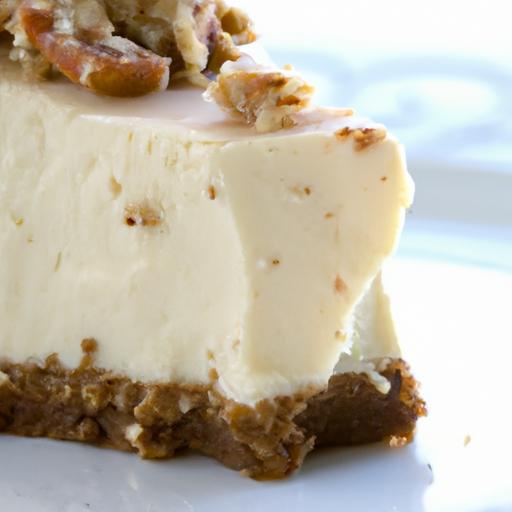


