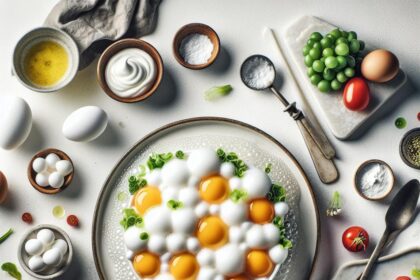
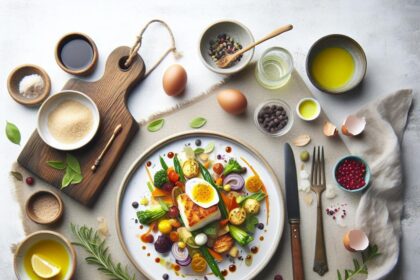
In the realm of modern gastronomy, few techniques captivate the senses quite like the art of creating culinary foams-those ethereal, cloud-like textures that float delicately atop dishes, transforming ordinary ingredients into extraordinary experiences. Welcome to “Foam Mastery: Crafting Stable Culinary Clouds with Ease,” where science meets creativity and the magic of molecular gastronomy unfolds in your kitchen. Whether you’re a seasoned chef or an enthusiastic home cook, mastering the subtle alchemy behind stable foams unlocks a new dimension of flavor and presentation. Join us as we dive into the secrets of texture, stability, and technique, revealing how to effortlessly turn liquids into luscious, airy masterpieces that elevate every bite.
Foam Mastery: Understanding the Science Behind Stable Culinary Foams
Foam mastery begins at the fascinating crossroads of science and art, where culinary clouds are crafted with precision and passion. The magic behind stable foams lies in the delicate balance of surface tension, protein structures, and the right choice of ingredients. Whether you’re elevating soups, desserts, or cocktails, understanding how to create lasting texture opens a world of textures that delight both the eye and palate.
Prep and Cook Time
- Preparation: 10 minutes
- Foaming Process: 5-7 minutes
- Total Time: 15-17 minutes
Yield
- Makes approximately 1 cup of stable foam, enough to top 4 servings
Difficulty Level
- Intermediate to Advanced – mastering techniques and ingredient selection is key
Ingredients
- 1 cup whole milk or alternative milk (for a lighter foam)
- 2 teaspoons soy lecithin – a natural emulsifier for foam stability
- 1 tablespoon neutral-flavored oil (e.g., grapeseed oil) – enhances film flexibility
- Pinch of salt – balances taste
- Flavor additions (optional): 1 teaspoon vanilla extract or citrus zest
Instructions
- Chill your bowl and whisk or immersion blender attachment. Cold equipment helps maintain foam structure.
- Pour the milk into a wide, shallow container to maximize surface area for aeration.
- Sprinkle the soy lecithin gently over the surface; allow it to hydrate for 1-2 minutes. This critical step strengthens the foam’s network.
- Add the neutral oil and a pinch of salt, stirring gently to combine without breaking the surface tension.
- Use an immersion blender or hand whisk positioned just below the surface to start aerating slowly; once bubbles form, increase speed to incorporate air without overshooting.
- Continue whisking until a stable, glossy foam forms on the surface, roughly 5-7 minutes. Look for a cloud-like texture that holds shape yet feels light and creamy.
- Gently skim the foam using a slotted spoon or spatula and transfer immediately to your serving vessel to prevent collapse.
Chef’s Notes: Tips for Success
- Ingredient choice is critical: Using fresh, cold dairy or plant-based milks with higher protein content will help stabilize the foam. Adjust lecithin percentage if using non-dairy milk for better results.
- Lecithin timing: Always hydrate soy lecithin before aeration; adding it directly to warm or steaming liquids weakens foam structure.
- Controlling temperature: Cool ingredients encourage denser foams; warm liquids tend to dissipate bubbles quickly.
- Substitutions: If lecithin is unavailable, egg whites or aquafaba (chickpea liquid) can create airy foams but cook/serve immediately to avoid collapse.
- Troubleshooting: If bubbles are large and unstable, reduce whisk speed or increase lecithin slightly. For thin foams, ensure you’re aerating at the surface rather than deep mixing.
Serving Suggestions
- Spoon stable milk foam atop chilled soups such as chilled pea or cucumber for a luxurious textural contrast.
- Garnish desserts like lemon tarts or chocolate mousse with a delicate cloud of flavored foam for an ethereal finish.
- Use the foam as a cap for espresso or craft cocktails; dust with cinnamon or cocoa powder for visual drama.
- Pair with edible flowers or microgreens to create elegant plating that showcases both texture and color.
A Deeper Dive: Techniques and Tools for Effortless Foam Perfection
True foam mastery also requires understanding your toolkit. An immersion blender with a high-speed, narrow blade attachment is the preferred method for consistent aeration. Whisks offer more control for smaller volumes, while siphon chargers produce ultra-fine bubbles but demand practice and specific ingredients.
Maintain steady, gradual motion to prevent over-aeration, which can cause foam to break down prematurely. Employing a shallow vessel increases the interface where gas meets liquid, enhancing bubble formation. Above all, patience and precision are your allies on this cloud-crafting journey.
Troubleshooting Common Challenges in Foam Creation
- Foam collapses too quickly: Double-check ingredient temperatures and aeration speed; incorporate lecithin or stabilizers carefully.
- Large, unstable bubbles: Blend slower and reduce oil content; large bubbles mean weak surface films.
- Foam sinks immediately: Ensure proper hydration of emulsifiers and avoid overmixing.
- Flavor muted or off: Use neutral oils and fresh ingredients; adjust seasoning post-foam creation rather than before.
| Nutrient | Per Serving (1/4 cup foam) |
|---|---|
| Calories | 35 kcal |
| Protein | 1.2 g |
| Carbohydrates | 2.8 g |
| Fat | 2.0 g |
For an in-depth exploration of emulsification science and ingredient roles, visit the Science Daily’s Food Chemistry section.
Unlock more transformative culinary techniques in our molecular gastronomy guide and elevate your kitchen creativity today.

Q&A
Q&A: Foam Mastery – Crafting Stable Culinary Clouds with Ease
Q1: What exactly is culinary foam, and why has it become a popular technique in modern cooking?
A: Culinary foam is a delicate, airy texture created by incorporating gas into a flavorful liquid, transforming it into a light, cloud-like addition to dishes and drinks. It’s beloved in modern cuisine for its ability to elevate flavor, add a surprising texture, and provide an ethereal elegance that captivates both the eyes and palate.
Q2: How do you achieve that perfectly stable foam without it collapsing quickly?
A: Stability comes down to a few magic ingredients: the right emulsifiers (think lecithin or gelatin), proper aeration methods, and precise temperature control. Using these elements in harmony traps tiny bubbles within a sturdy network, allowing your foam to hold its shape and float atop your plate or glass longer-like a culinary cloud with endurance.
Q3: Which liquids work best for foaming, and are some better than others?
A: Almost any flavorful liquid can be foamed, but those rich in proteins, fats, or with added stabilizers tend to perform best. Broths, fruit juices, cream, and even coffee can be transformed into luscious foams. On the flip side, very oily or high-sugar liquids can be trickier, often requiring tweaks like adding a foaming agent or balancing pH.
Q4: What tools or techniques can help an aspiring chef craft these clouds with ease?
A: From simple immersion blenders and fine mesh strainers to specialized siphons and whippers, having the right toolset makes all the difference. Whipping manually is an art, but gadgets streamline the process and ensure consistency. Also, mastering gentle folding and incorporating just the right amount of air are key techniques.
Q5: Can foam be flavored or colored, and how does that impact stability?
A: Absolutely! Foams are a blank canvas for creativity-you can infuse everything from herbs and spices to vibrant vegetable juices or decadent chocolates. Coloring can add visual pop, but be mindful: adding too much pigment or aromatic oils may alter the foam’s structure, so balance is crucial to maintain that airy hold.
Q6: What are some unexpected dishes or drinks where culinary foam can shine?
A: Culinary foam is wonderfully versatile. Think miso foam topping ramen bowls, citrus foam crowning seafood plates, coffee foam enhancing cocktails, or even savory cheese foam dressing a salad. Its lightness can contrast heavy textures or amplify subtle flavors, making each bite or sip a memorable experience.
Q7: Any quick tips for beginners wanting to start their foam mastery journey at home?
A: Start simple-try foaming a bright vegetable broth or fruit juice with a handheld blender and a pinch of soy lecithin. Keep liquids chilled, work swiftly, and serve immediately for best results. Don’t fear experimentation; each attempt is a step closer to your own perfect culinary cloud.
Unlocking the secrets of stable culinary foams turns cooking into an art of lightness and surprise. With practice and playful curiosity, anyone can create these edible clouds that delight the senses and elevate everyday dishes into dreamy masterpieces.
In Conclusion
As we conclude our journey through the art and science of foam mastery, it’s clear that crafting those delicate, stable culinary clouds is both an accessible skill and a creative adventure. By understanding the delicate balance of ingredients, technique, and a dash of patience, any home cook or professional can elevate dishes with airy textures that surprise and delight. Remember, every bubble tells a story-of precision, passion, and playfulness in the kitchen. So go forth, whip, whisk, and infuse your dishes with whimsical lightness, turning simple ingredients into edible masterpieces that float effortlessly onto the palate. Happy foaming!